User talk:Lizz: Difference between revisions

From Dreamlight Valley Wiki
Jump to navigation Jump to search
No edit summary
Line 372: Line 372:
|-
|-
| [[File:Slender Sinister Fir.png|center|100px]]||name1=Slender Sinister Fir 1 (very tall) (has [[High Snowy Fir]] variant counterpart)||size1=3x3||wood1=yes||tile1=no||landscapingSubtype1=Fir||biome1=Forgotten Lands
| [[File:Slender Sinister Fir.png|center|100px]]||name1=Slender Sinister Fir 1 (very tall) (has [[High Snowy Fir]] variant counterpart)||size1=3x3||wood1=yes||tile1=no||landscapingSubtype1=Fir||biome1=Forgotten Lands
|-
| [[File:Lush Sinister Fir.png|center|100px]]||name1=Lush Sinister Fir||size1=4x4||wood1=north, east||tile1=no||landscapingSubtype1=Fir - Lush||biome1=Forgotten Lands


Line 482: Line 486:


|-
|-
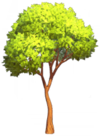
| [[File:Tall Acacia Tree.png|center|100px]]||name1=Tall Acacia Tree 1 (shortest)||size1=2x2||wood1=yes||tile1=no||biome1=Sunlit Plateau
| [[File:Tall Acacia Tree.png|center|100px]]||name1=Tall Acacia Tree 1 (shortest)||size1=2x2||wood1=yes||tile1=no||landscapingSubtype1=Acacia Tree||biome1=Sunlit Plateau
|-
|-
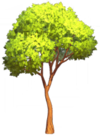
| img||name2=Tall Acacia Tree 2 (tallest)||size2=2x2||wood2=yes||tile2=no||biome2=Sunlit Plateau
| img||name2=Tall Acacia Tree 2 (tallest)||size2=2x2||wood2=yes||tile2=no||landscapingSubtype2=Acacia Tree||biome2=Sunlit Plateau
|-
|-
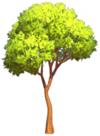
| img||name3=Tall Acacia Tree 3 (widest)||size3=5x5||wood3=north, east, single southwest||tile3=no||biome3=Sunlit Plateau
| img||name3=Tall Acacia Tree 3 (widest)||size3=5x5||wood3=north, east, single southwest||tile3=no||landscapingSubtype3=Acacia Tree||biome3=Sunlit Plateau


|-
|-
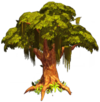
| [[File:Moss-Covered Tree.png|center|100px]]||name1=Moss-Covered Tree 1 (short)||size1=5x5||wood1=yes||tile1=no||biome1=Glade of Trust
| [[File:Moss-Covered Tree.png|center|100px]]||name1=Moss-Covered Tree 1 (short)||size1=5x5||wood1=yes||tile1=no||landscapingSubtype1=Moss-Covered Tree||biome1=Glade of Trust
|-
|-
| img||name2=Moss-Covered Tree 2 (tall)||size2=8x8||wood2=no||tile2=no||biome2=Glade of Trust
| img||name2=Moss-Covered Tree 2 (tall)||size2=8x8||wood2=no||tile2=no||landscapingSubtype2=Moss-Covered Tree||biome2=Glade of Trust


|-
|-
| [[File:Meager Tree.png|center|100px]]||name1=Meager Tree||size1=6x6||wood1=north only||tile1=no||biome1=Biome TBD
| [[File:Meager Tree.png|center|100px]]||name1=Meager Tree||size1=6x6||wood1=north only||tile1=no||landscapingSubtype1=Meager Tree||biome1=Biome TBD
    
    
|-
|-
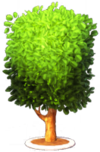
| [[File:Lush Tree.png|center|100px]]||name1=Lush Tree||size1=3x5||wood1=yes||tile1=no||biome1=Biome TBD
| [[File:Lush Tree.png|center|100px]]||name1=Lush Tree||size1=3x5||wood1=yes||tile1=no||landscapingSubtype1=Lush Tree||biome1=Biome TBD


|-
|-
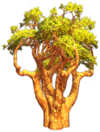
| [[File:Lush Dragon Tree.png|center|100px]]||name1=Lush Dragon Tree 1 (1 trunk hole)||size1=3x3||wood1=yes||tile1=no||biome1=Biome TBD
| [[File:Lush Dragon Tree.png|center|100px]]||name1=Lush Dragon Tree 1 (1 trunk hole)||size1=3x3||wood1=yes||tile1=no||landscapingSubtype1=Dragon Tree||biome1=Biome TBD
|-
|-
| img||name2=Lush Dragon Tree 2 (2 trunk holes, branches more visible and upward-extending)||size2=3x3||wood2=yes||tile2=no||biome2=Biome TBD
| img||name2=Lush Dragon Tree 2 (2 trunk holes, branches more visible and upward-extending)||size2=3x3||wood2=yes||tile2=no||landscapingSubtype2=Dragon Tree||biome2=Biome TBD


|-
|-
| img||name1=Sinister Tree||size1=6x6||wood1=north only||tile1=no||biome1=Forgotten Lands
| img||name1=Sinister Tree||size1=6x6||wood1=north only||tile1=no||landscapingSubtype1=Sinister Tree||biome1=Forgotten Lands


|-
|-
| [[File:Fallen Trunk.png|center|100px]]||name1=Fallen Trunk||size1=4x2||wood1=no||tile1=yes||biome1=Biome TBD
| [[File:Fallen Trunk.png|center|100px]]||name1=Fallen Trunk||size1=4x2||wood1=no||tile1=yes||landscapingSubtype1=Trunk - Fallen||biome1=Biome TBD


|-
|-
| [[File:Tree Trunk.png|center|100px]]||name1=Tree Trunk 1||size1=4x4||wood1=no||tile1=no||biome1=Biome TBD
| [[File:Tree Trunk.png|center|100px]]||name1=Tree Trunk 1||size1=4x4||wood1=no||tile1=no||landscapingSubtype1=Trunk||biome1=Biome TBD
|-
|-
| img||name2=Tree Trunk 2 (medium height, slender)||size2=2x2||wood2=no||tile2=no||biome2=Biome TBD
| img||name2=Tree Trunk 2 (medium height, slender)||size2=2x2||wood2=no||tile2=no||landscapingSubtype2=Trunk||biome2=Biome TBD
|-
|-
| img||name3=Tree Trunk 3 (tallest, with leafy branch)||size3=4x5||wood3=no||tile3=no||biome3=Biome TBD
| img||name3=Tree Trunk 3 (tallest, with leafy branch)||size3=4x5||wood3=no||tile3=no||landscapingSubtype3=Trunk||biome3=Biome TBD


|-
|-
| [[File:Squat Tree Stump.png|center|100px]]||name1=Squat Tree Stump||size1=2x2||wood1=no||tile1=yes||biome1=Biome TBD
| [[File:Squat Tree Stump.png|center|100px]]||name1=Squat Tree Stump||size1=2x2||wood1=no||tile1=yes||landscapingSubtype1=Stump - Squat||biome1=Biome TBD


|-
|-
| [[File:Dead Pine Tree.png|center|100px]]||name1=Dead Pine Tree 1 (tall, with small leaf)||size1=4x4||wood1=yes||tile1=no||biome1=Biome TBD
| [[File:Dead Pine Tree.png|center|100px]]||name1=Dead Pine Tree 1 (tall, with small leaf)||size1=4x4||wood1=yes||tile1=no||landscapingSubtype1=Dead Pine Tree||biome1=Biome TBD
|-
|-
| img||name2=Dead Pine Tree 2 (short)||size2=3x3||wood2=yes||tile2=no||biome2=Biome TBD
| img||name2=Dead Pine Tree 2 (short)||size2=3x3||wood2=yes||tile2=no||landscapingSubtype2=Dead Pine Tree||biome2=Biome TBD


|-
|-
| [[File:Three-Limbed Tree.png|center|100px]]||name1=Three-Limbed Tree 1||size1=3x4||wood1=yes||tile1=no||biome1=Biome TBD
| [[File:Three-Limbed Tree.png|center|100px]]||name1=Three-Limbed Tree 1||size1=3x4||wood1=yes||tile1=no||landscapingSubtype1=Three-Limbed Tree||biome1=Biome TBD
|-
|-
| img||name2=Three-Limbed Tree 2 (short)||size2=4x4||wood2=yes||tile2=no||biome2=Biome TBD
| img||name2=Three-Limbed Tree 2 (short)||size2=4x4||wood2=yes||tile2=no||landscapingSubtype2=Three-Limbed Tree||biome2=Biome TBD


Line 541: Line 545:
|-
|-
| img||name3=Frozen Twisted Dead Tree 3 (spiky variant)||size3=5x6||wood3=north, east, single southwest||tile3=no||biome3=Forgotten Lands
| img||name3=Frozen Twisted Dead Tree 3 (spiky variant)||size3=5x6||wood3=north, east, single southwest||tile3=no||biome3=Forgotten Lands
|}
===ROCKS - gutted ===
{| class="wikitable sortable" id='recipe-table'
! Image
! Name
! Size
! Can be placed on tile?
! Can be walked through?
! Landscaping Subtype
! Biome Unlock
|-
| [[File:Small Plaza Stone Cluster.png|center|100px]]||Small Plaza Stone Cluster||3x3||yes||yes||Stone Cluster||Plaza
|-
| [[File:Small Peaceful Meadow Stone Cluster.png|center|100px]]||Small Peaceful Meadow Stone Cluster||3x3||yes||yes||Stone Cluster||Peaceful Meadow
|-
| [[File:Small Dazzle Beach Stone Cluster.png|center|100px]]||Small Dazzle Beach Stone Cluster||3x3||yes||yes||Stone Cluster||Dazzle Beach
|-
| [[File:Small Forest of Valor Stone Cluster.png|center|100px]]||Small Forest of Valor Stone Cluster||3x3||yes||yes||Stone Cluster||Forest of Valor
|-
| [[File:Small Glade of Trust Stone Cluster.png|center|100px]]||Small Glade of Trust Stone Cluster||3x3||yes||yes||Stone Cluster||Glade of Trust
|-
| [[File:Small Sunlit Plateau Stone Cluster.png|center|100px]]||Small Sunlit Plateau Stone Cluster||3x3||yes||yes||Stone Cluster||Sunlit Plateau
|-
| [[File:Small Snowy Frosted Heights Stone Cluster.png|center|100px]]||Small Snowy Frosted Heights Stone Cluster||3x3||yes||yes||Stone Cluster||Frosted Heights
|-
| [[File:Small Forgotten Lands Stone Cluster.png|center|100px]]||Small Forgotten Lands Stone Cluster||3x3||yes||yes||Stone Cluster||Forgotten Lands
|-
| [[File:Small Plaza Rock.png|center|100px]]||Small Plaza Rock||1x2||yes||no||Rock - Small||Plaza
|-
| [[File:Small Mossy Peaceful Meadow Rock.png|center|100px]]||Small Mossy Peaceful Meadow Rock||1x2||yes||no||Rock - Small||Peaceful Meadow
|-
| [[File:Small Dazzle Beach Rock.png|center|100px]]||Small Dazzle Beach Rock||1x2||yes||no||Rock - Small||Dazzle Beach
|-
| [[File:Small Mossy Forest of Valor Rock.png|center|100px]]||Small Mossy Forest of Valor Rock||1x2||yes||no||Rock - Small||Forest of Valor
|-
| [[File:Small Mossy Glade of Trust Rock.png|center|100px]]||Small Mossy Glade of Trust Rock||1x2||yes||no||Rock - Small||Glade of Trust
|-
| [[File:Small Mossy Sunlit Plateau Rock.png|center|100px]]||Small Mossy Sunlit Plateau Rock||1x2||yes||no||Rock - Small||Sunlit Plateau
|-
| [[File:Small Snowy Frosted Heights Rock.png|center|100px]]||Small Snowy Frosted Heights Rock||2x2||yes||no||Rock - Small||Frosted Heights
|-
| [[File:Small Mossy Forgotten Lands Rock.png|center|100px]]||Small Mossy Forgotten Lands Rock||1x2||yes||no||Rock - Small||Forgotten Lands
|-
| [[File:Mossy Plaza Rock.png|center|100px]]||Mossy Plaza Rock||4x5||yes||no||Rock - Medium||Plaza
|-
| [[File:Mossy Peaceful Meadow Rock.png|center|100px]]||Mossy Peaceful Meadow Rock||4x5||yes||no||Rock - Medium||Peaceful Meadow
|-
| [[File:Dazzle Beach Rock.png|center|100px]]||Dazzle Beach Rock||4x5||yes||no||Rock - Medium||Dazzle Beach
|-
| [[File:Mossy Forest of Valor Rock.png|center|100px]]||Mossy Forest of Valor Rock||4x5||no||no||Rock - Medium||Forest of Valor
|-
| [[File:Mossy Glade of Trust Rock.png|center|100px]]||Mossy Glade of Trust Rock||4x5||yes||no||Rock - Medium||Glade of Trust
|-
| [[File:Mossy Sunlit Plateau Rock.png|center|100px]]||Mossy Sunlit Plateau Rock||4x5||yes||no||Rock - Medium||Sunlit Plateau
|-
| [[File:Snowy Frosted Heights Rock.png|center|100px]]||Snowy Frosted Heights Rock||4x5||yes||no||Rock - Medium||Frosted Heights
|-
| [[File:Mossy Forgotten Lands Rock.png|center|100px]]||Mossy Forgotten Lands Rock||4x5||yes||no||Rock - Medium||Forgotten Lands
|-
| [[File:Large Dazzle Beach Rock.png|center|100px]]||Large Dazzle Beach Rock||11x11||yes||no||Rock - Large||Dazzle Beach
|-
| [[File:Large Mossy Peaceful Meadow Rock.png|center|100px]]||Large Mossy Peaceful Meadow Rock||11x11||yes||no||Rock - Large||Peaceful Meadow
|-
| [[File:Large Mossy Forest of Valor Rock.png|center|100px]]||Large Mossy Forest of Valor Rock||11x11||yes||no||Rock - Large||Forest of Valor
|-
| [[File:Large Mossy Glade of Trust Rock.png|center|100px]]||Large Mossy Glade of Trust Rock||11x11||yes||no||Rock - Large||Glade of Trust
|-
| [[File:Large Mossy Sunlit Plateau Rock.png|center|100px]]||Large Mossy Sunlit Plateau Rock||11x11||yes||no||Rock - Large||Sunlit Plateau
|-
| [[File:Large Snowy Frosted Heights Rock.png|center|100px]]||Large Snowy Frosted Heights Lands Rock||11x11||no||no||Rock - Large||Frosted Heights
|-
| [[File:Large Mossy Forgotten Lands Rock.png|center|100px]]||Large Mossy Forgotten Lands Rock||11x11||yes||no||Rock - Large||Forgotten Lands
|}
===UNDERBRUSH - gutted ===
{| class="wikitable sortable" id='recipe-table'
! Image
! Name
! Size
! Can be placed on tile?
! Can be walked through?
! Landscaping Subtype
! Biome Unlock
|-
| [[File:Plaza Dwarf Birch.png|center|100px]]||Plaza Dwarf Birch||3x3||yes||no||landscapingSubtype=Dwarf Birch||Plaza
|-
| [[File:Peaceful Meadow Dwarf Birch.png|center|100px]]||Peaceful Meadow Dwarf Birch||3x3||yes||no||landscapingSubtype=Dwarf Birch||Peaceful Meadow
|-
| [[File:Dazzle Beach Dwarf Birch.png|center|100px]]||Dazzle Beach Dwarf Birch||3x3||yes||no||landscapingSubtype=Dwarf Birch||Dazzle Beach
|-
| [[File:Forest of Valor Dwarf Birch.png|center|100px]]||Forest of Valor Dwarf Birch||3x3||yes||no||landscapingSubtype=Dwarf Birch||Forest of Valor
|-
| [[File:Glade of Trust Dwarf Birch.png|center|100px]]||Glade of Trust Dwarf Birch||3x3||yes||no||landscapingSubtype=Dwarf Birch||Glade of Trust
|-
| [[File:Sunlit Plateau Dwarf Birch.png|center|100px]]||Sunlit Plateau Dwarf Birch||3x3||yes||no||landscapingSubtype=Dwarf Birch||Sunlit Plateau
|-
| [[File:Frosted Heights Dwarf Birch.png|center|100px]]||Frosted Heights Dwarf Birch||3x3||yes||no||landscapingSubtype=Dwarf Birch||Frosted Heights
|-
| [[File:Forgotten Lands Dwarf Birch.png|center|100px]]||Forgotten Lands Dwarf Birch||3x3||yes||no||landscapingSubtype=Dwarf Birch||Forgotten Lands
|-
| [[File:Plaza Light Dwarf Birch.png|center|100px]]||Plaza Light Dwarf Birch||3x3||yes||no||Dwarf Birch - Light||Plaza
|-
| [[File:Peaceful Meadow Light Dwarf Birch.png|center|100px]]||Peaceful Meadow Light Dwarf Birch||3x3||yes||no||Dwarf Birch - Light||Peaceful Meadow
|-
| [[File:Forest of Valor Light Dwarf Birch.png|center|100px]]||Forest of Valor Light Dwarf Birch||3x3||yes||no||Dwarf Birch - Light||Forest of Valor
|-
| [[File:Glade of Trust Light Dwarf Birch.png|center|100px]]||Glade of Trust Light Dwarf Birch||3x3||yes||no||Dwarf Birch - Light||Glade of Trust
|-
| [[File:Sunlit Plateau Light Dwarf Birch.png|center|100px]]||Sunlit Plateau Light Dwarf Birch||3x3||yes||no||Dwarf Birch - Light||Sunlit Plateau
|-
| [[File:Frosted Heights Light Dwarf Birch.png|center|100px]]||Frosted Heights Light Dwarf Birch||3x3||yes||no||Dwarf Birch - Light||Frosted Heights
|-
| [[File:Forgotten Lands Light Dwarf Birch.png|center|100px]]||Forgotten Lands Light Dwarf Birch||3x3||yes||no||Dwarf Birch - Light||Forgotten Lands
|-
| [[File:Plaza Dwarf Maple.png|center|100px]]||Plaza Dwarf Maple||3x3||yes||no||landscapingSubtype=Dwarf Maple||Plaza
|-
| [[File:Peaceful Meadow Dwarf Maple.png|center|100px]]||Peaceful Meadow Dwarf Maple||3x3||yes||no||landscapingSubtype=Dwarf Maple||Peaceful Meadow
|-
| [[File:Dazzle Beach Dwarf Maple.png|center|100px]]||Dazzle Beach Dwarf Maple||3x3||yes||no||landscapingSubtype=Dwarf Maple||Dazzle Beach
|-
| [[File:Forest of Valor Dwarf Maple.png|center|100px]]||Forest of Valor Dwarf Maple||3x3||yes||no||landscapingSubtype=Dwarf Maple||Forest of Valor
|-
| [[File:Glade of Trust Dwarf Maple.png|center|100px]]||Glade of Trust Dwarf Maple||3x3||yes||no||landscapingSubtype=Dwarf Maple||Glade of Trust
|-
| [[File:Sunlit Plateau Dwarf Maple.png|center|100px]]||Sunlit Plateau Dwarf Maple||3x3||yes||no||landscapingSubtype=Dwarf Maple||Sunlit Plateau
|-
| [[File:Frosted Heights Dwarf Maple.png|center|100px]]||Frosted Heights Dwarf Maple||3x3||yes||no||landscapingSubtype=Dwarf Maple||Frosted Heights
|-
| [[File:Forgotten Lands Dwarf Maple.png|center|100px]]||Forgotten Lands Dwarf Maple||3x3||yes||no||landscapingSubtype=Dwarf Maple||Forgotten Lands
|-
| [[File:Plaza Light Dwarf Maple.png|center|100px]]||Plaza Light Dwarf Maple||3x3||yes||no||Dwarf Maple - Light||Plaza
|-
| [[File:Peaceful Meadow Light Dwarf Maple.png|center|100px]]||Peaceful Meadow Light Dwarf Maple||3x3||yes||no||Dwarf Maple - Light||Peaceful Meadow
|-
| [[File:Dazzle Beach Light Dwarf Maple.png|center|100px]]||Dazzle Beach Light Dwarf Maple||3x3||yes||no||Dwarf Maple - Light||Dazzle Beach
|-
| [[File:Forest of Valor Light Dwarf Maple.png|center|100px]]||Forest of Valor Light Dwarf Maple||3x3||yes||no||Dwarf Maple - Light||Forest of Valor
|-
| [[File:Glade of Trust Light Dwarf Maple.png|center|100px]]||Glade of Trust Light Dwarf Maple||3x3||yes||no||Dwarf Maple - Light||Glade of Trust
|-
| [[File:Sunlit Plateau Light Dwarf Maple.png|center|100px]]||Sunlit Plateau Light Dwarf Maple||3x3||yes||no||Dwarf Maple - Light||Sunlit Plateau
|-
| [[File:Frosted Heights Light Dwarf Maple.png|center|100px]]||Frosted Heights Light Dwarf Maple||3x3||yes||no||Dwarf Maple - Light||Frosted Heights
|-
| [[File:Forgotten Lands Light Dwarf Maple.png|center|100px]]||Forgotten Lands Light Dwarf Maple||3x3||yes||no||Dwarf Maple - Light||Forgotten Lands
|-
| [[File:Plaza Flower Bush.png|center|100px]]||Plaza Flower Bush||3x3||yes||no||Flower Bush||Plaza
|-
| [[File:Peaceful Meadow Flower Bush.png|center|100px]]||Peaceful Meadow Flower Bush||3x3||yes||no||Flower Bush||Peaceful Meadow
|-
| [[File:Dazzle Beach Flower Bush.png|center|100px]]||Dazzle Beach Flower Bush||3x3||yes||no||Flower Bush||Dazzle Beach
|-
| [[File:Forest of Valor Flower Bush.png|center|100px]]||Forest of Valor Flower Bush||3x3||yes||no||Flower Bush||Forest of Valor
|-
| [[File:Glade of Trust Flower Bush.png|center|100px]]||Glade of Trust Flower Bush||3x3||yes||no||Flower Bush||Glade of Trust
|-
| [[File:Sunlit Plateau Flower Bush.png|center|100px]]||Sunlit Plateau Flower Bush||3x3||yes||no||Flower Bush||Sunlit Plateau
|-
| [[File:Frosted Heights Flower Bush.png|center|100px]]||Frosted Heights Flower Bush||3x3||yes||no||Flower Bush||Frosted Heights
|-
| [[File:Forgotten Lands Flower Bush.png|center|100px]]||Forgotten Lands Flower Bush||3x3||yes||no||Flower Bush||Forgotten Lands
|-
| [[File:Plaza Fern.png|center|100px]]||Plaza Fern||3x3||yes||yes||landscapingSubtype=Fern||Plaza
|-
| [[File:Forest of Valor Fern.png|center|100px]]||Forest of Valor Fern||3x3||yes||yes||landscapingSubtype=Fern||Forest of Valor
|-
| [[File:Glade of Trust Fern.png|center|100px]]||Glade of Trust Fern||3x3||yes||yes||landscapingSubtype=Fern||Glade of Trust
|-
| [[File:Sunlit Plateau Fern.png|center|100px]]||Sunlit Plateau Fern||3x3||yes||yes||landscapingSubtype=Fern||Sunlit Plateau
|-
| [[File:Forgotten Lands Fern.png|center|100px]]||Forgotten Lands Fern||3x3||no||yes||landscapingSubtype=Fern||Forgotten Lands
|-
| [[File:Bracken.png|center|100px]]||Bracken||4x4||no||yes||Bracken||Biome TBD
|-
| [[File:Forest of Valor Bracken.png|center|100px]]||Forest of Valor Bracken||4x4||no||yes||Bracken||Forest of Valor
|-
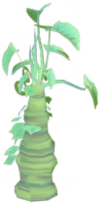
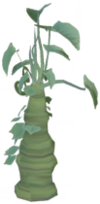
| [[File:Dreamlight Valley Desert Rose.png|center|100px]]||Dreamlight Valley Desert Rose||2x2||no||no||Desert Rose||Biome TBD
|-
| [[File:Glade of Trust Dreamlight Valley Desert Rose.png|center|100px]]||Glade of Trust Dreamlight Valley Desert Rose||2x2||no||no||Desert Rose||Glade of Trust
|-
| [[File:Tropical Fern.png|center|100px]]||Tropical Fern||2x2||no||yes||landscapingSubtype=Fern - Tropical||Dazzle Beach
|-
| [[File:Glade of Trust Tropical Fern.png|center|100px]]||Glade of Trust Tropical Fern||2x2||no||yes||landscapingSubtype=Fern - Tropical||Glade of Trust
|-
| [[File:Orchid Base.png|center|100px]]||Orchid Base||2x2||no||yes||Orchid Base||Biome TBD
|-
| [[File:Glade of Trust Orchid Base.png|center|100px]]||Glade of Trust Orchid Base||2x2||no||yes||Orchid Base||Glade of Trust
|-
| [[File:Syngonium.png|center|100px]]||Syngonium||2x2||no||yes||Syngonium||Biome TBD
|-
| [[File:Glade of Trust Syngonium.png|center|100px]]||Glade of Trust Syngonium||2x2||no||yes||Syngonium||Glade of Trust
|-
| [[File:Peaceful Meadow Reeds.png|center|100px]]||Peaceful Meadow Reeds||3x3||no, on water only||yes||Reeds||Peaceful Meadow
|-
| [[File:Forest of Valor Reeds.png|center|100px]]||Forest of Valor Reeds||3x3||no, on water only||yes||Reeds||Forest of Valor
|-
| [[File:Glade of Trust Reeds.png|center|100px]]||Glade of Trust Reeds||3x3||no, on water only||yes||Reeds||Glade of Trust
|-
| [[File:Sunlit Plateau Reeds.png|center|100px]]||Sunlit Plateau Reeds||3x3||no, on water only||yes||Reeds||Sunlit Plateau
|-
| [[File:Forgotten Lands Reeds.png|center|100px]]||Forgotten Lands Reeds||3x3||no, on water only||yes||Reeds||Forgotten Lands
|-
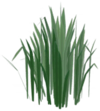
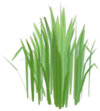
| [[File:Meadow Grass.png|center|100px]]||Meadow Grass 1||4x4||no||yes||Grass||Peaceful Meadow
|-
| img||Meadow Grass 2||5x5||no||yes||Grass||Peaceful Meadow
|-
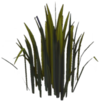
| [[File:Beach Grass.png|center|100px]]||Beach Grass 1||4x4||no||yes||Grass||Dazzle Beach
|-
| img||Beach Grass 2 (has [[Sunlit Plateau Grass]] variant counterpart)||5x5||no||yes||Grass||Dazzle Beach
|-
| img||Sunlit Plateau Grass 2 (has [[Beach Grass]] variant counterpart)||5x5||no||yes||Grass||Sunlit Plateau
|-
| [[File:Sunlit Plateau Grass.png|center|100px]]||Sunlit Plateau Grass 1||4x4||no||yes||Grass||Sunlit Plateau
|-
| img||Sunlit Plateau Grass 3||4x4||no||yes||Grass||Sunlit Plateau
|-
| img||Sunlit Plateau Grass 4||2x3||no||yes||Grass||Sunlit Plateau
|-
| [[File:Thorn Vine.png|center|100px]]||Thorn Vine 1||2x2||no||no||Thorn Vine||Forgotten Lands
|-
| img||Thorn Vine 2||4x2||no||no||Thorn Vine||Forgotten Lands
|-
| img||Thorn Vine 3||2x4||no||no||Thorn Vine||Forgotten Lands
|-
| [[File:Tall Forest of Valor Reeds.png|center|100px]]||Tall Forest of Valor Reeds||2x2||no, on water only||yes||Reeds - Tall||Forest of Valor
|-
| [[File:Tall Glade of Trust Reeds.png|center|100px]]||Tall Glade of Trust Reeds||2x2||no, on water only||yes||Reeds - Tall||Glade of Trust
|-
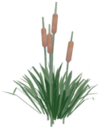
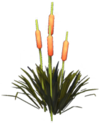
| [[File:Forest of Valor Cattails.png|center|100px]]||Forest of Valor Cattails||2x2||no, on water only||yes||Cattails||Forest of Valor
|-
| [[File:Glade of Trust Cattails.png|center|100px]]||Glade of Trust Cattails||2x2||no, on water only||yes||Cattails||Glade of Trust
|}
===TREES - gutted===
{| class="wikitable sortable" id='recipe-table'
! Image
! Name
! Size
! Produces wood?
! Can be placed on tile?
! Landscaping Subtype
! Biome Unlock
 
|-
| [[File:Bare-Limbed Tree.png|center|100px]]||Bare-Limbed Tree 1 (medium height, medium dark wood)||3x3||yes||no||Bare-Limbed Tree||Biome TBD
|-
| img||Bare-Limbed Tree 2 (tall, dark wood)||3x3||yes||no||Bare-Limbed Tree||Biome TBD
|-
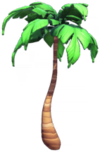
| [[File:Bent Palm Tree.png|center|100px]]||Bent Palm Tree 1 (shortest) (has [[Bent Sunlit Plateau Palm Tree]] variant counterpart)||2x2||yes||yes||Palm Tree - Bent||Dazzle Beach
|-
| [[File:Bent Sunlit Plateau Palm Tree.png|center|100px]]||Bent Sunlit Plateau Palm Tree (has [[Bent Palm Tree]] variant counterpart)||2x2||yes||yes||Palm Tree - Bent||Sunlit Plateau
|-
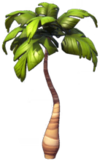
| img||Bent Palm Tree 2 (medium height) (has [[Tall Sunlit Plateau Palm Tree]] variant counterpart)||3x3||yes||no||Palm Tree - Tall||Dazzle Beach
|-
| [[File:Tall Sunlit Plateau Palm Tree.png|center|100px]]||Tall Sunlit Plateau Palm Tree (has [[Bent Palm Tree]] variant counterpart)||3x3||yes||no||Palm Tree - Tall||Sunlit Plateau
|-
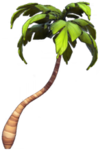
| img||Bent Palm Tree 3 (tallest) (has [[Curved Sunlit Plateau Palm Tree]] variant counterpart)||2x2||yes||yes||Palm Tree - Curved||Dazzle Beach
|-
| [[File:Curved Sunlit Plateau Palm Tree.png|center|100px]]||Curved Sunlit Plateau Palm Tree (has [[Bent Palm Tree]] variant counterpart)||2x2||yes||yes||Palm Tree - Curved||Sunlit Plateau
|-
| [[File:Round Palm Tree.png|center|100px]]||Round Palm Tree||4x4||yes||no||Palm Tree - Round||Dazzle Beach
|-
| [[File:Round Sunlit Plateau Palm Tree.png|center|100px]]||Round Sunlit Plateau Palm Tree||4x4||yes||no||Palm Tree - Round||Sunlit Plateau
|-
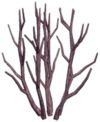
| [[File:Dead Bush.png|center|100px]]||Dead Bush||2x2||no||no||Dead Bush||Biome TBD
|-
| [[File:Frozen Dead Bush.png|center|100px]]||Frozen Dead Bush||2x2||no||no||Dead Bush||Biome TBD
|-
| [[File:Scraggly Bush.png|center|100px]]||Scraggly Bush||2x2||no||no||Dead Bush||Biome TBD
|-
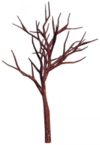
| img||Snowy Dead Tree 1 (tall, sort of pronged)||3x3||yes||no||Dead Tree||Frosted Heights
|-
| img||Dead Forgotten Lands Tree 1 (tall, sort of pronged)||3x3||yes||no||Dead Tree||Forgotten Lands
|-
| img||Snowy Dead Tree Tree 2 (shorter, pronged, but more spindly)||3x3||yes||no||Dead Tree||Frosted Heights
|-
| img||Dead Forgotten Lands Tree 2 (shorter, pronged, but more spindly)||3x3||yes||no||Dead Tree||Forgotten Lands
|-
| [[File:Fir.png|center|100px]]||Fir 1 (short) (has [[High Snowy Fir]] variant counterpart)||3x3||yes||no||Fir||Forest of Valor
|-
| [[File:High Snowy Fir.png|center|100px]]||High Snowy Fir 1 (short) (has [[Fir]] variant counterpart)||3x3||yes||no||Fir||Frosted Heights
|-
| img||Fir 2 (medium height) (has [[Slender Sinister Fir]] variant counterpart)||3x3||yes||no||Fir||Forest of Valor
|-
| img||Slender Sinister Fir 3 (medium height) (has [[Fir]] variant counterpart)||3x3||yes||no||Fir||Forgotten Lands
|-
| img||Fir 3 (tall) (has [[High Snowy Fir]] and [[Slender Sinister Fir]] variant counterparts)||3x3||yes||no||Fir||Forest of Valor
|-
| img||High Snowy Fir 2 (tall) (has [[Fir]] and [[Slender Sinister Fir]] variant counterparts)||3x3||yes||no||Fir||Frosted Heights
|-
| img||Slender Sinister Fir 2 (tall) (has [[Fir]] and [[High Snowy Fir]] variant counterparts)||3x3||yes||yes||Fir||Forgotten Lands
|-
| img||High Snowy Fir 3 (very tall) (has [[Slender Sinister Fir]] variant counterpart)||3x3||yes||no||Fir||Frosted Heights
|-
| [[File:Slender Sinister Fir.png|center|100px]]||Slender Sinister Fir 1 (very tall) (has [[High Snowy Fir]] variant counterpart)||3x3||yes||no||Fir||Forgotten Lands
|-
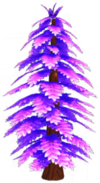
| [[File:Lush Sinister Fir.png|center|100px]]||Lush Sinister Fir||4x4||north, east||no||Fir - Lush||Forgotten Lands
|-
| [[File:Short Japanese Maple.png|center|100px]]||Short Japanese Maple 1 (medium-tall, branch to left) (has [[Small Oak]] variant counterpart)||3x3||yes||no||Biome TBD
|-
| img||Short Japanese Maple 2 (short)||1x1||yes||yes||Biome TBD
|-
| img||Short Japanese Maple 3 (tallest, branch to right) (has [[Small Oak]] variant counterpart)||4x4||yes||no||Biome TBD
|-
| [[File:Small Oak.png|center|100px]]||Small Oak 1 (medium-tall, branch to left) (has [[Short Japanese Maple]] variant counterpart)||3x3||yes||no||Biome TBD
|-
| img||Small Oak 2 (shortest)||3x3||yes||no||Biome TBD
|-
| img||Small Oak 3 (tallest, branch to right) (has [[Short Japanese Maple]] variant counterpart)||3x3||yes||no||Biome TBD
|-
| [[File:Simple Maple.png|center|100px]]||Simple Maple 1 (slender, short, upright)||3x3||yes||no||Maple Tree||Biome TBD
|-
| [[File:Tall Black Maple.png|center|100px]]||Tall Black Maple 1 (slender, upright)||3x3||yes||no||Maple Tree||Biome TBD
|-
| [[File:Tall Maple.png|center|100px]]||Tall Maple 1 (slender, short, upright)||3x3||yes||no||Maple Tree||Biome TBD
|-
| img||Simple Maple 2 (slender, tall, curved)||5x5||north only||no||Maple Tree||Biome TBD
|-
| img||Tall Black Maple 2 (slender, tall, curved)||5x5||north only||no||Maple Tree||Biome TBD
|-
| img||Tall Maple 2 (slender, tall, curved)||3x3||yes||yes||Maple Tree||Biome TBD
|-
| img||Simple Maple 3 (normal thickness, tall, upright)||4x4||yes||no||Maple Tree||Biome TBD
|-
| img||Tall Black Maple 3 (normal thickness, tall, upright)||4x4||north, east||no||Maple Tree||Biome TBD
|-
| img||Tall Maple 3 (normal thickness, tall, upright)||4x4||north, east||no||Maple Tree||Biome TBD
|-
| img||Tall Black Maple 4 (slender, short, curved) (Simple Maple and Tall Maple do not have this variant)||4x4||north, east||no||Maple Tree||Biome TBD
|-
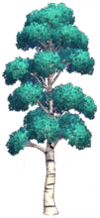
| img||Light Birch Tree 1 (medium-tall, normal thickness, upright) (has [[Tall Birch Tree]] variant counterpart)||3x3||yes||yes||Birch Tree||Biome TBD
|-
| [[File:Tall Birch Tree.png|center|100px]]||Tall Birch Tree 1 (medium-tall, normal thickness, upright) (has [[Light Birch Tree]] variant counterpart)||3x3||yes||no||Birch Tree||Biome TBD
|-
| [[File:Light Birch Tree.png|center|100px]]||Light Birch Tree 2 (medium height, slender, upright)||3x3||yes||yes||Birch Tree||Biome TBD
|-
| img||Light Birch Tree 3 (medium-short, slender, slightly curved)||3x3||yes||yes||Birch Tree||Biome TBD
|-
| img||Light Birch Tree 4 (short, slender, upright)||4x4||yes||yes||Birch Tree||Biome TBD
|-
| img||Light Birch Tree 5 (tall, dual trunk) (has [[Tall Birch Tree]] variant counterpart)||4x6||yes||yes||Birch Tree||Biome TBD
|-
| img||Tall Birch Tree 3 (tall, dual trunk) (has [[Light Birch Tree]] variant counterpart)||3x5||yes||no||Birch Tree||Biome TBD
|-
| img||Tall Birch Tree 2 (tall, slender, upright)||4x4||yes||no||Birch Tree||Biome TBD
|-
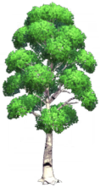
| [[File:Swamp Tree.png|center|100px]]||Swamp Tree 1 (shortest)||6x6||north only||yes||Swamp Tree||Glade of Trust
|-
| img||Swamp Tree 2 (medium height, flatter canopy top)||7x7||no||yes||Swamp Tree||Glade of Trust
|-
| img||Swamp Tree 3 (tallest)||9x9||no||no* (the majority can be placed on tile, but a single square of the 81 units in the 9x9 parameters cannot)||Swamp Tree||Glade of Trust
|-
| [[File:Wide Swamp Tree.png|center|100px]]||Wide Swamp Tree||8x8||no||yes||Swamp Tree - Wide||Glade of Trust
|-
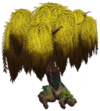
| [[File:Swamp Willow Tree.png|center|100px]]||Swamp Willow Tree||6x6||no||yes||Willow - Swamp||Glade of Trust
|-
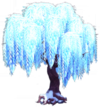
| [[File:Frozen Willow Tree.png|center|100px]]||Frozen Willow Tree||5x5||no||no||Willow - Frozen||Frosted Heights
|-
| [[File:Large Plaza Tree.png|center|100px]]||Large Plaza Tree||6x6||north only||no||Plaza Tree - Large||Plaza
|-
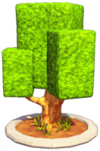
| [[File:Plaza Tree.png|center|100px]]||Plaza Tree||2x2||yes||yes||Plaza Tree||Plaza
|-
| [[File:Large Plaza Hedge.png|center|100px]]||Large Plaza Hedge||6x19||no||yes||Hedge||Plaza
|-
| [[File:Small Plaza Hedge.png|center|100px]]||Small Plaza Hedge||5x14||no||yes||Hedge||Plaza
|-
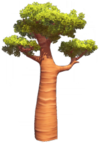
| [[File:Wide Baobab Tree.png|center|100px]]||Wide Baobab Tree 1 (tall, with branch)||4x4||north, east||no||Baobab Tree||Sunlit Plateau
|-
| img||Wide Baobab Tree 2 (short)||4x4||north, east||no||Baobab Tree||Sunlit Plateau
|-
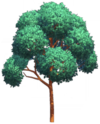
| [[File:Tall Acacia Tree.png|center|100px]]||Tall Acacia Tree 1 (shortest)||2x2||yes||no||Acacia Tree||Sunlit Plateau
|-
| img||Tall Acacia Tree 2 (tallest)||2x2||yes||no||Acacia Tree||Sunlit Plateau
|-
| img||Tall Acacia Tree 3 (widest)||5x5||north, east, single southwest||no||Acacia Tree||Sunlit Plateau
|-
| [[File:Moss-Covered Tree.png|center|100px]]||Moss-Covered Tree 1 (short)||5x5||yes||no||Moss-Covered Tree||Glade of Trust
|-
| img||Moss-Covered Tree 2 (tall)||8x8||no||no||Moss-Covered Tree||Glade of Trust
|-
| [[File:Meager Tree.png|center|100px]]||Meager Tree||6x6||north only||no||Meager Tree||Biome TBD
 
|-
| [[File:Lush Tree.png|center|100px]]||Lush Tree||3x5||yes||no||Lush Tree||Biome TBD
|-
| [[File:Lush Dragon Tree.png|center|100px]]||Lush Dragon Tree 1 (1 trunk hole)||3x3||yes||no||Dragon Tree||Biome TBD
|-
| img||Lush Dragon Tree 2 (2 trunk holes, branches more visible and upward-extending)||3x3||yes||no||Dragon Tree||Biome TBD
|-
| img||Sinister Tree||6x6||north only||no||Sinister Tree||Forgotten Lands
|-
| [[File:Fallen Trunk.png|center|100px]]||Fallen Trunk||4x2||no||yes||Trunk - Fallen||Biome TBD
|-
| [[File:Tree Trunk.png|center|100px]]||Tree Trunk 1||4x4||no||no||Trunk||Biome TBD
|-
| img||Tree Trunk 2 (medium height, slender)||2x2||no||no||Trunk||Biome TBD
|-
| img||Tree Trunk 3 (tallest, with leafy branch)||4x5||no||no||Trunk||Biome TBD
|-
| [[File:Squat Tree Stump.png|center|100px]]||Squat Tree Stump||2x2||no||yes||Stump - Squat||Biome TBD
|-
| [[File:Dead Pine Tree.png|center|100px]]||Dead Pine Tree 1 (tall, with small leaf)||4x4||yes||no||Dead Pine Tree||Biome TBD
|-
| img||Dead Pine Tree 2 (short)||3x3||yes||no||Dead Pine Tree||Biome TBD
|-
| [[File:Three-Limbed Tree.png|center|100px]]||Three-Limbed Tree 1||3x4||yes||no||Three-Limbed Tree||Biome TBD
|-
| img||Three-Limbed Tree 2 (short)||4x4||yes||no||Three-Limbed Tree||Biome TBD
|-
| img||Frozen Twisted Dead Tree 1 (multi-tiered, looks closest to thumbnail, but no frost)||5x6||north, east||no||Forgotten Lands
|-
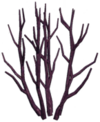
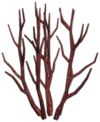
| img||Frozen Twisted Dead Tree 2 (normalish red tree variant)||3x3||yes||no||Forgotten Lands
|-
| img||Frozen Twisted Dead Tree 3 (spiky variant)||5x6||north, east, single southwest||no||Forgotten Lands


|}
|}
</div>
</div>
==Colors inside infobox==
Hello!! I've seen your edits adding colors to the infobox, awesome work!! I noticed that you hid them from displaying. Is there a reason you didn't think they should show or was it issues with having it work correctly (if that's the case happy to try and assist!)

Revision as of 22:21, 31 January 2023

https://www.mediawiki.org/wiki/Help:Tables

ROCKS

Image Name Size Can be placed on tile? Can be walked through? Landscaping Subtype Biome Unlock
Orange Apple 12,333.00


Small Plaza Stone Cluster.png
name1=Small Plaza Stone Cluster size1=3x3 tile1=yes walkthrough1=yes landscapingSubtype1=Stone Cluster biome1=Plaza
Small Peaceful Meadow Stone Cluster.png
name1=Small Peaceful Meadow Stone Cluster size1=3x3 tile1=yes walkthrough1=yes landscapingSubtype1=Stone Cluster biome1=Peaceful Meadow
Small Dazzle Beach Stone Cluster.png
name1=Small Dazzle Beach Stone Cluster size1=3x3 tile1=yes walkthrough1=yes landscapingSubtype1=Stone Cluster biome1=Dazzle Beach
Small Forest of Valor Stone Cluster.png
name1=Small Forest of Valor Stone Cluster size1=3x3 tile1=yes walkthrough1=yes landscapingSubtype1=Stone Cluster biome1=Forest of Valor
Small Glade of Trust Stone Cluster.png
name1=Small Glade of Trust Stone Cluster size1=3x3 tile1=yes walkthrough1=yes landscapingSubtype1=Stone Cluster biome1=Glade of Trust
Small Sunlit Plateau Stone Cluster.png
name1=Small Sunlit Plateau Stone Cluster size1=3x3 tile1=yes walkthrough1=yes landscapingSubtype1=Stone Cluster biome1=Sunlit Plateau
Small Snowy Frosted Heights Stone Cluster.png
name1=Small Snowy Frosted Heights Stone Cluster size1=3x3 tile1=yes walkthrough1=yes landscapingSubtype1=Stone Cluster biome1=Frosted Heights
Small Forgotten Lands Stone Cluster.png
name1=Small Forgotten Lands Stone Cluster size1=3x3 tile1=yes walkthrough1=yes landscapingSubtype1=Stone Cluster biome1=Forgotten Lands


Small Plaza Rock.png
name1=Small Plaza Rock size1=1x2 tile1=yes walkthrough1=no landscapingSubtype1=Rock - Small biome1=Plaza
Small Mossy Peaceful Meadow Rock.png
name1=Small Mossy Peaceful Meadow Rock size1=1x2 tile1=yes walkthrough1=no landscapingSubtype1=Rock - Small biome1=Peaceful Meadow
Small Dazzle Beach Rock.png
name1=Small Dazzle Beach Rock size1=1x2 tile1=yes walkthrough1=no landscapingSubtype1=Rock - Small biome1=Dazzle Beach
Small Mossy Forest of Valor Rock.png
name1=Small Mossy Forest of Valor Rock size1=1x2 tile1=yes walkthrough1=no landscapingSubtype1=Rock - Small biome1=Forest of Valor
Small Mossy Glade of Trust Rock.png
name1=Small Mossy Glade of Trust Rock size1=1x2 tile1=yes walkthrough1=no landscapingSubtype1=Rock - Small biome1=Glade of Trust
Small Mossy Sunlit Plateau Rock.png
name1=Small Mossy Sunlit Plateau Rock size1=1x2 tile1=yes walkthrough1=no landscapingSubtype1=Rock - Small biome1=Sunlit Plateau
Small Snowy Frosted Heights Rock.png
name1=Small Snowy Frosted Heights Rock size1=2x2 tile1=yes walkthrough1=no landscapingSubtype1=Rock - Small biome1=Frosted Heights
Small Mossy Forgotten Lands Rock.png
name1=Small Mossy Forgotten Lands Rock size1=1x2 tile1=yes walkthrough1=no landscapingSubtype1=Rock - Small biome1=Forgotten Lands
Mossy Plaza Rock.png
name1=Mossy Plaza Rock size1=4x5 tile1=yes walkthrough1=no landscapingSubtype1=Rock - Medium biome1=Plaza
Mossy Peaceful Meadow Rock.png
name1=Mossy Peaceful Meadow Rock size1=4x5 tile1=yes walkthrough1=no landscapingSubtype1=Rock - Medium biome1=Peaceful Meadow
Dazzle Beach Rock.png
name1=Dazzle Beach Rock size1=4x5 tile1=yes walkthrough1=no landscapingSubtype1=Rock - Medium biome1=Dazzle Beach
Mossy Forest of Valor Rock.png
name1=Mossy Forest of Valor Rock size1=4x5 tile1=no walkthrough1=no landscapingSubtype1=Rock - Medium biome1=Forest of Valor
Mossy Glade of Trust Rock.png
name1=Mossy Glade of Trust Rock size1=4x5 tile1=yes walkthrough1=no landscapingSubtype1=Rock - Medium biome1=Glade of Trust
Mossy Sunlit Plateau Rock.png
name1=Mossy Sunlit Plateau Rock size1=4x5 tile1=yes walkthrough1=no landscapingSubtype1=Rock - Medium biome1=Sunlit Plateau
Snowy Frosted Heights Rock.png
name1=Snowy Frosted Heights Rock size1=4x5 tile1=yes walkthrough1=no landscapingSubtype1=Rock - Medium biome1=Frosted Heights
Mossy Forgotten Lands Rock.png
name1=Mossy Forgotten Lands Rock size1=4x5 tile1=yes walkthrough1=no landscapingSubtype1=Rock - Medium biome1=Forgotten Lands


Large Dazzle Beach Rock.png
name1=Large Dazzle Beach Rock size1=11x11 tile1=yes walkthrough1=no landscapingSubtype1=Rock - Large biome1=Dazzle Beach
Large Mossy Peaceful Meadow Rock.png
name1=Large Mossy Peaceful Meadow Rock size1=11x11 tile1=yes walkthrough1=no landscapingSubtype1=Rock - Large biome1=Peaceful Meadow
Large Mossy Forest of Valor Rock.png
name1=Large Mossy Forest of Valor Rock size1=11x11 tile1=yes walkthrough1=no landscapingSubtype1=Rock - Large biome1=Forest of Valor
Large Mossy Glade of Trust Rock.png
name1=Large Mossy Glade of Trust Rock size1=11x11 tile1=yes walkthrough1=no landscapingSubtype1=Rock - Large biome1=Glade of Trust
Large Mossy Sunlit Plateau Rock.png
name1=Large Mossy Sunlit Plateau Rock size1=11x11 tile1=yes walkthrough1=no landscapingSubtype1=Rock - Large biome1=Sunlit Plateau
Large Snowy Frosted Heights Rock.png
name1=Large Snowy Frosted Heights Lands Rock size1=11x11 tile1=no walkthrough1=no landscapingSubtype1=Rock - Large biome1=Frosted Heights
Large Mossy Forgotten Lands Rock.png
name1=Large Mossy Forgotten Lands Rock size1=11x11 tile1=yes walkthrough1=no landscapingSubtype1=Rock - Large biome1=Forgotten Lands


UNDERBRUSH

Image Name Size Can be placed on tile? Can be walked through? Landscaping Subtype Biome Unlock
Plaza Dwarf Birch.png
name1=Plaza Dwarf Birch size1=3x3 tile1=yes walkthrough1=no landscapingSubtype=Dwarf Birch biome1=Plaza
Peaceful Meadow Dwarf Birch.png
name1=Peaceful Meadow Dwarf Birch size1=3x3 tile1=yes walkthrough1=no landscapingSubtype=Dwarf Birch biome1=Peaceful Meadow
Dazzle Beach Dwarf Birch.png
name1=Dazzle Beach Dwarf Birch size1=3x3 tile1=yes walkthrough1=no landscapingSubtype=Dwarf Birch biome1=Dazzle Beach
Forest of Valor Dwarf Birch.png
name1=Forest of Valor Dwarf Birch size1=3x3 tile1=yes walkthrough1=no landscapingSubtype=Dwarf Birch biome1=Forest of Valor
Glade of Trust Dwarf Birch.png
name1=Glade of Trust Dwarf Birch size1=3x3 tile1=yes walkthrough1=no landscapingSubtype=Dwarf Birch biome1=Glade of Trust
Sunlit Plateau Dwarf Birch.png
name1=Sunlit Plateau Dwarf Birch size1=3x3 tile1=yes walkthrough1=no landscapingSubtype=Dwarf Birch biome1=Sunlit Plateau
Frosted Heights Dwarf Birch.png
name1=Frosted Heights Dwarf Birch size1=3x3 tile1=yes walkthrough1=no landscapingSubtype=Dwarf Birch biome1=Frosted Heights
Forgotten Lands Dwarf Birch.png
name1=Forgotten Lands Dwarf Birch size1=3x3 tile1=yes walkthrough1=no landscapingSubtype=Dwarf Birch biome1=Forgotten Lands


Plaza Light Dwarf Birch.png
name1=Plaza Light Dwarf Birch size1=3x3 tile1=yes walkthrough1=no landscapingSubtype1=Dwarf Birch - Light biome1=Plaza
Peaceful Meadow Light Dwarf Birch.png
name1=Peaceful Meadow Light Dwarf Birch size1=3x3 tile1=yes walkthrough1=no landscapingSubtype1=Dwarf Birch - Light biome1=Peaceful Meadow
Forest of Valor Light Dwarf Birch.png
name1=Forest of Valor Light Dwarf Birch size1=3x3 tile1=yes walkthrough1=no landscapingSubtype1=Dwarf Birch - Light biome1=Forest of Valor
Glade of Trust Light Dwarf Birch.png
name1=Glade of Trust Light Dwarf Birch size1=3x3 tile1=yes walkthrough1=no landscapingSubtype1=Dwarf Birch - Light biome1=Glade of Trust
Sunlit Plateau Light Dwarf Birch.png
name1=Sunlit Plateau Light Dwarf Birch size1=3x3 tile1=yes walkthrough1=no landscapingSubtype1=Dwarf Birch - Light biome1=Sunlit Plateau
Frosted Heights Light Dwarf Birch.png
name1=Frosted Heights Light Dwarf Birch size1=3x3 tile1=yes walkthrough1=no landscapingSubtype1=Dwarf Birch - Light biome1=Frosted Heights
Forgotten Lands Light Dwarf Birch.png
name1=Forgotten Lands Light Dwarf Birch size1=3x3 tile1=yes walkthrough1=no landscapingSubtype1=Dwarf Birch - Light biome1=Forgotten Lands
Plaza Dwarf Maple.png
name1=Plaza Dwarf Maple size1=3x3 tile1=yes walkthrough1=no landscapingSubtype=Dwarf Maple biome1=Plaza
Peaceful Meadow Dwarf Maple.png
name1=Peaceful Meadow Dwarf Maple size1=3x3 tile1=yes walkthrough1=no landscapingSubtype=Dwarf Maple biome1=Peaceful Meadow
Dazzle Beach Dwarf Maple.png
name1=Dazzle Beach Dwarf Maple size1=3x3 tile1=yes walkthrough1=no landscapingSubtype=Dwarf Maple biome1=Dazzle Beach
Forest of Valor Dwarf Maple.png
name1=Forest of Valor Dwarf Maple size1=3x3 tile1=yes walkthrough1=no landscapingSubtype=Dwarf Maple biome1=Forest of Valor
Glade of Trust Dwarf Maple.png
name1=Glade of Trust Dwarf Maple size1=3x3 tile1=yes walkthrough1=no landscapingSubtype=Dwarf Maple biome1=Glade of Trust
Sunlit Plateau Dwarf Maple.png
name1=Sunlit Plateau Dwarf Maple size1=3x3 tile1=yes walkthrough1=no landscapingSubtype=Dwarf Maple biome1=Sunlit Plateau
Frosted Heights Dwarf Maple.png
name1=Frosted Heights Dwarf Maple size1=3x3 tile1=yes walkthrough1=no landscapingSubtype=Dwarf Maple biome1=Frosted Heights
Forgotten Lands Dwarf Maple.png
name1=Forgotten Lands Dwarf Maple size1=3x3 tile1=yes walkthrough1=no landscapingSubtype=Dwarf Maple biome1=Forgotten Lands
Plaza Light Dwarf Maple.png
name1=Plaza Light Dwarf Maple size1=3x3 tile1=yes walkthrough1=no landscapingSubtype1=Dwarf Maple - Light biome1=Plaza
Peaceful Meadow Light Dwarf Maple.png
name1=Peaceful Meadow Light Dwarf Maple size1=3x3 tile1=yes walkthrough1=no landscapingSubtype1=Dwarf Maple - Light biome1=Peaceful Meadow
Dazzle Beach Light Dwarf Maple.png
name1=Dazzle Beach Light Dwarf Maple size1=3x3 tile1=yes walkthrough1=no landscapingSubtype1=Dwarf Maple - Light biome1=Dazzle Beach
Forest of Valor Light Dwarf Maple.png
name1=Forest of Valor Light Dwarf Maple size1=3x3 tile1=yes walkthrough1=no landscapingSubtype1=Dwarf Maple - Light biome1=Forest of Valor
Glade of Trust Light Dwarf Maple.png
name1=Glade of Trust Light Dwarf Maple size1=3x3 tile1=yes walkthrough1=no landscapingSubtype1=Dwarf Maple - Light biome1=Glade of Trust
Sunlit Plateau Light Dwarf Maple.png
name1=Sunlit Plateau Light Dwarf Maple size1=3x3 tile1=yes walkthrough1=no landscapingSubtype1=Dwarf Maple - Light biome1=Sunlit Plateau
Frosted Heights Light Dwarf Maple.png
name1=Frosted Heights Light Dwarf Maple size1=3x3 tile1=yes walkthrough1=no landscapingSubtype1=Dwarf Maple - Light biome1=Frosted Heights
Forgotten Lands Light Dwarf Maple.png
name1=Forgotten Lands Light Dwarf Maple size1=3x3 tile1=yes walkthrough1=no landscapingSubtype1=Dwarf Maple - Light biome1=Forgotten Lands


Plaza Flower Bush.png
name1=Plaza Flower Bush size1=3x3 tile1=yes walkthrough1=no landscapingSubtype1=Flower Bush biome1=Plaza
Peaceful Meadow Flower Bush.png
name1=Peaceful Meadow Flower Bush size1=3x3 tile1=yes walkthrough1=no landscapingSubtype1=Flower Bush biome1=Peaceful Meadow
Dazzle Beach Flower Bush.png
name1=Dazzle Beach Flower Bush size1=3x3 tile1=yes walkthrough1=no landscapingSubtype1=Flower Bush biome1=Dazzle Beach
Forest of Valor Flower Bush.png
name1=Forest of Valor Flower Bush size1=3x3 tile1=yes walkthrough1=no landscapingSubtype1=Flower Bush biome1=Forest of Valor
Glade of Trust Flower Bush.png
name1=Glade of Trust Flower Bush size1=3x3 tile1=yes walkthrough1=no landscapingSubtype1=Flower Bush biome1=Glade of Trust
Sunlit Plateau Flower Bush.png
name1=Sunlit Plateau Flower Bush size1=3x3 tile1=yes walkthrough1=no landscapingSubtype1=Flower Bush biome1=Sunlit Plateau
Frosted Heights Flower Bush.png
name1=Frosted Heights Flower Bush size1=3x3 tile1=yes walkthrough1=no landscapingSubtype1=Flower Bush biome1=Frosted Heights
Forgotten Lands Flower Bush.png
name1=Forgotten Lands Flower Bush size1=3x3 tile1=yes walkthrough1=no landscapingSubtype1=Flower Bush biome1=Forgotten Lands


Plaza Fern.png
name1=Plaza Fern size1=3x3 tile1=yes walkthrough1=yes landscapingSubtype=Fern biome1=Plaza
Forest of Valor Fern.png
name1=Forest of Valor Fern size1=3x3 tile1=yes walkthrough1=yes landscapingSubtype=Fern biome1=Forest of Valor
Glade of Trust Fern.png
name1=Glade of Trust Fern size1=3x3 tile1=yes walkthrough1=yes landscapingSubtype=Fern biome1=Glade of Trust
Sunlit Plateau Fern.png
name1=Sunlit Plateau Fern size1=3x3 tile1=yes walkthrough1=yes landscapingSubtype=Fern biome1=Sunlit Plateau
Forgotten Lands Fern.png
name1=Forgotten Lands Fern size1=3x3 tile1=no walkthrough1=yes landscapingSubtype=Fern biome1=Forgotten Lands


Bracken.png
name1=Bracken size1=4x4 tile1=no walkthrough1=yes landscapingSubtype1=Bracken biome1=Biome TBD
Forest of Valor Bracken.png
name1=Forest of Valor Bracken size1=4x4 tile1=no walkthrough1=yes landscapingSubtype1=Bracken biome1=Forest of Valor
Dreamlight Valley Desert Rose.png
name1=Dreamlight Valley Desert Rose size1=2x2 tile1=no walkthrough1=no landscapingSubtype1=Desert Rose biome1=Biome TBD
Glade of Trust Dreamlight Valley Desert Rose.png
name1=Glade of Trust Dreamlight Valley Desert Rose size1=2x2 tile1=no walkthrough1=no landscapingSubtype1=Desert Rose biome1=Glade of Trust
Tropical Fern.png
name1=Tropical Fern size1=2x2 tile1=no walkthrough1=yes landscapingSubtype=Fern - Tropical biome1=Dazzle Beach
Glade of Trust Tropical Fern.png
name1=Glade of Trust Tropical Fern size1=2x2 tile1=no walkthrough1=yes landscapingSubtype=Fern - Tropical biome1=Glade of Trust
Orchid Base.png
name1=Orchid Base size1=2x2 tile1=no walkthrough1=yes landscapingSubtype1=Orchid Base biome1=Biome TBD
Glade of Trust Orchid Base.png
name1=Glade of Trust Orchid Base size1=2x2 tile1=no walkthrough1=yes landscapingSubtype1=Orchid Base biome1=Glade of Trust
Syngonium.png
name1=Syngonium size1=2x2 tile1=no walkthrough1=yes landscapingSubtype1=Syngonium biome1=Biome TBD
Glade of Trust Syngonium.png
name1=Glade of Trust Syngonium size1=2x2 tile1=no walkthrough1=yes landscapingSubtype1=Syngonium biome1=Glade of Trust


Peaceful Meadow Reeds.png
name1=Peaceful Meadow Reeds size1=3x3 tile1=no, on water only walkthrough1=yes landscapingSubtype1=Reeds biome1=Peaceful Meadow
Forest of Valor Reeds.png
name1=Forest of Valor Reeds size1=3x3 tile1=no, on water only walkthrough1=yes landscapingSubtype1=Reeds biome1=Forest of Valor
Glade of Trust Reeds.png
name1=Glade of Trust Reeds size1=3x3 tile1=no, on water only walkthrough1=yes landscapingSubtype1=Reeds biome1=Glade of Trust
Sunlit Plateau Reeds.png
name1=Sunlit Plateau Reeds size1=3x3 tile1=no, on water only walkthrough1=yes landscapingSubtype1=Reeds biome1=Sunlit Plateau
Forgotten Lands Reeds.png
name1=Forgotten Lands Reeds size1=3x3 tile1=no, on water only walkthrough1=yes landscapingSubtype1=Reeds biome1=Forgotten Lands


Meadow Grass.png
name1=Meadow Grass 1 size1=4x4 tile1=no walkthrough1=yes landscapingSubtype1=Grass biome1=Peaceful Meadow
img name2=Meadow Grass 2 size2=5x5 tile2=no walkthrough2=yes landscapingSubtype2=Grass biome2=Peaceful Meadow
Beach Grass.png
name1=Beach Grass 1 size1=4x4 tile1=no walkthrough1=yes landscapingSubtype1=Grass biome1=Dazzle Beach
img name2=Beach Grass 2 (has Sunlit Plateau Grass variant counterpart) size2=5x5 tile2=no walkthrough2=yes landscapingSubtype2=Grass biome2=Dazzle Beach
img name2=Sunlit Plateau Grass 2 (has Beach Grass variant counterpart) size2=5x5 tile2=no walkthrough2=yes landscapingSubtype2=Grass biome2=Sunlit Plateau
Sunlit Plateau Grass.png
name1=Sunlit Plateau Grass 1 size1=4x4 tile1=no walkthrough1=yes landscapingSubtype1=Grass biome1=Sunlit Plateau
img name3=Sunlit Plateau Grass 3 size3=4x4 tile3=no walkthrough3=yes landscapingSubtype3=Grass biome3=Sunlit Plateau
img name4=Sunlit Plateau Grass 4 size4=2x3 tile4=no walkthrough4=yes landscapingSubtype4=Grass biome4=Sunlit Plateau


Thorn Vine.png
name1=Thorn Vine 1 size1=2x2 tile1=no walkthrough1=no landscapingSubtype1=Thorn Vine biome1=Forgotten Lands
img name2=Thorn Vine 2 size2=4x2 tile2=no walkthrough2=no landscapingSubtype2=Thorn Vine biome2=Forgotten Lands
img name3=Thorn Vine 3 size3=2x4 tile3=no walkthrough3=no landscapingSubtype3=Thorn Vine biome3=Forgotten Lands
Tall Forest of Valor Reeds.png
name1=Tall Forest of Valor Reeds size1=2x2 tile1=no, on water only walkthrough1=yes landscapingSubtype1=Reeds - Tall biome1=Forest of Valor
Tall Glade of Trust Reeds.png
name1=Tall Glade of Trust Reeds size1=2x2 tile1=no, on water only walkthrough1=yes landscapingSubtype1=Reeds - Tall biome1=Glade of Trust
Forest of Valor Cattails.png
name1=Forest of Valor Cattails size1=2x2 tile1=no, on water only walkthrough1=yes landscapingSubtype1=Cattails biome1=Forest of Valor
Glade of Trust Cattails.png
name1=Glade of Trust Cattails size1=2x2 tile1=no, on water only walkthrough1=yes landscapingSubtype1=Cattails biome1=Glade of Trust


TREES

Image Name Size Produces wood? Can be placed on tile? Landscaping Subtype Biome Unlock


Bare-Limbed Tree.png
name1=Bare-Limbed Tree 1 (medium height, medium dark wood) size1=3x3 wood1=yes tile1=no landscapingSubtype1=Bare-Limbed Tree biome1=Biome TBD
img name2=Bare-Limbed Tree 2 (tall, dark wood) size2=3x3 wood2=yes tile2=no landscapingSubtype2=Bare-Limbed Tree biome2=Biome TBD


Bent Palm Tree.png
name1=Bent Palm Tree 1 (shortest) (has Bent Sunlit Plateau Palm Tree variant counterpart) size1=2x2 wood1=yes tile1=yes landscapingSubtype1=Palm Tree - Bent biome1=Dazzle Beach
Bent Sunlit Plateau Palm Tree.png
name1=Bent Sunlit Plateau Palm Tree (has Bent Palm Tree variant counterpart) size1=2x2 wood1=yes tile1=yes landscapingSubtype1=Palm Tree - Bent biome1=Sunlit Plateau
img name2=Bent Palm Tree 2 (medium height) (has Tall Sunlit Plateau Palm Tree variant counterpart) size2=3x3 wood2=yes tile2=no landscapingSubtype2=Palm Tree - Tall biome2=Dazzle Beach
Tall Sunlit Plateau Palm Tree.png
name1=Tall Sunlit Plateau Palm Tree (has Bent Palm Tree variant counterpart) size1=3x3 wood1=yes tile1=no landscapingSubtype1=Palm Tree - Tall biome1=Sunlit Plateau
img name3=Bent Palm Tree 3 (tallest) (has Curved Sunlit Plateau Palm Tree variant counterpart) size3=2x2 wood3=yes tile3=yes landscapingSubtype3=Palm Tree - Curved biome3=Dazzle Beach
Curved Sunlit Plateau Palm Tree.png
name1=Curved Sunlit Plateau Palm Tree (has Bent Palm Tree variant counterpart) size1=2x2 wood1=yes tile1=yes landscapingSubtype1=Palm Tree - Curved biome1=Sunlit Plateau
Round Palm Tree.png
name1=Round Palm Tree size1=4x4 wood1=yes tile1=no landscapingSubtype1=Palm Tree - Round biome1=Dazzle Beach
Round Sunlit Plateau Palm Tree.png
name1=Round Sunlit Plateau Palm Tree size1=4x4 wood1=yes tile1=no landscapingSubtype1=Palm Tree - Round biome1=Sunlit Plateau


Dead Bush.png
name1=Dead Bush size1=2x2 wood1=no tile1=no landscapingSubtype1=Dead Bush biome1=Biome TBD
Frozen Dead Bush.png
name1=Frozen Dead Bush size1=2x2 wood1=no tile1=no landscapingSubtype1=Dead Bush biome1=Biome TBD
Scraggly Bush.png
name1=Scraggly Bush size1=2x2 wood1=no tile1=no landscapingSubtype1=Dead Bush biome1=Biome TBD


img name1=Snowy Dead Tree 1 (tall, sort of pronged) size1=3x3 wood1=yes tile1=no landscapingSubtype1=Dead Tree biome1=Frosted Heights
img name1=Dead Forgotten Lands Tree 1 (tall, sort of pronged) size1=3x3 wood1=yes tile1=no landscapingSubtype1=Dead Tree biome1=Forgotten Lands
img name2=Snowy Dead Tree Tree 2 (shorter, pronged, but more spindly) size2=3x3 wood2=yes tile2=no landscapingSubtype2=Dead Tree biome2=Frosted Heights
img name2=Dead Forgotten Lands Tree 2 (shorter, pronged, but more spindly) size2=3x3 wood2=yes tile2=no landscapingSubtype2=Dead Tree biome2=Forgotten Lands


Fir.png
name1=Fir 1 (short) (has High Snowy Fir variant counterpart) size1=3x3 wood1=yes tile1=no landscapingSubtype1=Fir biome1=Forest of Valor
High Snowy Fir.png
name1=High Snowy Fir 1 (short) (has Fir variant counterpart) size1=3x3 wood1=yes tile1=no landscapingSubtype1=Fir biome1=Frosted Heights


img name2=Fir 2 (medium height) (has Slender Sinister Fir variant counterpart) size2=3x3 wood2=yes tile2=no landscapingSubtype2=Fir biome2=Forest of Valor
img name3=Slender Sinister Fir 3 (medium height) (has Fir variant counterpart) size3=3x3 wood3=yes tile3=no landscapingSubtype3=Fir biome3=Forgotten Lands


img name3=Fir 3 (tall) (has High Snowy Fir and Slender Sinister Fir variant counterparts) size3=3x3 wood3=yes tile3=no landscapingSubtype3=Fir biome3=Forest of Valor
img name2=High Snowy Fir 2 (tall) (has Fir and Slender Sinister Fir variant counterparts) size2=3x3 wood2=yes tile2=no landscapingSubtype2=Fir biome2=Frosted Heights
img name2=Slender Sinister Fir 2 (tall) (has Fir and High Snowy Fir variant counterparts) size2=3x3 wood2=yes tile2=yes landscapingSubtype2=Fir biome2=Forgotten Lands


img name3=High Snowy Fir 3 (very tall) (has Slender Sinister Fir variant counterpart) size3=3x3 wood3=yes tile3=no landscapingSubtype3=Fir biome3=Frosted Heights
Slender Sinister Fir.png
name1=Slender Sinister Fir 1 (very tall) (has High Snowy Fir variant counterpart) size1=3x3 wood1=yes tile1=no landscapingSubtype1=Fir biome1=Forgotten Lands


Lush Sinister Fir.png
name1=Lush Sinister Fir size1=4x4 wood1=north, east tile1=no landscapingSubtype1=Fir - Lush biome1=Forgotten Lands


Short Japanese Maple.png
name1=Short Japanese Maple 1 (medium-tall, branch to left) (has Small Oak variant counterpart) size1=3x3 wood1=yes tile1=no biome1=Biome TBD
img name2=Short Japanese Maple 2 (short) size2=1x1 wood2=yes tile2=yes biome2=Biome TBD
img name3=Short Japanese Maple 3 (tallest, branch to right) (has Small Oak variant counterpart) size3=4x4 wood3=yes tile3=no biome3=Biome TBD
Small Oak.png
name1=Small Oak 1 (medium-tall, branch to left) (has Short Japanese Maple variant counterpart) size1=3x3 wood1=yes tile1=no biome1=Biome TBD
img name2=Small Oak 2 (shortest) size2=3x3 wood2=yes tile2=no biome2=Biome TBD
img name3=Small Oak 3 (tallest, branch to right) (has Short Japanese Maple variant counterpart) size3=3x3 wood3=yes tile3=no biome3=Biome TBD


Simple Maple.png
name1=Simple Maple 1 (slender, short, upright) size1=3x3 wood1=yes tile1=no landscapingSubtype1=Maple Tree biome1=Biome TBD
Tall Black Maple.png
name1=Tall Black Maple 1 (slender, upright) size1=3x3 wood1=yes tile1=no landscapingSubtype1=Maple Tree biome1=Biome TBD
Tall Maple.png
name1=Tall Maple 1 (slender, short, upright) size1=3x3 wood1=yes tile1=no landscapingSubtype1=Maple Tree biome1=Biome TBD


img name2=Simple Maple 2 (slender, tall, curved) size2=5x5 wood2=north only tile2=no landscapingSubtype2=Maple Tree biome2=Biome TBD
img name2=Tall Black Maple 2 (slender, tall, curved) size2=5x5 wood2=north only tile2=no landscapingSubtype2=Maple Tree biome2=Biome TBD
img name2=Tall Maple 2 (slender, tall, curved) size2=3x3 wood2=yes tile2=yes landscapingSubtype2=Maple Tree biome2=Biome TBD


img name3=Simple Maple 3 (normal thickness, tall, upright) size3=4x4 wood3=yes tile3=no landscapingSubtype3=Maple Tree biome3=Biome TBD
img name3=Tall Black Maple 3 (normal thickness, tall, upright) size3=4x4 wood3=north, east tile3=no landscapingSubtype3=Maple Tree biome3=Biome TBD
img name3=Tall Maple 3 (normal thickness, tall, upright) size3=4x4 wood3=north, east tile3=no landscapingSubtype3=Maple Tree biome3=Biome TBD


img name4=Tall Black Maple 4 (slender, short, curved) (Simple Maple and Tall Maple do not have this variant) size4=4x4 wood4=north, east tile4=no landscapingSubtype4=Maple Tree biome4=Biome TBD


img name1=Light Birch Tree 1 (medium-tall, normal thickness, upright) (has Tall Birch Tree variant counterpart) size1=3x3 wood1=yes tile1=yes landscapingSubtype1=Birch Tree biome1=Biome TBD
Tall Birch Tree.png
name1=Tall Birch Tree 1 (medium-tall, normal thickness, upright) (has Light Birch Tree variant counterpart) size1=3x3 wood1=yes tile1=no landscapingSubtype1=Birch Tree biome1=Biome TBD
Light Birch Tree.png
name2=Light Birch Tree 2 (medium height, slender, upright) size2=3x3 wood2=yes tile2=yes landscapingSubtype2=Birch Tree biome2=Biome TBD
img name3=Light Birch Tree 3 (medium-short, slender, slightly curved) size3=3x3 wood3=yes tile3=yes landscapingSubtype3=Birch Tree biome3=Biome TBD
img name4=Light Birch Tree 4 (short, slender, upright) size4=4x4 wood4=yes tile4=yes landscapingSubtype4=Birch Tree biome4=Biome TBD
img name5=Light Birch Tree 5 (tall, dual trunk) (has Tall Birch Tree variant counterpart) size5=4x6 wood5=yes tile5=yes landscapingSubtype5=Birch Tree biome5=Biome TBD
img name3=Tall Birch Tree 3 (tall, dual trunk) (has Light Birch Tree variant counterpart) size3=3x5 wood3=yes tile3=no landscapingSubtype3=Birch Tree biome3=Biome TBD


img name2=Tall Birch Tree 2 (tall, slender, upright) size2=4x4 wood2=yes tile2=no landscapingSubtype2=Birch Tree biome2=Biome TBD


Swamp Tree.png
name1=Swamp Tree 1 (shortest) size1=6x6 wood1=north only tile1=yes landscapingSubtype1=Swamp Tree biome1=Glade of Trust
img name2=Swamp Tree 2 (medium height, flatter canopy top) size2=7x7 wood2=no tile2=yes landscapingSubtype2=Swamp Tree biome2=Glade of Trust
img name3=Swamp Tree 3 (tallest) size3=9x9 wood3=no tile3=no* (the majority can be placed on tile, but a single square of the 81 units in the 9x9 parameters cannot) landscapingSubtype3=Swamp Tree biome3=Glade of Trust
Wide Swamp Tree.png
name1=Wide Swamp Tree size1=8x8 wood1=no tile1=yes landscapingSubtype1=Swamp Tree - Wide biome1=Glade of Trust


Swamp Willow Tree.png
name1=Swamp Willow Tree size1=6x6 wood1=no tile1=yes landscapingSubtype1=Willow - Swamp biome1=Glade of Trust
Frozen Willow Tree.png
name1=Frozen Willow Tree size1=5x5 wood1=no tile1=no landscapingSubtype1=Willow - Frozen biome1=Frosted Heights
Large Plaza Tree.png
name1=Large Plaza Tree size1=6x6 wood1=north only tile1=no landscapingSubtype1=Plaza Tree - Large biome1=Plaza
Plaza Tree.png
name1=Plaza Tree size1=2x2 wood1=yes tile1=yes landscapingSubtype1=Plaza Tree biome1=Plaza


Large Plaza Hedge.png
name1=Large Plaza Hedge size1=6x19 wood1=no tile1=yes landscapingSubtype1=Hedge biome1=Plaza
Small Plaza Hedge.png
name1=Small Plaza Hedge size1=5x14 wood1=no tile1=yes landscapingSubtype1=Hedge biome1=Plaza
Wide Baobab Tree.png
name1=Wide Baobab Tree 1 (tall, with branch) size1=4x4 wood1=north, east tile1=no landscapingSubtype1=Baobab Tree biome1=Sunlit Plateau
img name2=Wide Baobab Tree 2 (short) size2=4x4 wood2=north, east tile2=no landscapingSubtype2=Baobab Tree biome2=Sunlit Plateau


Tall Acacia Tree.png
name1=Tall Acacia Tree 1 (shortest) size1=2x2 wood1=yes tile1=no landscapingSubtype1=Acacia Tree biome1=Sunlit Plateau
img name2=Tall Acacia Tree 2 (tallest) size2=2x2 wood2=yes tile2=no landscapingSubtype2=Acacia Tree biome2=Sunlit Plateau
img name3=Tall Acacia Tree 3 (widest) size3=5x5 wood3=north, east, single southwest tile3=no landscapingSubtype3=Acacia Tree biome3=Sunlit Plateau
Moss-Covered Tree.png
name1=Moss-Covered Tree 1 (short) size1=5x5 wood1=yes tile1=no landscapingSubtype1=Moss-Covered Tree biome1=Glade of Trust
img name2=Moss-Covered Tree 2 (tall) size2=8x8 wood2=no tile2=no landscapingSubtype2=Moss-Covered Tree biome2=Glade of Trust


Meager Tree.png
name1=Meager Tree size1=6x6 wood1=north only tile1=no landscapingSubtype1=Meager Tree biome1=Biome TBD
Lush Tree.png
name1=Lush Tree size1=3x5 wood1=yes tile1=no landscapingSubtype1=Lush Tree biome1=Biome TBD
Lush Dragon Tree.png
name1=Lush Dragon Tree 1 (1 trunk hole) size1=3x3 wood1=yes tile1=no landscapingSubtype1=Dragon Tree biome1=Biome TBD
img name2=Lush Dragon Tree 2 (2 trunk holes, branches more visible and upward-extending) size2=3x3 wood2=yes tile2=no landscapingSubtype2=Dragon Tree biome2=Biome TBD
img name1=Sinister Tree size1=6x6 wood1=north only tile1=no landscapingSubtype1=Sinister Tree biome1=Forgotten Lands
Fallen Trunk.png
name1=Fallen Trunk size1=4x2 wood1=no tile1=yes landscapingSubtype1=Trunk - Fallen biome1=Biome TBD
Tree Trunk.png
name1=Tree Trunk 1 size1=4x4 wood1=no tile1=no landscapingSubtype1=Trunk biome1=Biome TBD
img name2=Tree Trunk 2 (medium height, slender) size2=2x2 wood2=no tile2=no landscapingSubtype2=Trunk biome2=Biome TBD
img name3=Tree Trunk 3 (tallest, with leafy branch) size3=4x5 wood3=no tile3=no landscapingSubtype3=Trunk biome3=Biome TBD


Squat Tree Stump.png
name1=Squat Tree Stump size1=2x2 wood1=no tile1=yes landscapingSubtype1=Stump - Squat biome1=Biome TBD


Dead Pine Tree.png
name1=Dead Pine Tree 1 (tall, with small leaf) size1=4x4 wood1=yes tile1=no landscapingSubtype1=Dead Pine Tree biome1=Biome TBD
img name2=Dead Pine Tree 2 (short) size2=3x3 wood2=yes tile2=no landscapingSubtype2=Dead Pine Tree biome2=Biome TBD
Three-Limbed Tree.png
name1=Three-Limbed Tree 1 size1=3x4 wood1=yes tile1=no landscapingSubtype1=Three-Limbed Tree biome1=Biome TBD
img name2=Three-Limbed Tree 2 (short) size2=4x4 wood2=yes tile2=no landscapingSubtype2=Three-Limbed Tree biome2=Biome TBD


img name1=Frozen Twisted Dead Tree 1 (multi-tiered, looks closest to thumbnail, but no frost) size1=5x6 wood1=north, east tile1=no biome1=Forgotten Lands
img name2=Frozen Twisted Dead Tree 2 (normalish red tree variant) size2=3x3 wood2=yes tile2=no biome2=Forgotten Lands
img name3=Frozen Twisted Dead Tree 3 (spiky variant) size3=5x6 wood3=north, east, single southwest tile3=no biome3=Forgotten Lands


ROCKS - gutted

Image Name Size Can be placed on tile? Can be walked through? Landscaping Subtype Biome Unlock
Small Plaza Stone Cluster.png
Small Plaza Stone Cluster 3x3 yes yes Stone Cluster Plaza
Small Peaceful Meadow Stone Cluster.png
Small Peaceful Meadow Stone Cluster 3x3 yes yes Stone Cluster Peaceful Meadow
Small Dazzle Beach Stone Cluster.png
Small Dazzle Beach Stone Cluster 3x3 yes yes Stone Cluster Dazzle Beach
Small Forest of Valor Stone Cluster.png
Small Forest of Valor Stone Cluster 3x3 yes yes Stone Cluster Forest of Valor
Small Glade of Trust Stone Cluster.png
Small Glade of Trust Stone Cluster 3x3 yes yes Stone Cluster Glade of Trust
Small Sunlit Plateau Stone Cluster.png
Small Sunlit Plateau Stone Cluster 3x3 yes yes Stone Cluster Sunlit Plateau
Small Snowy Frosted Heights Stone Cluster.png
Small Snowy Frosted Heights Stone Cluster 3x3 yes yes Stone Cluster Frosted Heights
Small Forgotten Lands Stone Cluster.png
Small Forgotten Lands Stone Cluster 3x3 yes yes Stone Cluster Forgotten Lands


Small Plaza Rock.png
Small Plaza Rock 1x2 yes no Rock - Small Plaza
Small Mossy Peaceful Meadow Rock.png
Small Mossy Peaceful Meadow Rock 1x2 yes no Rock - Small Peaceful Meadow
Small Dazzle Beach Rock.png
Small Dazzle Beach Rock 1x2 yes no Rock - Small Dazzle Beach
Small Mossy Forest of Valor Rock.png
Small Mossy Forest of Valor Rock 1x2 yes no Rock - Small Forest of Valor
Small Mossy Glade of Trust Rock.png
Small Mossy Glade of Trust Rock 1x2 yes no Rock - Small Glade of Trust
Small Mossy Sunlit Plateau Rock.png
Small Mossy Sunlit Plateau Rock 1x2 yes no Rock - Small Sunlit Plateau
Small Snowy Frosted Heights Rock.png
Small Snowy Frosted Heights Rock 2x2 yes no Rock - Small Frosted Heights
Small Mossy Forgotten Lands Rock.png
Small Mossy Forgotten Lands Rock 1x2 yes no Rock - Small Forgotten Lands
Mossy Plaza Rock.png
Mossy Plaza Rock 4x5 yes no Rock - Medium Plaza
Mossy Peaceful Meadow Rock.png
Mossy Peaceful Meadow Rock 4x5 yes no Rock - Medium Peaceful Meadow
Dazzle Beach Rock.png
Dazzle Beach Rock 4x5 yes no Rock - Medium Dazzle Beach
Mossy Forest of Valor Rock.png
Mossy Forest of Valor Rock 4x5 no no Rock - Medium Forest of Valor
Mossy Glade of Trust Rock.png
Mossy Glade of Trust Rock 4x5 yes no Rock - Medium Glade of Trust
Mossy Sunlit Plateau Rock.png
Mossy Sunlit Plateau Rock 4x5 yes no Rock - Medium Sunlit Plateau
Snowy Frosted Heights Rock.png
Snowy Frosted Heights Rock 4x5 yes no Rock - Medium Frosted Heights
Mossy Forgotten Lands Rock.png
Mossy Forgotten Lands Rock 4x5 yes no Rock - Medium Forgotten Lands


Large Dazzle Beach Rock.png
Large Dazzle Beach Rock 11x11 yes no Rock - Large Dazzle Beach
Large Mossy Peaceful Meadow Rock.png
Large Mossy Peaceful Meadow Rock 11x11 yes no Rock - Large Peaceful Meadow
Large Mossy Forest of Valor Rock.png
Large Mossy Forest of Valor Rock 11x11 yes no Rock - Large Forest of Valor
Large Mossy Glade of Trust Rock.png
Large Mossy Glade of Trust Rock 11x11 yes no Rock - Large Glade of Trust
Large Mossy Sunlit Plateau Rock.png
Large Mossy Sunlit Plateau Rock 11x11 yes no Rock - Large Sunlit Plateau
Large Snowy Frosted Heights Rock.png
Large Snowy Frosted Heights Lands Rock 11x11 no no Rock - Large Frosted Heights
Large Mossy Forgotten Lands Rock.png
Large Mossy Forgotten Lands Rock 11x11 yes no Rock - Large Forgotten Lands


UNDERBRUSH - gutted

Image Name Size Can be placed on tile? Can be walked through? Landscaping Subtype Biome Unlock
Plaza Dwarf Birch.png
Plaza Dwarf Birch 3x3 yes no landscapingSubtype=Dwarf Birch Plaza
Peaceful Meadow Dwarf Birch.png
Peaceful Meadow Dwarf Birch 3x3 yes no landscapingSubtype=Dwarf Birch Peaceful Meadow
Dazzle Beach Dwarf Birch.png
Dazzle Beach Dwarf Birch 3x3 yes no landscapingSubtype=Dwarf Birch Dazzle Beach
Forest of Valor Dwarf Birch.png
Forest of Valor Dwarf Birch 3x3 yes no landscapingSubtype=Dwarf Birch Forest of Valor
Glade of Trust Dwarf Birch.png
Glade of Trust Dwarf Birch 3x3 yes no landscapingSubtype=Dwarf Birch Glade of Trust
Sunlit Plateau Dwarf Birch.png
Sunlit Plateau Dwarf Birch 3x3 yes no landscapingSubtype=Dwarf Birch Sunlit Plateau
Frosted Heights Dwarf Birch.png
Frosted Heights Dwarf Birch 3x3 yes no landscapingSubtype=Dwarf Birch Frosted Heights
Forgotten Lands Dwarf Birch.png
Forgotten Lands Dwarf Birch 3x3 yes no landscapingSubtype=Dwarf Birch Forgotten Lands


Plaza Light Dwarf Birch.png
Plaza Light Dwarf Birch 3x3 yes no Dwarf Birch - Light Plaza
Peaceful Meadow Light Dwarf Birch.png
Peaceful Meadow Light Dwarf Birch 3x3 yes no Dwarf Birch - Light Peaceful Meadow
Forest of Valor Light Dwarf Birch.png
Forest of Valor Light Dwarf Birch 3x3 yes no Dwarf Birch - Light Forest of Valor
Glade of Trust Light Dwarf Birch.png
Glade of Trust Light Dwarf Birch 3x3 yes no Dwarf Birch - Light Glade of Trust
Sunlit Plateau Light Dwarf Birch.png
Sunlit Plateau Light Dwarf Birch 3x3 yes no Dwarf Birch - Light Sunlit Plateau
Frosted Heights Light Dwarf Birch.png
Frosted Heights Light Dwarf Birch 3x3 yes no Dwarf Birch - Light Frosted Heights
Forgotten Lands Light Dwarf Birch.png
Forgotten Lands Light Dwarf Birch 3x3 yes no Dwarf Birch - Light Forgotten Lands
Plaza Dwarf Maple.png
Plaza Dwarf Maple 3x3 yes no landscapingSubtype=Dwarf Maple Plaza
Peaceful Meadow Dwarf Maple.png
Peaceful Meadow Dwarf Maple 3x3 yes no landscapingSubtype=Dwarf Maple Peaceful Meadow
Dazzle Beach Dwarf Maple.png
Dazzle Beach Dwarf Maple 3x3 yes no landscapingSubtype=Dwarf Maple Dazzle Beach
Forest of Valor Dwarf Maple.png
Forest of Valor Dwarf Maple 3x3 yes no landscapingSubtype=Dwarf Maple Forest of Valor
Glade of Trust Dwarf Maple.png
Glade of Trust Dwarf Maple 3x3 yes no landscapingSubtype=Dwarf Maple Glade of Trust
Sunlit Plateau Dwarf Maple.png
Sunlit Plateau Dwarf Maple 3x3 yes no landscapingSubtype=Dwarf Maple Sunlit Plateau
Frosted Heights Dwarf Maple.png
Frosted Heights Dwarf Maple 3x3 yes no landscapingSubtype=Dwarf Maple Frosted Heights
Forgotten Lands Dwarf Maple.png
Forgotten Lands Dwarf Maple 3x3 yes no landscapingSubtype=Dwarf Maple Forgotten Lands
Plaza Light Dwarf Maple.png
Plaza Light Dwarf Maple 3x3 yes no Dwarf Maple - Light Plaza
Peaceful Meadow Light Dwarf Maple.png
Peaceful Meadow Light Dwarf Maple 3x3 yes no Dwarf Maple - Light Peaceful Meadow
Dazzle Beach Light Dwarf Maple.png
Dazzle Beach Light Dwarf Maple 3x3 yes no Dwarf Maple - Light Dazzle Beach
Forest of Valor Light Dwarf Maple.png
Forest of Valor Light Dwarf Maple 3x3 yes no Dwarf Maple - Light Forest of Valor
Glade of Trust Light Dwarf Maple.png
Glade of Trust Light Dwarf Maple 3x3 yes no Dwarf Maple - Light Glade of Trust
Sunlit Plateau Light Dwarf Maple.png
Sunlit Plateau Light Dwarf Maple 3x3 yes no Dwarf Maple - Light Sunlit Plateau
Frosted Heights Light Dwarf Maple.png
Frosted Heights Light Dwarf Maple 3x3 yes no Dwarf Maple - Light Frosted Heights
Forgotten Lands Light Dwarf Maple.png
Forgotten Lands Light Dwarf Maple 3x3 yes no Dwarf Maple - Light Forgotten Lands


Plaza Flower Bush.png
Plaza Flower Bush 3x3 yes no Flower Bush Plaza
Peaceful Meadow Flower Bush.png
Peaceful Meadow Flower Bush 3x3 yes no Flower Bush Peaceful Meadow
Dazzle Beach Flower Bush.png
Dazzle Beach Flower Bush 3x3 yes no Flower Bush Dazzle Beach
Forest of Valor Flower Bush.png
Forest of Valor Flower Bush 3x3 yes no Flower Bush Forest of Valor
Glade of Trust Flower Bush.png
Glade of Trust Flower Bush 3x3 yes no Flower Bush Glade of Trust
Sunlit Plateau Flower Bush.png
Sunlit Plateau Flower Bush 3x3 yes no Flower Bush Sunlit Plateau
Frosted Heights Flower Bush.png
Frosted Heights Flower Bush 3x3 yes no Flower Bush Frosted Heights
Forgotten Lands Flower Bush.png
Forgotten Lands Flower Bush 3x3 yes no Flower Bush Forgotten Lands


Plaza Fern.png
Plaza Fern 3x3 yes yes landscapingSubtype=Fern Plaza
Forest of Valor Fern.png
Forest of Valor Fern 3x3 yes yes landscapingSubtype=Fern Forest of Valor
Glade of Trust Fern.png
Glade of Trust Fern 3x3 yes yes landscapingSubtype=Fern Glade of Trust
Sunlit Plateau Fern.png
Sunlit Plateau Fern 3x3 yes yes landscapingSubtype=Fern Sunlit Plateau
Forgotten Lands Fern.png
Forgotten Lands Fern 3x3 no yes landscapingSubtype=Fern Forgotten Lands


Bracken.png
Bracken 4x4 no yes Bracken Biome TBD
Forest of Valor Bracken.png
Forest of Valor Bracken 4x4 no yes Bracken Forest of Valor
Dreamlight Valley Desert Rose.png
Dreamlight Valley Desert Rose 2x2 no no Desert Rose Biome TBD
Glade of Trust Dreamlight Valley Desert Rose.png
Glade of Trust Dreamlight Valley Desert Rose 2x2 no no Desert Rose Glade of Trust
Tropical Fern.png
Tropical Fern 2x2 no yes landscapingSubtype=Fern - Tropical Dazzle Beach
Glade of Trust Tropical Fern.png
Glade of Trust Tropical Fern 2x2 no yes landscapingSubtype=Fern - Tropical Glade of Trust
Orchid Base.png
Orchid Base 2x2 no yes Orchid Base Biome TBD
Glade of Trust Orchid Base.png
Glade of Trust Orchid Base 2x2 no yes Orchid Base Glade of Trust
Syngonium.png
Syngonium 2x2 no yes Syngonium Biome TBD
Glade of Trust Syngonium.png
Glade of Trust Syngonium 2x2 no yes Syngonium Glade of Trust


Peaceful Meadow Reeds.png
Peaceful Meadow Reeds 3x3 no, on water only yes Reeds Peaceful Meadow
Forest of Valor Reeds.png
Forest of Valor Reeds 3x3 no, on water only yes Reeds Forest of Valor
Glade of Trust Reeds.png
Glade of Trust Reeds 3x3 no, on water only yes Reeds Glade of Trust
Sunlit Plateau Reeds.png
Sunlit Plateau Reeds 3x3 no, on water only yes Reeds Sunlit Plateau
Forgotten Lands Reeds.png
Forgotten Lands Reeds 3x3 no, on water only yes Reeds Forgotten Lands


Meadow Grass.png
Meadow Grass 1 4x4 no yes Grass Peaceful Meadow
img Meadow Grass 2 5x5 no yes Grass Peaceful Meadow
Beach Grass.png
Beach Grass 1 4x4 no yes Grass Dazzle Beach
img Beach Grass 2 (has Sunlit Plateau Grass variant counterpart) 5x5 no yes Grass Dazzle Beach
img Sunlit Plateau Grass 2 (has Beach Grass variant counterpart) 5x5 no yes Grass Sunlit Plateau
Sunlit Plateau Grass.png
Sunlit Plateau Grass 1 4x4 no yes Grass Sunlit Plateau
img Sunlit Plateau Grass 3 4x4 no yes Grass Sunlit Plateau
img Sunlit Plateau Grass 4 2x3 no yes Grass Sunlit Plateau


Thorn Vine.png
Thorn Vine 1 2x2 no no Thorn Vine Forgotten Lands
img Thorn Vine 2 4x2 no no Thorn Vine Forgotten Lands
img Thorn Vine 3 2x4 no no Thorn Vine Forgotten Lands
Tall Forest of Valor Reeds.png
Tall Forest of Valor Reeds 2x2 no, on water only yes Reeds - Tall Forest of Valor
Tall Glade of Trust Reeds.png
Tall Glade of Trust Reeds 2x2 no, on water only yes Reeds - Tall Glade of Trust
Forest of Valor Cattails.png
Forest of Valor Cattails 2x2 no, on water only yes Cattails Forest of Valor
Glade of Trust Cattails.png
Glade of Trust Cattails 2x2 no, on water only yes Cattails Glade of Trust


TREES - gutted

Image Name Size Produces wood? Can be placed on tile? Landscaping Subtype Biome Unlock


Bare-Limbed Tree.png
Bare-Limbed Tree 1 (medium height, medium dark wood) 3x3 yes no Bare-Limbed Tree Biome TBD
img Bare-Limbed Tree 2 (tall, dark wood) 3x3 yes no Bare-Limbed Tree Biome TBD


Bent Palm Tree.png
Bent Palm Tree 1 (shortest) (has Bent Sunlit Plateau Palm Tree variant counterpart) 2x2 yes yes Palm Tree - Bent Dazzle Beach
Bent Sunlit Plateau Palm Tree.png
Bent Sunlit Plateau Palm Tree (has Bent Palm Tree variant counterpart) 2x2 yes yes Palm Tree - Bent Sunlit Plateau
img Bent Palm Tree 2 (medium height) (has Tall Sunlit Plateau Palm Tree variant counterpart) 3x3 yes no Palm Tree - Tall Dazzle Beach
Tall Sunlit Plateau Palm Tree.png
Tall Sunlit Plateau Palm Tree (has Bent Palm Tree variant counterpart) 3x3 yes no Palm Tree - Tall Sunlit Plateau
img Bent Palm Tree 3 (tallest) (has Curved Sunlit Plateau Palm Tree variant counterpart) 2x2 yes yes Palm Tree - Curved Dazzle Beach
Curved Sunlit Plateau Palm Tree.png
Curved Sunlit Plateau Palm Tree (has Bent Palm Tree variant counterpart) 2x2 yes yes Palm Tree - Curved Sunlit Plateau
Round Palm Tree.png
Round Palm Tree 4x4 yes no Palm Tree - Round Dazzle Beach
Round Sunlit Plateau Palm Tree.png
Round Sunlit Plateau Palm Tree 4x4 yes no Palm Tree - Round Sunlit Plateau


Dead Bush.png
Dead Bush 2x2 no no Dead Bush Biome TBD
Frozen Dead Bush.png
Frozen Dead Bush 2x2 no no Dead Bush Biome TBD
Scraggly Bush.png
Scraggly Bush 2x2 no no Dead Bush Biome TBD


img Snowy Dead Tree 1 (tall, sort of pronged) 3x3 yes no Dead Tree Frosted Heights
img Dead Forgotten Lands Tree 1 (tall, sort of pronged) 3x3 yes no Dead Tree Forgotten Lands
img Snowy Dead Tree Tree 2 (shorter, pronged, but more spindly) 3x3 yes no Dead Tree Frosted Heights
img Dead Forgotten Lands Tree 2 (shorter, pronged, but more spindly) 3x3 yes no Dead Tree Forgotten Lands


Fir.png
Fir 1 (short) (has High Snowy Fir variant counterpart) 3x3 yes no Fir Forest of Valor
High Snowy Fir.png
High Snowy Fir 1 (short) (has Fir variant counterpart) 3x3 yes no Fir Frosted Heights


img Fir 2 (medium height) (has Slender Sinister Fir variant counterpart) 3x3 yes no Fir Forest of Valor
img Slender Sinister Fir 3 (medium height) (has Fir variant counterpart) 3x3 yes no Fir Forgotten Lands


img Fir 3 (tall) (has High Snowy Fir and Slender Sinister Fir variant counterparts) 3x3 yes no Fir Forest of Valor
img High Snowy Fir 2 (tall) (has Fir and Slender Sinister Fir variant counterparts) 3x3 yes no Fir Frosted Heights
img Slender Sinister Fir 2 (tall) (has Fir and High Snowy Fir variant counterparts) 3x3 yes yes Fir Forgotten Lands


img High Snowy Fir 3 (very tall) (has Slender Sinister Fir variant counterpart) 3x3 yes no Fir Frosted Heights
Slender Sinister Fir.png
Slender Sinister Fir 1 (very tall) (has High Snowy Fir variant counterpart) 3x3 yes no Fir Forgotten Lands


Lush Sinister Fir.png
Lush Sinister Fir 4x4 north, east no Fir - Lush Forgotten Lands


Short Japanese Maple.png
Short Japanese Maple 1 (medium-tall, branch to left) (has Small Oak variant counterpart) 3x3 yes no Biome TBD
img Short Japanese Maple 2 (short) 1x1 yes yes Biome TBD
img Short Japanese Maple 3 (tallest, branch to right) (has Small Oak variant counterpart) 4x4 yes no Biome TBD
Small Oak.png
Small Oak 1 (medium-tall, branch to left) (has Short Japanese Maple variant counterpart) 3x3 yes no Biome TBD
img Small Oak 2 (shortest) 3x3 yes no Biome TBD
img Small Oak 3 (tallest, branch to right) (has Short Japanese Maple variant counterpart) 3x3 yes no Biome TBD


Simple Maple.png
Simple Maple 1 (slender, short, upright) 3x3 yes no Maple Tree Biome TBD
Tall Black Maple.png
Tall Black Maple 1 (slender, upright) 3x3 yes no Maple Tree Biome TBD
Tall Maple.png
Tall Maple 1 (slender, short, upright) 3x3 yes no Maple Tree Biome TBD


img Simple Maple 2 (slender, tall, curved) 5x5 north only no Maple Tree Biome TBD
img Tall Black Maple 2 (slender, tall, curved) 5x5 north only no Maple Tree Biome TBD
img Tall Maple 2 (slender, tall, curved) 3x3 yes yes Maple Tree Biome TBD


img Simple Maple 3 (normal thickness, tall, upright) 4x4 yes no Maple Tree Biome TBD
img Tall Black Maple 3 (normal thickness, tall, upright) 4x4 north, east no Maple Tree Biome TBD
img Tall Maple 3 (normal thickness, tall, upright) 4x4 north, east no Maple Tree Biome TBD


img Tall Black Maple 4 (slender, short, curved) (Simple Maple and Tall Maple do not have this variant) 4x4 north, east no Maple Tree Biome TBD


img Light Birch Tree 1 (medium-tall, normal thickness, upright) (has Tall Birch Tree variant counterpart) 3x3 yes yes Birch Tree Biome TBD
Tall Birch Tree.png
Tall Birch Tree 1 (medium-tall, normal thickness, upright) (has Light Birch Tree variant counterpart) 3x3 yes no Birch Tree Biome TBD
Light Birch Tree.png
Light Birch Tree 2 (medium height, slender, upright) 3x3 yes yes Birch Tree Biome TBD
img Light Birch Tree 3 (medium-short, slender, slightly curved) 3x3 yes yes Birch Tree Biome TBD
img Light Birch Tree 4 (short, slender, upright) 4x4 yes yes Birch Tree Biome TBD
img Light Birch Tree 5 (tall, dual trunk) (has Tall Birch Tree variant counterpart) 4x6 yes yes Birch Tree Biome TBD
img Tall Birch Tree 3 (tall, dual trunk) (has Light Birch Tree variant counterpart) 3x5 yes no Birch Tree Biome TBD


img Tall Birch Tree 2 (tall, slender, upright) 4x4 yes no Birch Tree Biome TBD


Swamp Tree.png
Swamp Tree 1 (shortest) 6x6 north only yes Swamp Tree Glade of Trust
img Swamp Tree 2 (medium height, flatter canopy top) 7x7 no yes Swamp Tree Glade of Trust
img Swamp Tree 3 (tallest) 9x9 no no* (the majority can be placed on tile, but a single square of the 81 units in the 9x9 parameters cannot) Swamp Tree Glade of Trust
Wide Swamp Tree.png
Wide Swamp Tree 8x8 no yes Swamp Tree - Wide Glade of Trust


Swamp Willow Tree.png
Swamp Willow Tree 6x6 no yes Willow - Swamp Glade of Trust
Frozen Willow Tree.png
Frozen Willow Tree 5x5 no no Willow - Frozen Frosted Heights
Large Plaza Tree.png
Large Plaza Tree 6x6 north only no Plaza Tree - Large Plaza
Plaza Tree.png
Plaza Tree 2x2 yes yes Plaza Tree Plaza


Large Plaza Hedge.png
Large Plaza Hedge 6x19 no yes Hedge Plaza
Small Plaza Hedge.png
Small Plaza Hedge 5x14 no yes Hedge Plaza
Wide Baobab Tree.png
Wide Baobab Tree 1 (tall, with branch) 4x4 north, east no Baobab Tree Sunlit Plateau
img Wide Baobab Tree 2 (short) 4x4 north, east no Baobab Tree Sunlit Plateau


Tall Acacia Tree.png
Tall Acacia Tree 1 (shortest) 2x2 yes no Acacia Tree Sunlit Plateau
img Tall Acacia Tree 2 (tallest) 2x2 yes no Acacia Tree Sunlit Plateau
img Tall Acacia Tree 3 (widest) 5x5 north, east, single southwest no Acacia Tree Sunlit Plateau
Moss-Covered Tree.png
Moss-Covered Tree 1 (short) 5x5 yes no Moss-Covered Tree Glade of Trust
img Moss-Covered Tree 2 (tall) 8x8 no no Moss-Covered Tree Glade of Trust


Meager Tree.png
Meager Tree 6x6 north only no Meager Tree Biome TBD
Lush Tree.png
Lush Tree 3x5 yes no Lush Tree Biome TBD
Lush Dragon Tree.png
Lush Dragon Tree 1 (1 trunk hole) 3x3 yes no Dragon Tree Biome TBD
img Lush Dragon Tree 2 (2 trunk holes, branches more visible and upward-extending) 3x3 yes no Dragon Tree Biome TBD
img Sinister Tree 6x6 north only no Sinister Tree Forgotten Lands
Fallen Trunk.png
Fallen Trunk 4x2 no yes Trunk - Fallen Biome TBD
Tree Trunk.png
Tree Trunk 1 4x4 no no Trunk Biome TBD
img Tree Trunk 2 (medium height, slender) 2x2 no no Trunk Biome TBD
img Tree Trunk 3 (tallest, with leafy branch) 4x5 no no Trunk Biome TBD


Squat Tree Stump.png
Squat Tree Stump 2x2 no yes Stump - Squat Biome TBD


Dead Pine Tree.png
Dead Pine Tree 1 (tall, with small leaf) 4x4 yes no Dead Pine Tree Biome TBD
img Dead Pine Tree 2 (short) 3x3 yes no Dead Pine Tree Biome TBD
Three-Limbed Tree.png
Three-Limbed Tree 1 3x4 yes no Three-Limbed Tree Biome TBD
img Three-Limbed Tree 2 (short) 4x4 yes no Three-Limbed Tree Biome TBD


img Frozen Twisted Dead Tree 1 (multi-tiered, looks closest to thumbnail, but no frost) 5x6 north, east no Forgotten Lands
img Frozen Twisted Dead Tree 2 (normalish red tree variant) 3x3 yes no Forgotten Lands
img Frozen Twisted Dead Tree 3 (spiky variant) 5x6 north, east, single southwest no Forgotten Lands


Colors inside infobox

Hello!! I've seen your edits adding colors to the infobox, awesome work!! I noticed that you hid them from displaying. Is there a reason you didn't think they should show or was it issues with having it work correctly (if that's the case happy to try and assist!)

I was thinking if you agree they should display - would be nice to show them as small colored boxed (like they appear in the clothing filter) vs text, then have the boxes link to the categories for the colors. Happy to set it up, just wanted to bounce it off you since this has been your project. What do you think? -- Marblemadmax (talk) 10:25, 30 January 2023 (UTC)

Hi, there, and thank you! :) A couple of reasons, actually:
  • It seemed like a pretty big change to make to the very prominent infobox without talking to someone first. (Though admittedly I have in the past displayed the colors in the infobox, and then removed them later in the day, when I did a big editing chunk, to make it easier for me to see which pages I had already added colors to at a glance.)
  • As I've become familiar with the values (at least for the objects I've unlocked in my game), I've found them to be a little "buggy", for lack of a better word - or maybe "QA-neglected"? I've seen instances where the appearance of an item was changed, but the color filter wasn't (Spooky Speaker), instances where the color filters are swapped for closely-related items (Golden Floral Gown, White and Pink Floral Gown), items where there's a color in the name, but the color filter applied doesn't match (Tan Modern Armchair), or items where a color in the name isn't present (Black and Red Long-Sleeved Gown) - and that's just the ones I can think of off the top of my head, there's also cases where a color filter is applied for a teeny tiny accent color, but then isn't for a larger focal color. Because of this, I fear that putting the colors in the prominent infobox would be more confusing than helpful for users of the wiki trying to get the most relevant information about an item at a quick glance.
  • This might be unfounded, but given the quality of the data I've described, I fear that if it was more visible, casual visitors to the wiki and/or people trying to be helpful might say, "Oh, Black and Red Long-Sleeved Gown only has Red color filter on it, it's missing black, I'll go ahead and add that" without actually checking in the game - and to be honest, checking in the game is kind of a PITA, because you have to actually use the filters and see what results turn up, there's no way of looking at an item directly and determining what color filters are associated with it (that I know of...)

That being said, it's still useful information that I think is worth documenting in the wiki - and I'm not sure if you noticed, but all of the Color+Clothing and Color+Furniture combination categories are added to a page (done dynamically in the infobox template), so users can see all pages tagged "Blue Furniture", for instance.

Maybe I'm not giving people enough credit -- making colors more visible by adding it to the infobox would certainly encourage others to contribute and have a better chance that the rest of the items get information added! Per your suggestion, I did play around with a tag-style formatting in Template:Color -- but it looked a little heavy-handed IMO when I tested out what it would look like - it's a lot of colored pixels, particularly if there's multiple color filters. I had originally done colored text, but was struggling to override default link colors last time I attempted (as I also was for the tag styling).

What are your thoughts on any of this? Sorry for info overload! Lizz (talk) 20:15, 30 January 2023 (UTC)