Game Guide: Difference between revisions
(Created page with "{{stub}} <!--{{infobox |image= |width=350px |description= }}--> The '''Game Guide''' contains in-game instructions with platform-specific controls for many primary elements of the game. The content shown is typically first shown to players during a First Time User Experience (FTUE) during gameplay, and then is available for later reference. It can be found under the '''Settings''' tab. {| class='wikitable' style="text-align:center;" |- | {{inlineIcon|Controls|iconOnly|s...") |
|||
| (39 intermediate revisions by 2 users not shown) | |||
| Line 5: | Line 5: | ||
|description= | |description= | ||
}}--> | }}--> | ||
The '''Game Guide''' contains in-game instructions with platform-specific controls for many primary elements of the game. The content shown is typically first shown to players during a First Time User Experience (FTUE) during gameplay, and then is available for later reference. It can be found under the '''Settings''' tab. | The '''Game Guide''' contains in-game instructions with platform-specific controls for many primary elements of the game. The content shown is typically first shown to players during a First Time User Experience (FTUE) during gameplay, and then is available for later reference. It can be found under the '''Settings''' tab. | ||
{| class= | Images and text in this article will reference only one set of console controls for brevity. | ||
{{TOC Right}} | |||
{| class="wikitable gameGuideTileTable" style="" | |||
|- | |- | ||
| {{inlineIcon|Controls|iconOnly|size=30}}<br>Gameplay | | style="" | {{inlineIcon|Controls|iconOnly|size=30}}<br>Gameplay | ||
| {{inlineIcon|Cooking|iconOnly|size=30}}<br>Cooking | | style="" | {{inlineIcon|Cooking|iconOnly|size=30|link=#Cooking}}<br>Cooking | ||
| {{inlineIcon|Dreamlight|iconOnly|size=30}}<br>Dreamlight | | style="" | {{inlineIcon|Dreamlight|iconOnly|size=30|link=#Dreamlight}}<br>Dreamlight | ||
| {{inlineIcon|Energy|iconOnly|size=30}}<br>Energy | | style="" | {{inlineIcon|Energy|iconOnly|size=30|link=#Energy}}<br>Energy | ||
| {{inlineIcon|Fishing|iconOnly|size=30}}<br>Fishing | | style="" | {{inlineIcon|Fishing|iconOnly|size=30|link=#Fishing}}<br>Fishing | ||
| style="" | {{inlineIcon|Friendship|iconOnly|size=30|link=#Friendship}}<br>Friendship | |||
|- | |- | ||
| {{inlineIcon| | | style="" | {{inlineIcon|Gardening|iconOnly|size=30|link=#Gardening}}<br>Gardening | ||
| {{inlineIcon| | | style="" | {{inlineIcon|House|iconOnly|size=30|link=#House}}<br>House | ||
| {{inlineIcon| | | style="" | {{inlineIcon|Star Coins|iconOnly|size=30|link=#Selling}}<br>Selling | ||
| {{inlineIcon| | | style="" | {{inlineIcon|Guide Tools|iconOnly|size=30|link=#Tools}}<br>Tools | ||
| {{inlineIcon| | | style="" | {{inlineIcon|Collection|iconOnly|size=30|link=#Collection}}<br>Collection | ||
| style="" | {{inlineIcon|Crafting|iconOnly|size=30|link=#Crafting}}<br>Crafting | |||
|- | |- | ||
| {{inlineIcon| | | style="" | {{inlineIcon|Customization|iconOnly|size=30|link=#Customization}}<br>Customization | ||
| {{inlineIcon| | | style="" | {{inlineIcon|Quests|iconOnly|size=30|link=#Quests}}<br>Quests | ||
| {{inlineIcon| | | style="" | {{inlineIcon|Map|iconOnly|size=30|link=#Map}}<br>Map | ||
| {{inlineIcon| | | style="" | {{inlineIcon|Camera|iconOnly|size=30|link=#Camera}}<br>Camera | ||
| {{inlineIcon| | | style="" | {{inlineIcon|Touch of Magic|iconOnly|size=30|link=#Touch of Magic}}<br>Touch of Magic | ||
| style="" | {{inlineIcon|Mining|iconOnly|size=30|link=#Mining}}<br>Mining | |||
|- | |- | ||
| {{inlineIcon| | | style="" | {{inlineIcon|DreamSnaps|iconOnly|size=30|link=#DreamSnaps}}<br>DreamSnaps | ||
| {{inlineIcon| | | style="" | {{inlineIcon|Ancient Machines|iconOnly|size=30|link=#Ancient Machines}}<br>Ancient Machines | ||
| {{inlineIcon| | | style="" | {{inlineIcon|Board Game|iconOnly|size=30|link=#Board Game}}<br>Board Game | ||
| {{inlineIcon| | | style="" | {{inlineIcon|Timebending|iconOnly|size=30|link=#Timebending}}<br>Timebending | ||
| | | style="" | {{inlineIcon|Valley Visits|iconOnly|size=30|link=#Valley Visits}}<br>Valley Visits | ||
|} | |||
==Gameplay== | |||
===<span class="guideHeader">Moving and Interacting</span>=== | |||
{| class="wikitable guideTable" | |||
| [[File:Game Guide - Controls - Xbox Controller.png|200px|center|link=]] | |||
Move your Character using the Left Stick. Look around using the Right Stick! | |||
| [[File:Game Guide - Controls - Interact.png|200px|center|link=]] | |||
Use <div class="guide-controlLabel">A</div> to interact with your surroundings. | |||
|} | |} | ||
==Controls== | ===<span class="guideHeader">Clear the Way</span>=== | ||
{| class="wikitable guideTable" | |||
| [[File:Game Guide - Mining - Tool Wheel Pickaxe.png|200px|center|link=]] | |||
Select the proper Tool for the proper task... | |||
| [[File:Game Guide - Controls - Obstacles.png|200px|center|link=]] | |||
And to get rid of what's blocking you! | |||
|} | |||
===Now synced to real time!===<!--Note: This header is NOT all-uppercased in game!--> | |||
{| class="wikitable guideTable" | |||
| [[File:Game Guide - Controls - Daylight Sync.png|200px|center|link=]] | |||
The game is now synced to your time! The time will change from day to night as time passes. | |||
| [[File:Game Guide - Controls - Character Schedule.png|200px|center|link=]] | |||
Characters will follow their own schedule, so look out for that! | |||
| [[File:Game Guide - Controls - Daily Resets.png|200px|center|link=]] | |||
Make sure to come back daily to discover new stuff! | |||
|} | |||
==Cooking== | ==Cooking== | ||
===<span class="guideHeader">The Fine Art of Cooking</span>=== | |||
{| class="wikitable guideTable" | |||
| [[File:White_Gas_Stove.png|175px|center|link=]] | |||
Interact with any stove using <div class="guide-controlLabel">A</div> to start cooking. | |||
| [[File:Coal Ore.png|135px|center|link=]] | |||
You'll need Coal to power it up! | |||
| [[File:Game Guide - Cooking - Ingredients.png|200px|center|link=]] | |||
Combine different Ingredients to discover new Recipes. | |||
| [[File:Game Guide - Cooking - Meal Uses.png|180px|center|link=]] | |||
Eat, sell, or give your meals to friends around the Valley! | |||
|} | |||
===Restaurant Orders===<!--Note: This header is NOT all-uppercased in game!--> | |||
{| class="wikitable guideTable" | |||
| [[File:Game Guide - Cooking - Meal Requests.png|200px|center|link=]] | |||
Villagers will sometimes have specific Meal requests while eating at Chez Remy. | |||
| [[File:Game Guide - Cooking - Fulfill Order.png|200px|center|link=]] | |||
Fulfill their order to gain Rewards and Friendship. | |||
|} | |||
==Dreamlight== | ==Dreamlight== | ||
===<span class="guideHeader">Use Dreamlight to Restore the Valley!</span>=== | |||
{| class="wikitable guideTable" | |||
| [[File:Game Guide - Dreamlight - Wishing Well.png|200px|center|link=]] | |||
Be active in the Valley! | |||
| [[File:Game Guide - Dreamlight - Dreamlight Duty Highlighted.png|200px|center|link=]] | |||
Earn Dreamlight from the Dreamlight menu! | |||
| [[File:Game Guide - Dreamlight - Night Thorn Blockers.png|283px|center|link=]] | |||
Remove Night Thorns from the Castle's entrance and other parts of the Valley. | |||
|} | |||
===<span class="guideHeader">Don't Forget Your Dreamlight Duties!</span>=== | |||
{| class="wikitable guideTable" | |||
| [[File:Game Guide - Dreamlight - Dreamlight Menu.png|200px|center|link=]] | |||
Dreamlight Duties are short tasks in the Valley. | |||
| [[File:Game Guide - Dreamlight - Dreamlight Duty.png|200px|center|link=]] | |||
Once completed, you'll earn Dreamlight from the Dreamlight Menu. Open it with <<>>.<!--TODO - Dpad down icon--> | |||
|} | |||
==Energy== | ==Energy== | ||
===<span class="guideHeader">Expand Your Energy Reserve</span>=== | |||
{| class="wikitable guideTable" | |||
| [[File:Game Guide - Energy - Level Meter.png|200px|center|link=]] | |||
Strengthen your Friendships! | |||
| [[File:Game Guide - Energy - New Level.png|200px|center|link=]] | |||
Gain experience and level up! | |||
| [[File:Game Guide - Energy - Energy Increase.png|200px|center|link=]]<!-- possibly same as File:Game Guide - House - Energy Highlight.png? --> | |||
Your Max Energy has increased! | |||
|} | |||
===<span class="guideHeader">How to Deal with Exhaustion</span>=== | |||
{| class="wikitable guideTable" | |||
| [[File:Game Guide - Energy - Activity Restriction.png|161px|center|link=]] | |||
Without Energy, say goodbye to many Activities. | |||
| [[File:Game Guide - Energy - Sources.png|200px|center|link=]] | |||
Eating or staying inside your House will refill Energy. | |||
| [[File:Meals Image.png|200px|center|link=]]<!--Meals Image.png--> | |||
A healthy cooked meal is the best way to recuperate. | |||
|} | |||
==Fishing== | ==Fishing== | ||
===<span class="guideHeader">Fishing Around the Valley</span>=== | |||
{| class="wikitable guideTable" | |||
| [[File:Game Guide - Fishing - Cast Line Animated.png|200px|center|link=]] | |||
Hold <div class="guide-controlLabel">X</div> to cast your line.<!--Note: in the game guide, this is animated--> | |||
| [[File:Game Guide - Fishing - Ripples.png|200px|center|link=]] | |||
Aim at the ripples to make sure you catch something. | |||
| [[File:Game Guide - Fishing - Green Circle Control Overlay.png|200px|center|link=]] | |||
Press <div class="guide-controlLabel">A</div> quickly every time the circle turns green. | |||
|} | |||
===<span class="guideHeader">Moana's Fishing Boat</span>=== | |||
{| class="wikitable guideTable" | |||
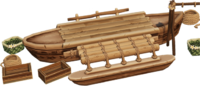
| [[File:Moana's Boat.png|200px|center|link=]]<!--Moana's Boat.png--> | |||
Moana will periodically go out to sea and catch fish for you. | |||
| [[File:Game Guide - Moana's Boat - Icon Level Display.png|200px|center|link=]] | |||
Make sure you visit the Fishing Boat often to claim what's been caught! | |||
| [[File:Game Guide - Moana's Boat - Scrooge Construction Sign.png|200px|center|link=]] <!-- Orange sign --> | |||
Upgrade the boat to increase its efficiency. | |||
|} | |||
==Friendship== | ==Friendship== | ||
===<span class="guideHeader">Directive: Plant</span>=== | |||
*WALL-E will now tend to his own Garden. | |||
*Make sure to visit the Garden regularly to harvest its crops. | |||
*Upgrade the Garden to increase its capacity and efficiency. | |||
===Let's hang out with friends!===<!--Note: This header is NOT all-uppercased in game!--> | |||
{| class="wikitable guideTable" | |||
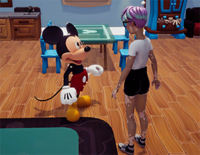
| [[File:Game Guide - Friendship - Roles.png|200px|center|link=]] | |||
Choose roles for your friends in the Village to get more resources. | |||
| [[File:Game Guide - Friendship - Hang out.png|200px|center|link=]] | |||
Hang out with Villagers, and they'll help with your duties. | |||
| [[File:Game Guide - Friendship - Role Hangout Bonus.png|200px|center|link=]] | |||
Level up your Friendships and assign the same roles to more Villagers to get bigger Hangout Bonuses! | |||
|} | |||
==Gardening== | ==Gardening== | ||
===<span class="guideHeader">Gardening in the Valley!</span>=== | |||
{| class="wikitable guideTable" | |||
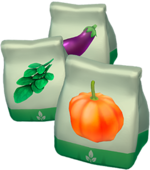
| [[File:Game Guide - Gardening - Seeds.png|150px|center|link=]] | |||
Get seeds by foraging or by trading at Goofy's Stall. | |||
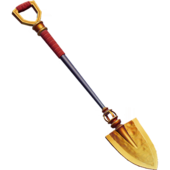
| [[File:Shovel.png|170px|center|link=]] | |||
Dig a gardening spot with your Shovel using <div class="guide-controlLabel">X</div>. | |||
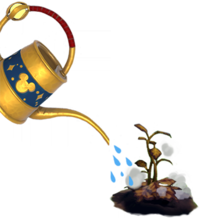
| [[File:Game Guide - Gardening - Watering.png|200px|center|link=]] | |||
Plant a seed, water it and wait for your crop to grow! | |||
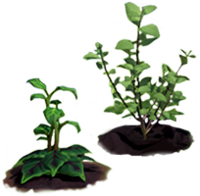
| [[File:Game Guide - Gardening - Growing Crops.png|200px|center|link=]] | |||
Crops grow faster in the area they're from! | |||
|} | |||
===<span class="guideHeader">Directive: Plant</span>===<!--This is duplicated in Friendship and Gardening--> | |||
{| class="wikitable guideTable" | |||
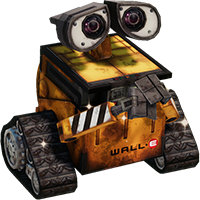
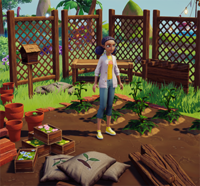
| [[File:Game Guide - WALL-E.png|200px|center|link=]] | |||
WALL-E will now tend to his own Garden. | |||
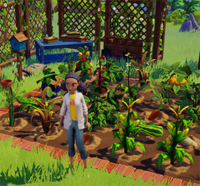
| [[File:Game Guide - Gardening - WALL-E's Garden Planted.png|200px|center|link=]] | |||
Make sure to visit the Garden regularly to harvest its crops. | |||
| [[File:Game Guide - Gardening - WALL-E's Garden Full.png|200px|center|link=]] | |||
Upgrade the Garden to increase its capacity and efficiency. | |||
|} | |||
==House== | ==House== | ||
===<span class="guideHeader">Home Sweet Home!</span>=== | |||
{| class="wikitable guideTable" | |||
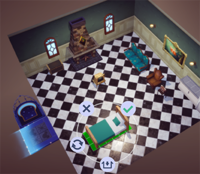
| [[File:Game Guide - House - Sample Room.png|200px|center|link=]] | |||
Expand and customize your House. | |||
| [[File:Game_Guide_-_Energy_-_Energy_Increase.png|200px|center|link=]] | |||
Restore your Energy by spending time in your House! | |||
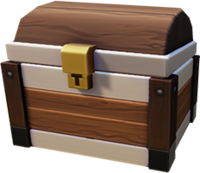
| [[File:Game Guide - House - Storage Chest.png|200px|center|link=]] | |||
Use your House's storage as a second Inventory. | |||
|} | |||
===<span class="guideHeader">Moving In: Placing a House</span>=== | |||
{| class="wikitable guideTable" | |||
| [[File:Game Guide - House - Furniture Menu.png|200px|center|link=]] | |||
You can find it in the Furniture menu. Open the Inventory. | |||
| [[File:Game Guide - House - Selection.png|200px|center|link=]] | |||
Enter the House menu and choose the one you want to place! | |||
| [[File:Construction_Icon.png|170px|center|link=]] <!-- Teal sign--> | |||
Place it anywhere in the Valley! You'll need to ask for Scrooge's help to upgrade it! | |||
|} | |||
==Selling== | ==Selling== | ||
=== | ===<span class="guideHeader">The Art of Earning Star Coins</span>=== | ||
{| class="wikitable | {| class="wikitable guideTable" | ||
|- | |- | ||
| Be active in the Valley. | | [[File:Game Guide - Selling - Sample Activities.png|200px|center|link=]] | ||
| Gather resources. | Be active in the Valley. | ||
| Sell what you don't need to Goofy's Stall! | | [[File:Game Guide - Selling - Sample Resources.png|200px|center|link=]] | ||
| Receive Star Coins in exchange. | Gather resources. | ||
| [[File:Goofy.png|200px|center|link=]] | |||
Sell what you don't need to Goofy's Stall! | |||
| [[File:Game Guide - Selling - Star Coins.png|200px|center|link=]] | |||
Receive Star Coins in exchange. | |||
|} | |} | ||
==Tools== | ==Tools== | ||
===<span class="guideHeader">Aim for the Ripples: The Fishing Rod</span>=== | |||
{| class="wikitable guideTable" | |||
| [[File:Game Guide - Tools - Tool Wheel Fishing Rod.png|200px|center|link=]] | |||
Open the Tool wheel with <div class="guide-controlLabel">RT</div> and select the Fishing Rod. | |||
| [[File:Game Guide - Tools - Fishing Green Circle.png|200px|center|link=]] | |||
Hold <div class="guide-controlLabel">X</div> to cast your line. | |||
|} | |||
===<span class="guideHeader">Rocks and Minerals: The Pickaxe</span>=== | |||
{| class="wikitable guideTable" | |||
| [[File:Game Guide - Mining - Tool Wheel Pickaxe.png|200px|center|link=]] | |||
Open the Tool wheel with <div class="guide-controlLabel">RT</div> and select the Pickaxe. | |||
| [[File:Game Guide - Mining - Rock Spots.png|200px|center|link=]] | |||
Mine and remove obstacles with <div class="guide-controlLabel">X</div>. | |||
|} | |||
===<span class="guideHeader">Dig a Little Deeper: The Shovel</span>=== | |||
{| class="wikitable guideTable" | |||
| [[File:Game Guide - Tools - Tool Wheel Shovel.png|200px|center|link=]] | |||
Open the Tool wheel with <div class="guide-controlLabel">RT</div> and select the Shovel. | |||
| [[File:Game Guide - Tools - Digging.png|200px|center|link=]] | |||
Dig holes in the ground and remove obstacles using <div class="guide-controlLabel">X</div>. | |||
|} | |||
===<span class="guideHeader">All is Green: The Watering Can</span>=== | |||
{| class="wikitable guideTable" | |||
| [[File:Game Guide - Tools - Tool Wheel Watering Can.png|200px|center|link=]] | |||
Open the Tool wheel with <div class="guide-controlLabel">RT</div> and select the Watering Can. | |||
| [[File:Game Guide - Tools - Watering.png|200px|center|link=]] | |||
Water crops and flowers with <div class="guide-controlLabel">X</div>. | |||
|} | |||
==Collection== | ==Collection== | ||
=== | ===<span class="guideHeader">The Collection Menu: A Compendium</span>=== | ||
{| class="wikitable guideTable" | |||
| [[File:Game Guide - Collection - Collection Menu.png|200px|center|link=]] | |||
Access the Collection Menu from the Main Menu. | |||
| [[File:Game Guide - Collection - Item Information.png|200px|center|link=]] | |||
Select an item to discover more info about it. | |||
|} | |||
==Crafting== | ==Crafting== | ||
===<span class="guideHeader">DIY: The Crafting Station</span>=== | |||
{| class="wikitable guideTable" | |||
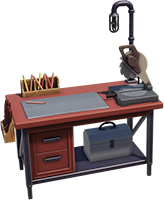
| [[File:Game Guide - Crafting - Crafting Station.png|200px|center|link=]] | |||
Interact with any Crafting Station to start. | |||
| [[File:Game Guide - Crafting - Recipe.png|200px|center|link=]] | |||
Select a Recipe to make sure you have the required materials and, if so, craft the desired item. | |||
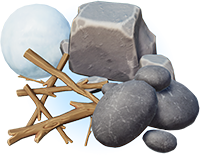
| [[File:Game Guide - Crafting - Materials.png|200px|center|link=]] | |||
Each Biome holds specific materials. Forage, experiment and discover new Crafting Recipes. | |||
|} | |||
=== | ==Customization== | ||
==Customization== | ===<span class="guideHeader">Dress Your Best: Clothing</span>=== | ||
{| class="wikitable guideTable" | |||
| [[File:Game Guide - Customization - Clothing Menu.png|200px|center|link=]]<!--Note: on Xbox, which is what all of these other text labels are consistent with, no V letter is shown on the button --> | |||
Access the Clothing menu from the Inventory. | |||
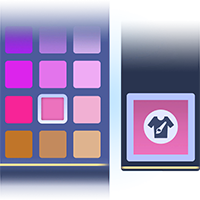
| [[File:Game Guide - Customization - Sample Clothing.png|200px|center|link=]] | |||
Select Clothes to customize the look of your Avatar. | |||
| [[File:Game Guide - Customization - Scrooge's Store Furniture.png|200px|center|link=]] | |||
Increase your Friendship Levels with your neighbors and visit Scrooge's Store daily to unlock new items. | |||
|} | |||
===<span class="guideHeader">Designing Your Universe: Furniture</span>=== | |||
{| class="wikitable guideTable" | |||
| [[File:Game Guide - Customization - Furniture Menu.png|200px|center|link=]]<!--Note: on Xbox, which is what all of these other text labels are consistent with, no F letter is shown on the button --> | |||
Access the Furniture menu from the Inventory. | |||
| [[File:Game Guide - Customization - Sample Furniture.png|200px|center|link=]] | |||
Select Furniture to customize your Village. | |||
| [[File:Game Guide - Customization - Scrooge's Store Furniture.png|200px|center|link=]] | |||
Visit Scrooge's Store daily and increase Friendship Levels with him to unlock more Furniture. | |||
|} | |||
==Quests== | ==Quests== | ||
===<span class="guideHeader">The Quest Log</span>=== | |||
{| class="wikitable guideTable" | |||
| [[File:Game Guide - Quests - Quest Menu.png|200px|center|link=]] | |||
Access the Quests menu by pressing <div class="guide-controlLabel">⧉</div> or from the Main Menu. | |||
| [[File:Game Guide - Quests - Track Quest.png|200px|center|link=]] | |||
You can also track a Quest by using <div class="guide-controlLabel">A</div>. | |||
|} | |||
===<span class="guideHeader">Keep Track of Your Story</span>=== | |||
{| class="wikitable guideTable" | |||
| [[File:Game Guide - Quests - New Quest.png|200px|center|link=]] | |||
Quickly track new Quests with <<>>!<!--TODO - left joystick depress?--> | |||
| [[File:Game Guide - Quests - Track Quest within Menu.png|200px|center|link=]] | |||
Missed it? Track a Quest by using the Track icon or <div class="guide-controlLabel">A</div> while in the Quest menu. | |||
|} | |||
==Map== | ==Map== | ||
===<span class="guideHeader">A Sense of Direction</span>=== | |||
{| class="wikitable guideTable" | |||
| [[File:Game Guide - Map - Main Menu Map.png|200px|center|link=]] | |||
Access the Map from the Main Menu. | |||
| [[File:Game Guide - Map - Dynamic Positions.png|200px|center|link=]] | |||
The Map shows you the position of Characters, Crops, Buildings, and more! | |||
| [[File:Game Guide - Map - Castle Icon.png|200px|center|link=]] | |||
Select the Castle or use the shortcut <div class="guide-controlLabel">X</div> to Fast Travel to available locations. | |||
|} | |||
===<span class="guideHeader">Travel at the Speed of Dreamlight</span>=== | |||
{| class="wikitable guideTable" | |||
| [[File:Game Guide - Map - Main Menu Map.png|200px|center|link=]] | |||
Access the Map from the Main Menu. | |||
| [[File:Game Guide - Map - Well Icon.png|200px|center|link=]] | |||
Press on a Well icon or open the Fast Travel menu to quickly teleport to a location in the Village. | |||
| [[File:Game Guide - Map - Well Icon Highlight.png|200px|center|link=]] | |||
Unlock more Realms or Wishing Wells by exploring the Village. | |||
|} | |||
===<span class="">Presence of NPCs in Different Villages</span>===<!--not all caps--> | |||
{| class="wikitable guideTable" | |||
| [[File:Game Guide - Map - Map Menu Characters Tab.png|200px|center]] | |||
In the Map Menu, open the Characters tab with <div class="guide-controlLabel">Y</div> to decide which Villagers are present in the current Village. | |||
| <!--[[File:Game Guide - Map - Map Menu Enable Characters.png|200px|center]]--> | |||
Enable or disable Characters.<br><br> Villagers will still show up if you need them for a specific action or Quest. | |||
|} | |||
==Camera== | ==Camera== | ||
=== | ===<span class="guideHeader">Capture the Moment: The Camera</span>=== | ||
{| class="wikitable guideTable" | |||
| [[File:Game Guide - Camera - Tool Wheel Camera.png|200px|center|link=]] | |||
Open the Tool wheel with <div class="guide-controlLabel">RT</div> and select the Camera. | |||
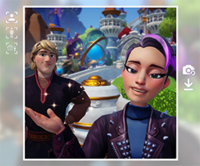
| [[File:Game Guide - Camera - Sample Photo.png|200px|center|link=]] | |||
Take the prettiest pictures and save them on your device. | |||
|} | |||
==Touch of Magic== | ==Touch of Magic== | ||
<!-- | |||
{| class="wikitable guideTable" | |||
| [[File:Game Guide - XXXXXX - XXXXXXXXX.png|200px|center|link=]] | |||
XXXXXXXXX | |||
| [[File:Game Guide - XXXXXX - XXXXXXXXX.png|200px|center|link=]] | |||
XXXXXXX | |||
|} | |||
--> | |||
===Touch of Magic -- Design Inventory===<!--Note: This header is NOT all-uppercased in game!--> | |||
{| class="wikitable guideTable" | |||
| [[File:Game Guide - Touch of Magic - Add New.png|200px|center|link=]] | |||
Choose <Add new> to create a new custom design. | |||
| [[File:Game Guide - Touch of Magic - Design Inventory.png|200px|center|link=]] | |||
You can modify or remove your design later. | |||
|} | |||
===Touch of Magic -- Decorating===<!--Note: This header is NOT all-uppercased in game!--> | |||
{| class="wikitable guideTable" | |||
| [[File:Game Guide - Touch of Magic - Color.png|200px|center|link=]] | |||
Change the color of your selected item at any time. | |||
| [[File:Game Guide - Touch of Magic - Motif Layers.png|82px|center|link=]] | |||
Add up to 50 motifs to an item. Modify the layer order by dragging it. | |||
|} | |||
===Touch of Magic -- Motif Placement===<!--Note: This header is NOT all-uppercased in game!--> | |||
{| class="wikitable guideTable" | |||
|- | |||
| [[File:Game Guide - Touch of Magic - Resize and Rotate.png|200px|center|link=]] | |||
Move, rotate and resize the Motif on your item. | |||
| [[File:Game Guide - Touch of Magic - Layer Effect.png|200px|center|link=]] | |||
Modify the Motif with a layer effect in the top bar. | |||
| [[File:Game Guide - Touch of Magic - Camera.png|100px|center|link=]] | |||
Change camera angles quickly<!-- no period--> | |||
|} | |||
==Mining== | ==Mining== | ||
=== | ===<span class="guideHeader">You Can Mine in the Valley</span>=== | ||
{| class="wikitable guideTable" | |||
| [[File:Game Guide - Mining - Tool Wheel Pickaxe.png|200px|center|link=]] | |||
Open the Tool wheel with <div class="guide-controlLabel">RT</div> and select the Pickaxe. | |||
| [[File:Game Guide - Mining - Rock Spots.png|200px|center|link=]] | |||
Mine rocks with <div class="guide-controlLabel">X</div> to gather minerals. | |||
| [[File:Game Guide - Mining - Materials.png|200px|center|link=]] | |||
And to get rid of what's blocking you! | |||
|} | |||
==DreamSnaps== | ==DreamSnaps== | ||
<!--FTUE shown during Faith, Trust, and Pixel Dust--> | <!--FTUE shown during Faith, Trust, and Pixel Dust--> | ||
=== | ===<span class="guideHeader">DreamSnaps: Requirements</span>=== | ||
{| class="wikitable guideTable" | |||
| [[File:Game Guide - DreamSnaps - Current Challenge Menu.png|200px|center|link=]] | |||
Challenge requirements can be found in the DreamSnaps section of the Events menu. | |||
| [[File:Game Guide - DreamSnaps - Challenge Requirements.png|200px|center|link=]] | |||
You can also check Challenge requirements in Photo Mode with <div class="guide-controlLabel">RT</div> OR in your Wardrobe or Furniture menus when DreamSnaps mode is activated. | |||
|} | |||
===<span class="guideHeader">DreamSnaps: How to Submit</span>=== | |||
{| class="wikitable guideTable" | |||
| [[File:Game Guide - DreamSnaps - Sample Items.png|200px|center|link=]] | |||
Place or wear items that meet the Challenge requirements before snapping a picture. | |||
| [[File:Game Guide - DreamSnaps - Challenge Requirements.png|200px|center|link=]] | |||
Check out the Challenge tab in Photo Mode to see if you meet all requirements. | |||
| [[File:Game Guide - DreamSnaps - Submit Highlight.png|200px|center|link=]] | |||
If you're happy with your snapshot, use <div class="guide-controlLabel">Y</div> to submit. | |||
|} | |||
===<span class="guideHeader">DreamSnaps: How it Works</span>=== | |||
{| class="wikitable guideTable" | |||
| [[File:Game Guide - DreamSnaps - Sample Items.png|200px|center|link=]] | |||
Using items that meet the Challenge requirements earns you more points. | |||
| [[File:Game Guide - DreamSnaps - Sample Photo.png|200px|center|link=]] | |||
You can also get more points by winning votes from the community. | |||
| [[File:Game Guide - DreamSnaps - Rewards.png|200px|center|link=]] | |||
When the Challenge is finished, results are calculated and you'll get rewards based on your ranking. | |||
|} | |||
===<span class="guideHeader">DreamSnaps: Voting</span>=== | |||
{| class="wikitable guideTable" | |||
| [[File:Game Guide - DreamSnaps - Voting Menu.png|200px|center|link=]] | |||
You can access the Voting feature in the DreamSnaps section of the Events menu. | |||
| [[File:Game Guide - DreamSnaps - Vote Now.png|200px|center|link=]] | |||
Casting votes will get you some Moonstones, up to a cap per challenge. | |||
|} | |||
<!-- | |||
From Avatar Import Tool? | |||
Taking a photo | |||
*Select the desired format for your image using the shortcut | |||
*Choose an expression, pose, backdrop, frame or filter | |||
*There are two camera modes: Selfie and Mid-range. | |||
*In Selfie mode you can crouch when posing with smaller Characters. | |||
--> | |||
==Ancient Machines== | |||
{{cleanup|When is FTUE shown?}} | |||
===<span class="">Ancient Machines</span>=== | |||
{| class="wikitable guideTable" | |||
| [[File:Game Guide - Ancient Machines - Overview.png|200px|center]] | |||
<!--no text--> | |||
| [[File:Game Guide - Ancient Machines - Machine Icons.png|200px|center]] | |||
Ancient Machines can be placed in your Village to assist with various tasks.<br><br>They use Mist {{inlineIcon|Mist|iconOnly}} to function.<br><br>Upgrade your Hourglass to craft more efficient Machines. | |||
|} | |||
=== | ===<span class="">Ancient Cooker</span>=== | ||
{| class="wikitable guideTable" | |||
| [[File:Game Guide - Ancient Machines - Cooker Ingredient UI.png|200px|center]] | |||
Choose the Ingredients and quantities you'd like to cook. (Costs Mist.) | |||
| [[File:Game Guide - Ancient Machines - Cooker Collect UI.png|200px|center]] | |||
Let it cook for a while, then come back and collect your meals.<!--These are left aligned, not center aligned, unlike most other text in the guide--> | |||
|} | |||
=== | ===<span class="">Ancient Gardener</span>=== | ||
{| class="wikitable guideTable" | |||
| [[File:Game Guide - Ancient Machines - Gardener Dig UI.png|200px|center]] | |||
For the Gardener to work, it needs to be set up on land where crops can grow. | |||
| [[File:Game Guide - Ancient Machines - Gardener Plant and Harvest UI.png|200px|center]] | |||
Plant seeds or harvest crops with a single action! (Costs Mist.) | |||
|} | |||
=== | ===<span class="">Ancient Vacuum</span>=== | ||
*You can | {| class="wikitable guideTable" | ||
| [[File:Game Guide - Ancient Machines - Vacuum.png|200px|center]] | |||
The Ancient Vacuum scans an area in a Biome for Night Thorns and Splinters of Fate.<br><br>Upgrade it to detect even more item types! | |||
| [[File:Game Guide - Ancient Machines - Vacuum Collect UI.png|200px|center]] | |||
Select the desired items and collect them from a single location! (Costs Mist.) | |||
|} | |||
==Board Game== | |||
<!--{{cleanup|When is FTUE shown?}} | |||
===<span class="guideHeader">Board Game: Header 1</span>=== | |||
{| class="wikitable guideTable" | |||
| [[File:Game Guide - XXXXXXXX - XXXXXXXXX.png|200px|center]] | |||
XXXXXXXXXXXXXXXXXXXXXXXXX | |||
| [[File:Game Guide - XXXXXXXX - XXXXXXXXX.png|200px|center]] | |||
XXXXXXXXXXXXXXXXXXXXXXXXX | |||
|}--> | |||
===<span class="">How to Play Scramblecoin</span>=== | |||
{| class="wikitable guideTable" | |||
| [[File:Game Guide - Board Game - Choose Figurines.png|200px|center]]<!--Note that this image shows Mickey selected, but the characteristics listed for Merlin--> | |||
First choose 5 figurines to play with. | |||
At the start of a game, each player chooses <span class="blue">5 figurines</span> to bring to the board. | |||
|} | |||
===<span class="guideHeader">How to Play Scramblecoin</span>=== | |||
{| class="wikitable guideTable" | |||
| [[File:Game Guide - Board Game - Figurine Characteristics.png|200px|center]] | |||
Each figurine has different characteristics, so choose wisely! | |||
|} | |||
===<span class="">How to Play Scramblecoin</span>=== | |||
{| class="wikitable guideTable" | |||
| [[File:Game Guide - Board Game - Coin Points.png|200px|center]] | |||
You have <span class="blue">5 turns</span> to collect more coins than your opponent. | |||
Coins are collected as soon as a figurine lands on its tile. | |||
|} | |||
===<span class="">How to Play Scramblecoin</span>=== | |||
A turn is resolved in <span class="blue">two steps</span>. | |||
{| class="wikitable guideTable" | |||
| [[File:Game Guide - Board Game - Place Figurine.png|200px|center]] | |||
1. You may place one of your figurines on the board: | |||
* According to its entry point | |||
* On top of another of your figurines to replace it. | |||
| [[File:Game Guide - Board Game - Move Figurine.png|200px|center]] | |||
2. Move all the figurines on the board. | |||
|} | |||
===<span class="">How to Play Scramblecoin</span>=== | |||
{| class="wikitable guideTable" | |||
| [[File:Game Guide - Board Game - Figurine Maximum.png|200px|center]] | |||
You can have a maximum of <span class="blue">3 figurines</span> on the board at once. | |||
|} | |||
===<span class="">How to Play Scramblecoin</span>=== | |||
At the start of each turn, you can either: | |||
{| class="wikitable guideTable" | |||
| [[File:Game Guide - Board Game - Add Figurine.png|200px|center]] | |||
Add a figurine <span class="blue">on top of another</span> in play to replace it. | |||
| OR | |||
| [[File:Game Guide - Board Game - Skip Placing Figurine.png|200px|center]] | |||
<span class="blue">Skip</span> placing a figurine this turn<!--No punctuation--> | |||
|} | |||
===<span class="">How to Play Scramblecoin</span>=== | |||
{| class="wikitable guideTable" | |||
| [[File:Game Guide - Board Game - Ranking.png|200px|center]] | |||
Play with every Villager every day to get <span class="blue">ranking points</span> and obtain <span class="blue">new figurines</span>. | |||
|} | |||
===<span class="">How to Play Scramblecoin</span>=== | |||
{| class="wikitable guideTable" | |||
| [[File:Game Guide - Board Game - Eager Villager.png|200px|center]]<!--(Image with Scramblecoin icon above Scrooge's head)--> | |||
Villagers may be eager to play the game with you. | |||
This awards more Friendship and ranking points. | |||
|} | |||
==Timebending== | |||
{{cleanup|When is FTUE shown?}} | |||
===<span class="">Timebending: The Hourglass</span>=== | |||
{| class="wikitable guideTable" | |||
| [[File:Game Guide - Timebending - Tool Wheel Hourglass.png|200px|center]] | |||
Use <div class="guide-controlLabel">RT</div> to open the Tool wheel and choose the Hourglass! | |||
| [[File:Game Guide - Timebending - Using Hourglass.png|200px|center]] | |||
Use the Hourglass to find artifacts lost to time! | |||
|} | |||
===<span class="">Hidden Treasure: How To Find Them</span>=== | |||
{| class="wikitable guideTable" | |||
| [[File:Game Guide - Timebending - Finding Treasure.png|200px|center]] | |||
Use the Hourglass to sense for hidden treasures, then follow the sand. | |||
| [[File:Game Guide - Timebending - Pulling Treasure.png|200px|center]] | |||
Once found, press the Hourglass button repeatedly to pull it out of the flow of time. | |||
| [[File:Game Guide - Timebending - Sample Treasure.png|200px|center]] | |||
Find unique treasures lost in time that can be combined at the Timebending Table! | |||
|} | |||
===<span class="">Time Rifts: How To Use</span>=== | |||
{| class="wikitable guideTable" | |||
| [[File:Game Guide - Timebending - Inactive Time Rift.png|200px|center]] | |||
You can open Time Rifts with the Hourglass button.<!--Period added, unsure which hotfix--> | |||
| [[File:Game Guide - Timebending - Active Time Rift.png|200px|center]] | |||
In Time Rifts, treasures appear continuously. | |||
| [[File:Game Guide - Timebending - Sample Treasure.png|200px|center]] | |||
A Time Rift lasts for a limited time only, so be quick to find as much treasure as you can. | |||
|} | |||
===<span class="">Timebending Table: How To Use</span>=== | |||
{| class="wikitable guideTable" | |||
| [[File:Game Guide - Timebending - Timebending Table.png|200px|center]] | |||
Interact with this table to use your Timebending resources. | |||
| [[File:Game Guide - Timebending - Exclusive Items.png|200px|center]] | |||
Combine your resources to create exclusive items. | |||
| [[File:Game Guide - Timebending - Upgrade.png|200px|center]] | |||
Upgrade your Hourglass to find even more types of resources. | |||
|} | |||
==Valley Visits== | |||
{{cleanup|When is FTUE shown?}} | |||
<!--===<span class="guideHeader">Valley Visits: Multiplayer Guide</span>===--> | |||
===Valley Visits: Multiplayer Guide===<!--Note: This header is NOT all-uppercased in game! - hence why not using the guideHeader span class--> | |||
{| class="wikitable guideTable" | |||
| [[File:Game Guide - Valley Visits - Valley Visit Station.png|200px|center]] | |||
You can invite up to 3 friends to your Valley. Use a Valley Visit Station to generate Visit Codes. | |||
| [[File:Game Guide - Valley Visits - Main Menu.png|200px|center]] | |||
Join a friend's Valley by entering the code in the Multiplayer section of the Main Menu. | |||
| [[File:Game Guide - Valley Visits - Benefits.png|200px|center]]{{cleanup|his picture is incorrect, it should be 2 images together - 3 running players on left and current image on right}} | |||
Visiting lets you collect Pixel Shards to craft special items, drop items to trade, and shop at Scrooge's Store. | |||
|} | |||
==History== | ==History== | ||
{{history|1.0|Added}} | {{history|1.0|Added}} | ||
{{history|1.6|Added [[DreamSnaps]]; Layout rearranged.}} | {{history|1.6|Added [[DreamSnaps]]; Layout rearranged.}} | ||
{{history|1.7|''Controls'' renamed to ''Gameplay''.}}{{cleanup|Not positive on this version}} | |||
{{history|1.8|UI slightly restructured<!--Previously 5 icons per row, now 6-->. Added ''Ancient Machines'', ''Board Game'', ''Timebending'', ''Valley Visits''.<!--For all new tiles, they will be disabled until FTUE is encountered and completed in-game.--> Added ''Presence of NPCs in Different Villages'' in ''Map'' section<!--Believe only once FTUE is completed?-->.}} | |||
{{history|1.8.7|* Minor typo fix, punctuation added: "You can open Time Rifts with the Hourglass button.", "Use the Hourglass to sense for hidden treasures, then follow the sand.", "Once found, press the Hourglass button repeatedly to pull it out of the flow of time."}} | |||
''* Denotes uncertain version'' | |||
Revision as of 17:32, 15 February 2024
| Article Stub
This article is a stub and is missing information. You can help Dreamlight Valley Wiki by expanding it! |
The Game Guide contains in-game instructions with platform-specific controls for many primary elements of the game. The content shown is typically first shown to players during a First Time User Experience (FTUE) during gameplay, and then is available for later reference. It can be found under the Settings tab.
Images and text in this article will reference only one set of console controls for brevity.
Gameplay |
Cooking |
Dreamlight |
Energy |
Fishing |
Friendship |
Gardening |
House |
Selling |
Tools |
Collection |
Crafting |
Customization |
Quests |
Map |
Camera |
Touch of Magic |
Mining |
DreamSnaps |
Ancient Machines |
Board Game |
Timebending |
Valley Visits |
Gameplay
Moving and Interacting
|
Move your Character using the Left Stick. Look around using the Right Stick! |
Use A to interact with your surroundings.
|
Clear the Way
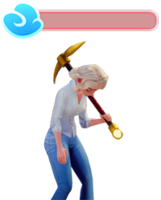
 Select the proper Tool for the proper task... |
And to get rid of what's blocking you! |
Now synced to real time!
|
The game is now synced to your time! The time will change from day to night as time passes. |
Characters will follow their own schedule, so look out for that! |
Make sure to come back daily to discover new stuff! |
Cooking
The Fine Art of Cooking
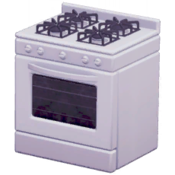 A to start cooking.
|
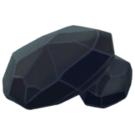 You'll need Coal to power it up! |
 Combine different Ingredients to discover new Recipes. |
 Eat, sell, or give your meals to friends around the Valley! |
Restaurant Orders
 Villagers will sometimes have specific Meal requests while eating at Chez Remy. |
 Fulfill their order to gain Rewards and Friendship. |
Dreamlight
Use Dreamlight to Restore the Valley!
 Be active in the Valley! |
 Earn Dreamlight from the Dreamlight menu! |
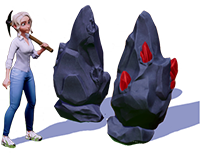
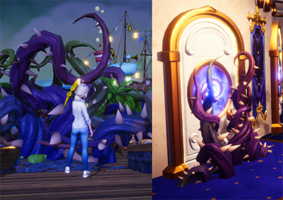 Remove Night Thorns from the Castle's entrance and other parts of the Valley. |
Don't Forget Your Dreamlight Duties!
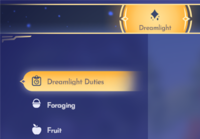 Dreamlight Duties are short tasks in the Valley. |
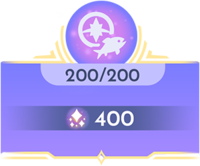 Once completed, you'll earn Dreamlight from the Dreamlight Menu. Open it with <<>>. |
Energy
Expand Your Energy Reserve
 Strengthen your Friendships! |
 Gain experience and level up! |
 Your Max Energy has increased! |
How to Deal with Exhaustion
 Without Energy, say goodbye to many Activities. |
 Eating or staying inside your House will refill Energy. |
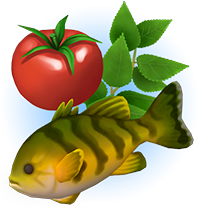
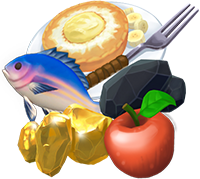
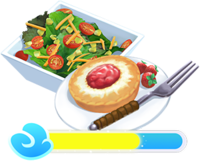 A healthy cooked meal is the best way to recuperate. |
Fishing
Fishing Around the Valley
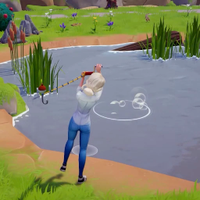 X to cast your line.
|
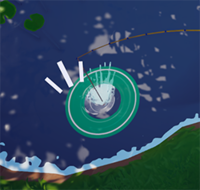
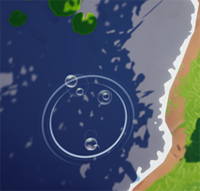 Aim at the ripples to make sure you catch something. |
 A quickly every time the circle turns green.
|
Moana's Fishing Boat
 Moana will periodically go out to sea and catch fish for you. |
Make sure you visit the Fishing Boat often to claim what's been caught! |
 Upgrade the boat to increase its efficiency. |
Friendship
Directive: Plant
- WALL-E will now tend to his own Garden.
- Make sure to visit the Garden regularly to harvest its crops.
- Upgrade the Garden to increase its capacity and efficiency.
Let's hang out with friends!
 Choose roles for your friends in the Village to get more resources. |
 Hang out with Villagers, and they'll help with your duties. |
 Level up your Friendships and assign the same roles to more Villagers to get bigger Hangout Bonuses! |
Gardening
Gardening in the Valley!
 Get seeds by foraging or by trading at Goofy's Stall. |
 X .
|
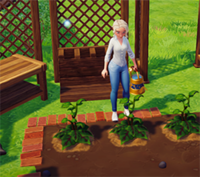
 Plant a seed, water it and wait for your crop to grow! |
 Crops grow faster in the area they're from! |
Directive: Plant
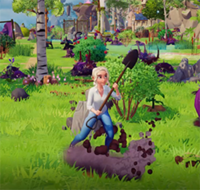
 WALL-E will now tend to his own Garden. |
 Make sure to visit the Garden regularly to harvest its crops. |
 Upgrade the Garden to increase its capacity and efficiency. |
House
Home Sweet Home!
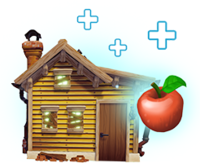
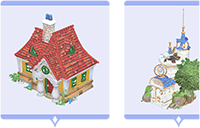
 Expand and customize your House. |
Restore your Energy by spending time in your House! |
 Use your House's storage as a second Inventory. |
Moving In: Placing a House
 You can find it in the Furniture menu. Open the Inventory. |
 Enter the House menu and choose the one you want to place! |
Place it anywhere in the Valley! You'll need to ask for Scrooge's help to upgrade it! |
Selling
The Art of Earning Star Coins
 Be active in the Valley. |
 Gather resources. |
 Sell what you don't need to Goofy's Stall! |
 Receive Star Coins in exchange. |
Tools
Aim for the Ripples: The Fishing Rod
 RT and select the Fishing Rod.
|
 X to cast your line.
|
Rocks and Minerals: The Pickaxe
RT and select the Pickaxe.
|
 X .
|
Dig a Little Deeper: The Shovel
 RT and select the Shovel.
|
 X .
|
All is Green: The Watering Can
 RT and select the Watering Can.
|
 X .
|
Collection
The Collection Menu: A Compendium
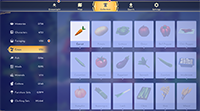 Access the Collection Menu from the Main Menu. |
 Select an item to discover more info about it. |
Crafting
DIY: The Crafting Station
 Interact with any Crafting Station to start. |
 Select a Recipe to make sure you have the required materials and, if so, craft the desired item. |
 Each Biome holds specific materials. Forage, experiment and discover new Crafting Recipes. |
Customization
Dress Your Best: Clothing
 Access the Clothing menu from the Inventory. |
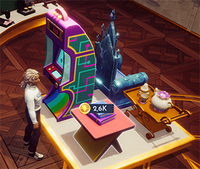
 Select Clothes to customize the look of your Avatar. |
 Increase your Friendship Levels with your neighbors and visit Scrooge's Store daily to unlock new items. |
Designing Your Universe: Furniture
 Access the Furniture menu from the Inventory. |
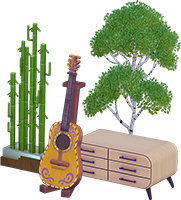 Select Furniture to customize your Village. |
Visit Scrooge's Store daily and increase Friendship Levels with him to unlock more Furniture. |
Quests
The Quest Log
|
Access the Quests menu by pressing ⧉ or from the Main Menu.
|
You can also track a Quest by using A .
|
Keep Track of Your Story
|
Quickly track new Quests with <<>>! |
Missed it? Track a Quest by using the Track icon or A while in the Quest menu.
|
Map
A Sense of Direction
|
Access the Map from the Main Menu. |
 The Map shows you the position of Characters, Crops, Buildings, and more! |
X to Fast Travel to available locations.
|
Travel at the Speed of Dreamlight
|
Access the Map from the Main Menu. |
Press on a Well icon or open the Fast Travel menu to quickly teleport to a location in the Village. |
Unlock more Realms or Wishing Wells by exploring the Village. |
Presence of NPCs in Different Villages
|
In the Map Menu, open the Characters tab with Y to decide which Villagers are present in the current Village.
|
Enable or disable Characters. |
Camera
Capture the Moment: The Camera
 RT and select the Camera.
|
 Take the prettiest pictures and save them on your device. |
Touch of Magic
Touch of Magic -- Design Inventory
 Choose <Add new> to create a new custom design. |
 You can modify or remove your design later. |
Touch of Magic -- Decorating
 Change the color of your selected item at any time. |
 Add up to 50 motifs to an item. Modify the layer order by dragging it. |
Touch of Magic -- Motif Placement
 Move, rotate and resize the Motif on your item. |
 Modify the Motif with a layer effect in the top bar. |
 Change camera angles quickly |
Mining
You Can Mine in the Valley
RT and select the Pickaxe.
|
X to gather minerals.
|
 And to get rid of what's blocking you! |
DreamSnaps
DreamSnaps: Requirements
|
Challenge requirements can be found in the DreamSnaps section of the Events menu. |
You can also check Challenge requirements in Photo Mode with RT OR in your Wardrobe or Furniture menus when DreamSnaps mode is activated.
|
DreamSnaps: How to Submit
|
Place or wear items that meet the Challenge requirements before snapping a picture. |
Check out the Challenge tab in Photo Mode to see if you meet all requirements. |
If you're happy with your snapshot, use Y to submit.
|
DreamSnaps: How it Works
|
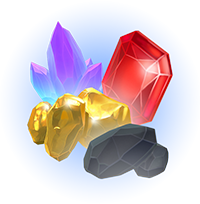
Using items that meet the Challenge requirements earns you more points. |
 You can also get more points by winning votes from the community. |
 When the Challenge is finished, results are calculated and you'll get rewards based on your ranking. |
DreamSnaps: Voting
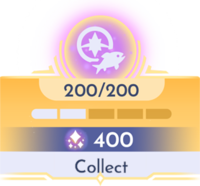
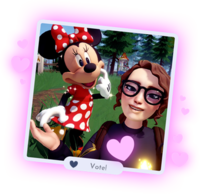
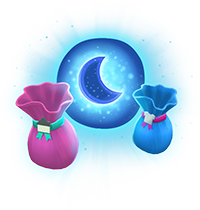
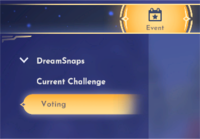 You can access the Voting feature in the DreamSnaps section of the Events menu. |
 Casting votes will get you some Moonstones, up to a cap per challenge. |
Ancient Machines
Ancient Machines
 |
Ancient Machines can be placed in your Village to assist with various tasks. |
Ancient Cooker
|
Choose the Ingredients and quantities you'd like to cook. (Costs Mist.) |
Let it cook for a while, then come back and collect your meals. |
Ancient Gardener
|
For the Gardener to work, it needs to be set up on land where crops can grow. |
Plant seeds or harvest crops with a single action! (Costs Mist.) |
Ancient Vacuum
|
The Ancient Vacuum scans an area in a Biome for Night Thorns and Splinters of Fate. |
Select the desired items and collect them from a single location! (Costs Mist.) |
Board Game
How to Play Scramblecoin
 First choose 5 figurines to play with. At the start of a game, each player chooses 5 figurines to bring to the board. |
How to Play Scramblecoin
|
Each figurine has different characteristics, so choose wisely! |
How to Play Scramblecoin
|
You have 5 turns to collect more coins than your opponent. Coins are collected as soon as a figurine lands on its tile. |
How to Play Scramblecoin
A turn is resolved in two steps.
 1. You may place one of your figurines on the board:
|
 2. Move all the figurines on the board. |
How to Play Scramblecoin
 You can have a maximum of 3 figurines on the board at once. |
How to Play Scramblecoin
At the start of each turn, you can either:
 Add a figurine on top of another in play to replace it. |
OR |  Skip placing a figurine this turn |
How to Play Scramblecoin
 Play with every Villager every day to get ranking points and obtain new figurines. |
How to Play Scramblecoin
 Villagers may be eager to play the game with you. This awards more Friendship and ranking points. |
Timebending
Timebending: The Hourglass
 RT to open the Tool wheel and choose the Hourglass!
|
 Use the Hourglass to find artifacts lost to time! |
Hidden Treasure: How To Find Them
 Use the Hourglass to sense for hidden treasures, then follow the sand. |
 Once found, press the Hourglass button repeatedly to pull it out of the flow of time. |
 Find unique treasures lost in time that can be combined at the Timebending Table! |
Time Rifts: How To Use
 You can open Time Rifts with the Hourglass button. |
 In Time Rifts, treasures appear continuously. |
A Time Rift lasts for a limited time only, so be quick to find as much treasure as you can. |
Timebending Table: How To Use
 Interact with this table to use your Timebending resources. |
 Combine your resources to create exclusive items. |
 Upgrade your Hourglass to find even more types of resources. |
Valley Visits
Valley Visits: Multiplayer Guide
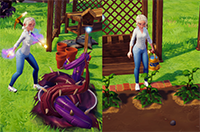
 You can invite up to 3 friends to your Valley. Use a Valley Visit Station to generate Visit Codes. |
Join a friend's Valley by entering the code in the Multiplayer section of the Main Menu. |
 Visiting lets you collect Pixel Shards to craft special items, drop items to trade, and shop at Scrooge's Store. |
History
- 1.0: Added
- 1.6: Added DreamSnaps; Layout rearranged.
- 1.7: Controls renamed to Gameplay.
- 1.8: UI slightly restructured. Added Ancient Machines, Board Game, Timebending, Valley Visits. Added Presence of NPCs in Different Villages in Map section.
- 1.8.7: * Minor typo fix, punctuation added: "You can open Time Rifts with the Hourglass button.", "Use the Hourglass to sense for hidden treasures, then follow the sand.", "Once found, press the Hourglass button repeatedly to pull it out of the flow of time."
* Denotes uncertain version