Sticks: Difference between revisions
Jump to navigation
Jump to search
(attempts at sizing columns - hardcoded atm) |
(→Trees: Not sure how/if this helps, but trying something different - added the thumbnails each tree stems from as first column) |
||
| Line 2: | Line 2: | ||
{| class="wikitable sortable" id='recipe-table' | {| class="wikitable sortable" id='recipe-table' | ||
! Landscaping<br>Menu Image | |||
! Image | ! Image | ||
! style="width: 400px;" |Name | ! style="width: 400px;" |Name | ||
| Line 12: | Line 13: | ||
|- | |- | ||
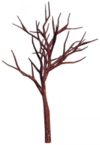
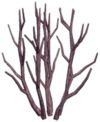
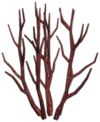
| [[File:Bare-Limbed Tree.png|center|100px|link=Bare-Limbed Tree]] [[File:Bare-Limbed Tree Medium Brown.png|center|100px|link=File:Bare-Limbed Tree Medium Brown.png]]|| [[Bare-Limbed Tree]] 1 (medium height, medium dark wood)|| 3x3 || yes || no || Bare-Limbed Tree ||Biome TBD | | [[File:Bare-Limbed Tree.png|center|100px|link=Bare-Limbed Tree]] | ||
| [[File:Bare-Limbed Tree Medium Brown.png|center|100px|link=File:Bare-Limbed Tree Medium Brown.png]]|| [[Bare-Limbed Tree]] 1 (medium height, medium dark wood)|| 3x3 || yes || no || Bare-Limbed Tree ||Biome TBD | |||
|- | |- | ||
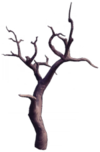
| [[File:Bare-Limbed Tree.png|center|100px|link=Bare-Limbed Tree]] | |||
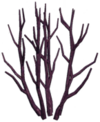
| [[File:Bare-Limbed Tree Tall Dark.png|center|100px|link=File:Bare-Limbed Tree Tall Dark.png]]|| [[Bare-Limbed Tree]] 2 (tall, dark wood)|| 3x3 || yes || no || Bare-Limbed Tree ||Biome TBD | | [[File:Bare-Limbed Tree Tall Dark.png|center|100px|link=File:Bare-Limbed Tree Tall Dark.png]]|| [[Bare-Limbed Tree]] 2 (tall, dark wood)|| 3x3 || yes || no || Bare-Limbed Tree ||Biome TBD | ||
| Line 20: | Line 23: | ||
|- | |- | ||
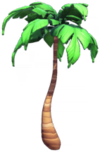
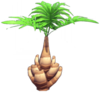
| [[File:Bent Palm Tree.png|center|100px|link=Bent Palm Tree]]||Bent Palm Tree 1 (shortest) <br>(has [[Bent Sunlit Plateau Palm Tree]] variant counterpart)|| 2x2 || yes || yes || Palm Tree - Bent || {{name|Dazzle Beach}} | | [[File:Bent Palm Tree.png|center|100px|link=Bent Palm Tree]] | ||
| img || Bent Palm Tree 1 (shortest) <br>(has [[Bent Sunlit Plateau Palm Tree]] variant counterpart)|| 2x2 || yes || yes || Palm Tree - Bent || {{name|Dazzle Beach}} | |||
|- | |- | ||
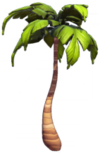
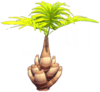
| [[File:Bent Sunlit Plateau Palm Tree.png|center|100px|link=Bent Sunlit Plateau Palm Tree]]||Bent Sunlit Plateau Palm Tree <br>(has [[Bent Palm Tree]] variant counterpart)|| 2x2 || yes || yes || Palm Tree - Bent || {{name|Sunlit Plateau}} | | [[File:Bent Sunlit Plateau Palm Tree.png|center|100px|link=Bent Sunlit Plateau Palm Tree]] | ||
| img || Bent Sunlit Plateau Palm Tree <br>(has [[Bent Palm Tree]] variant counterpart)|| 2x2 || yes || yes || Palm Tree - Bent || {{name|Sunlit Plateau}} | |||
|- | |- | ||
| img||Bent Palm Tree 2 (medium height) <br>(has [[Tall Sunlit Plateau Palm Tree]] variant counterpart)|| 3x3 || yes || no || Palm Tree - Tall || {{name|Dazzle Beach}} | | | ||
| img || Bent Palm Tree 2 (medium height) <br>(has [[Tall Sunlit Plateau Palm Tree]] variant counterpart)|| 3x3 || yes || no || Palm Tree - Tall || {{name|Dazzle Beach}} | |||
|- | |- | ||
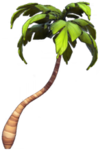
| [[File:Tall Sunlit Plateau Palm Tree.png|center|100px|link=Tall Sunlit Plateau Palm Tree]]||Tall Sunlit Plateau Palm Tree <br>(has [[Bent Palm Tree]] variant counterpart)|| 3x3 || yes || no || Palm Tree - Tall || {{name|Sunlit Plateau}} | | [[File:Tall Sunlit Plateau Palm Tree.png|center|100px|link=Tall Sunlit Plateau Palm Tree]] | ||
| img || Tall Sunlit Plateau Palm Tree <br>(has [[Bent Palm Tree]] variant counterpart) || 3x3 || yes || no || Palm Tree - Tall || {{name|Sunlit Plateau}} | |||
|- | |- | ||
| img||Bent Palm Tree 3 (tallest) <br>(has [[Curved Sunlit Plateau Palm Tree]] variant counterpart)|| 2x2 || yes || yes || Palm Tree - Curved || {{name|Dazzle Beach}} | | | ||
| img || Bent Palm Tree 3 (tallest) <br>(has [[Curved Sunlit Plateau Palm Tree]] variant counterpart)|| 2x2 || yes || yes || Palm Tree - Curved || {{name|Dazzle Beach}} | |||
|- | |- | ||
| [[File:Curved Sunlit Plateau Palm Tree.png|center|100px|link=Curved Sunlit Plateau Palm Tree]]||Curved Sunlit Plateau Palm Tree <br>(has [[Bent Palm Tree]] variant counterpart)|| 2x2 || yes || yes || Palm Tree - Curved || {{name|Sunlit Plateau}} | | [[File:Curved Sunlit Plateau Palm Tree.png|center|100px|link=Curved Sunlit Plateau Palm Tree]] | ||
| img || Curved Sunlit Plateau Palm Tree <br>(has [[Bent Palm Tree]] variant counterpart) || 2x2 || yes || yes || Palm Tree - Curved || {{name|Sunlit Plateau}} | |||
|- | |- | ||
| [[File:Round Palm Tree.png|center|100px|link=Round Palm Tree]] || [[Round Palm Tree]] || 4x4 || yes, to the north and east<ref name="north, east"></ref> || no || Palm Tree - Round || {{name|Dazzle Beach}} | | [[File:Round Palm Tree.png|center|100px|link=Round Palm Tree]] | ||
| img || [[Round Palm Tree]] || 4x4 || yes, to the north and east<ref name="north, east"></ref> || no || Palm Tree - Round || {{name|Dazzle Beach}} | |||
|- | |- | ||
| [[File:Round Sunlit Plateau Palm Tree.png|center|100px|link=Round Sunlit Plateau Palm Tree]]|| [[Round Sunlit Plateau Palm Tree]] || 4x4 || yes, to the north and east<ref name="north, east"></ref> || no || Palm Tree - Round || {{name|Sunlit Plateau}} | | [[File:Round Sunlit Plateau Palm Tree.png|center|100px|link=Round Sunlit Plateau Palm Tree]] | ||
| img || [[Round Sunlit Plateau Palm Tree]] || 4x4 || yes, to the north and east<ref name="north, east"></ref> || no || Palm Tree - Round || {{name|Sunlit Plateau}} | |||
|- | |- | ||
| [[File:Dead Bush.png|center|100px|link=Dead Bush]] || [[Dead Bush]] || 2x2 || no || no || Dead Bush || Biome TBD | | [[File:Dead Bush.png|center|100px|link=Dead Bush]] | ||
| img || [[Dead Bush]] || 2x2 || no || no || Dead Bush || Biome TBD | |||
|- | |- | ||
| [[File:Frozen Dead Bush.png|center|100px|link=Frozen Dead Bush]] || [[Frozen Dead Bush]] || 2x2 || no || no || Dead Bush || Biome TBD | | [[File:Frozen Dead Bush.png|center|100px|link=Frozen Dead Bush]] | ||
| img || [[Frozen Dead Bush]] || 2x2 || no || no || Dead Bush || Biome TBD | |||
|- | |- | ||
| [[File:Scraggly Bush.png|center|100px|link=Scraggly Bush]] || [[Scraggly Bush]] || 2x2 || no || no || Dead Bush || Biome TBD | | [[File:Scraggly Bush.png|center|100px|link=Scraggly Bush]] | ||
| img || [[Scraggly Bush]] || 2x2 || no || no || Dead Bush || Biome TBD | |||
|- | |- | ||
| img||Snowy Dead Tree 1 (tall, sort of pronged)|| 3x3 || yes || no || Dead Tree || {{name|Frosted Heights}} | | [[File:Snowy Dead Tree.png|center|100px|link=Snowy Dead Tree]] | ||
| img || [[Snowy Dead Tree]] 1 (tall, sort of pronged)|| 3x3 || yes || no || Dead Tree || {{name|Frosted Heights}} | |||
|- | |- | ||
| [[File:Dead Forgotten Lands Tree.png|center|100px|link=Dead Forgotten Lands Tree]] | |||
| [[File:Dead Forgotten Lands Tree Tall.png|center|100px|link=File:Dead Forgotten Lands Tree Tall.png]] || [[Dead Forgotten Lands Tree]] 1 (tall, sort of pronged) || 3x3 || yes || no || Dead Tree || {{name|Forgotten Lands}} | | [[File:Dead Forgotten Lands Tree Tall.png|center|100px|link=File:Dead Forgotten Lands Tree Tall.png]] || [[Dead Forgotten Lands Tree]] 1 (tall, sort of pronged) || 3x3 || yes || no || Dead Tree || {{name|Forgotten Lands}} | ||
|- | |- | ||
| img||Snowy Dead Tree | | [[File:Snowy Dead Tree.png|center|100px|link=Snowy Dead Tree]] | ||
| img || [[Snowy Dead Tree]] 2 (shorter, pronged, but more spindly)|| 3x3 || yes || no || Dead Tree || {{name|Frosted Heights}} | |||
|- | |- | ||
| [[File:Dead Forgotten Lands Tree.png|center|100px|link=Dead Forgotten Lands Tree]] | |||
| [[File:Dead Forgotten Lands Tree Short.png|center|100px|link=File:Dead Forgotten Lands Tree Short.png]] || [[Dead Forgotten Lands Tree]] 2 (shorter, pronged, but more spindly) || 3x3 || yes || no || Dead Tree || {{name|Forgotten Lands}} | | [[File:Dead Forgotten Lands Tree Short.png|center|100px|link=File:Dead Forgotten Lands Tree Short.png]] || [[Dead Forgotten Lands Tree]] 2 (shorter, pronged, but more spindly) || 3x3 || yes || no || Dead Tree || {{name|Forgotten Lands}} | ||
| Line 59: | Line 77: | ||
|- | |- | ||
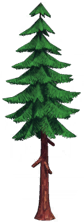
| [[File:Fir.png|center|100px|link=Fir]] [[File:Fir Short.png|center|100px|link=File:Fir Short.png]] || [[Fir]] 1 (short) <br>(has [[High Snowy Fir]] variant counterpart)|| 3x3 || yes || no || Fir || {{name|Forest of Valor}} | | [[File:Fir.png|center|100px|link=Fir]] | ||
| [[File:Fir Short.png|center|100px|link=File:Fir Short.png]] || [[Fir]] 1 (short) <br>(has [[High Snowy Fir]] variant counterpart)|| 3x3 || yes || no || Fir || {{name|Forest of Valor}} | |||
|- | |- | ||
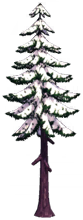
| [[File:High Snowy Fir.png|center|100px|link=High Snowy Fir]] [[File:High Snowy Fir Short.png|center|100px|link=File:High Snowy Fir Short.png]] || [[High Snowy Fir]] 1 (short) <br>(has [[Fir]] variant counterpart)|| 3x3 || yes || no || Fir || {{name|Frosted Heights}} | | [[File:High Snowy Fir.png|center|100px|link=High Snowy Fir]] | ||
| [[File:High Snowy Fir Short.png|center|100px|link=File:High Snowy Fir Short.png]] || [[High Snowy Fir]] 1 (short) <br>(has [[Fir]] variant counterpart)|| 3x3 || yes || no || Fir || {{name|Frosted Heights}} | |||
|- | |- | ||
| [[File:Fir.png|center|100px|link=Fir]] | |||
| [[File:Fir Medium.png|center|100px|link=File:Fir Medium.png]] || [[Fir]] 2 (medium height) <br>(has [[Slender Sinister Fir]] variant counterpart)|| 3x3 || yes || no || Fir || {{name|Forest of Valor}} | | [[File:Fir Medium.png|center|100px|link=File:Fir Medium.png]] || [[Fir]] 2 (medium height) <br>(has [[Slender Sinister Fir]] variant counterpart)|| 3x3 || yes || no || Fir || {{name|Forest of Valor}} | ||
|- | |- | ||
| [[File:Slender Sinister Fir.png|center|100px|link=Slender Sinister Fir]] | |||
| [[File:Slender Sinister Fir Medium.png|center|100px|link=File:Slender Sinister Fir Medium.png]] || [[Slender Sinister Fir]] 3 (medium height) <br>(has [[Fir]] variant counterpart)|| 3x3 || yes || no || Fir || {{name|Forgotten Lands}} | | [[File:Slender Sinister Fir Medium.png|center|100px|link=File:Slender Sinister Fir Medium.png]] || [[Slender Sinister Fir]] 3 (medium height) <br>(has [[Fir]] variant counterpart)|| 3x3 || yes || no || Fir || {{name|Forgotten Lands}} | ||
|- | |- | ||
| [[File:Fir.png|center|100px|link=Fir]] | |||
| [[File:Fir Tall.png|center|100px|link=File:Fir Tall.png]] || [[Fir]] 3 (tall) <br>(has [[High Snowy Fir]] and [[Slender Sinister Fir]] variant counterparts)|| 3x3 || yes || no || Fir || {{name|Forest of Valor}} | | [[File:Fir Tall.png|center|100px|link=File:Fir Tall.png]] || [[Fir]] 3 (tall) <br>(has [[High Snowy Fir]] and [[Slender Sinister Fir]] variant counterparts)|| 3x3 || yes || no || Fir || {{name|Forest of Valor}} | ||
|- | |- | ||
| [[File:High Snowy Fir.png|center|100px|link=High Snowy Fir]] | |||
| [[File:High Snowy Fir Tall.png|center|100px|link=File:High Snowy Fir Tall.png]] || [[High Snowy Fir]] 2 (tall) <br>(has [[Fir]] and [[Slender Sinister Fir]] variant counterparts)|| 3x3 || yes || no || Fir || {{name|Frosted Heights}} | | [[File:High Snowy Fir Tall.png|center|100px|link=File:High Snowy Fir Tall.png]] || [[High Snowy Fir]] 2 (tall) <br>(has [[Fir]] and [[Slender Sinister Fir]] variant counterparts)|| 3x3 || yes || no || Fir || {{name|Frosted Heights}} | ||
|- | |- | ||
| [[File:Slender Sinister Fir.png|center|100px|link=Slender Sinister Fir]] | |||
| [[File:Slender Sinister Fir Tall.png|center|100px|link=File:Slender Sinister Fir Tall.png]] || [[Slender Sinister Fir]] 2 (tall) <br>(has [[Fir]] and [[High Snowy Fir]] variant counterparts)|| 3x3 || yes || yes || Fir || {{name|Forgotten Lands}} | | [[File:Slender Sinister Fir Tall.png|center|100px|link=File:Slender Sinister Fir Tall.png]] || [[Slender Sinister Fir]] 2 (tall) <br>(has [[Fir]] and [[High Snowy Fir]] variant counterparts)|| 3x3 || yes || yes || Fir || {{name|Forgotten Lands}} | ||
|- | |- | ||
| [[File:High Snowy Fir.png|center|100px|link=High Snowy Fir]] | |||
| [[File:High Snowy Fir Very Tall.png|center|100px|link=File:High Snowy Fir Very Tall.png]] || [[High Snowy Fir]] 3 (very tall) <br>(has [[Slender Sinister Fir]] variant counterpart)|| 3x3 || yes || no || Fir || {{name|Frosted Heights}} | | [[File:High Snowy Fir Very Tall.png|center|100px|link=File:High Snowy Fir Very Tall.png]] || [[High Snowy Fir]] 3 (very tall) <br>(has [[Slender Sinister Fir]] variant counterpart)|| 3x3 || yes || no || Fir || {{name|Frosted Heights}} | ||
|- | |- | ||
| [[File:Slender Sinister Fir.png|center|100px|link=Slender Sinister Fir]] [[File:Slender Sinister Fir Very Tall.png|center|100px|link=File:Slender Sinister Fir Very Tall.png]] || [[Slender Sinister Fir]] 1 (very tall) <br>(has [[High Snowy Fir]] variant counterpart)|| 3x3 || yes || no || Fir || {{name|Forgotten Lands}} | | [[File:Slender Sinister Fir.png|center|100px|link=Slender Sinister Fir]] | ||
| [[File:Slender Sinister Fir Very Tall.png|center|100px|link=File:Slender Sinister Fir Very Tall.png]] || [[Slender Sinister Fir]] 1 (very tall) <br>(has [[High Snowy Fir]] variant counterpart)|| 3x3 || yes || no || Fir || {{name|Forgotten Lands}} | |||
|- | |- | ||
| [[File:Lush Sinister Fir.png|center|100px|link=Lush Sinister Fir]]||Lush Sinister Fir|| 4x4 ||yes, to the north and east<ref name="north, east">This tree only drops wood towards the north and east. If the entire northern and eastern edges are blocked, the tree will not produce wood.</ref>|| no || Fir - Lush || {{name|Forgotten Lands}} | | [[File:Lush Sinister Fir.png|center|100px|link=Lush Sinister Fir]] | ||
| img || [[Lush Sinister Fir]] || 4x4 || yes, to the north and east<ref name="north, east">This tree only drops wood towards the north and east. If the entire northern and eastern edges are blocked, the tree will not produce wood.</ref> || no || Fir - Lush || {{name|Forgotten Lands}} | |||
|- | |- | ||
| [[File:Short Japanese Maple.png|center|100px|link=Short Japanese Maple]] [[File:Short Japanese Maple Medium.png|center|100px|link=File:Short Japanese Maple Medium.png]] || [[Short Japanese Maple]] 1 (medium-tall) <br>(has [[Small Oak]] variant counterpart) || 3x3 || yes || no || Oak/Maple|| Biome TBD | | [[File:Short Japanese Maple.png|center|100px|link=Short Japanese Maple]] | ||
| [[File:Short Japanese Maple Medium.png|center|100px|link=File:Short Japanese Maple Medium.png]] || [[Short Japanese Maple]] 1 (medium-tall) <br>(has [[Small Oak]] variant counterpart) || 3x3 || yes || no || Oak/Maple|| Biome TBD | |||
|- | |- | ||
| [[File:Small Oak.png|center|100px|link=Small Oak]] [[File:Small Oak Medium.png|center|100px|link=File:Small Oak Medium.png]] || [[Small Oak]] 1 (medium-tall) <br>(has [[Short Japanese Maple]] variant counterpart) || 3x3 || yes || no || Oak/Maple || Biome TBD | | [[File:Small Oak.png|center|100px|link=Small Oak]] | ||
| [[File:Small Oak Medium.png|center|100px|link=File:Small Oak Medium.png]] || [[Small Oak]] 1 (medium-tall) <br>(has [[Short Japanese Maple]] variant counterpart) || 3x3 || yes || no || Oak/Maple || Biome TBD | |||
|- | |- | ||
| [[File:Short Japanese Maple.png|center|100px|link=Short Japanese Maple]] | |||
| [[File:Short Japanese Maple Short.png|center|100px|link=File:Short Japanese Maple Short.png]]||[[Short Japanese Maple]] 2 (short)|| 1x1 || yes || yes ||Oak/Maple||Biome TBD | | [[File:Short Japanese Maple Short.png|center|100px|link=File:Short Japanese Maple Short.png]]||[[Short Japanese Maple]] 2 (short)|| 1x1 || yes || yes ||Oak/Maple||Biome TBD | ||
|- | |- | ||
| [[File:Short Japanese Maple.png|center|100px|link=Short Japanese Maple]] | |||
| [[File:Short Japanese Maple Tall.png|center|100px|link=File:Short Japanese Maple Tall.png]] || [[Short Japanese Maple]] 3 (tallest) <br>(has [[Small Oak]] variant counterpart) || 4x4 || yes || no || Oak/Maple || Biome TBD | | [[File:Short Japanese Maple Tall.png|center|100px|link=File:Short Japanese Maple Tall.png]] || [[Short Japanese Maple]] 3 (tallest) <br>(has [[Small Oak]] variant counterpart) || 4x4 || yes || no || Oak/Maple || Biome TBD | ||
|- | |- | ||
| [[File:Small Oak.png|center|100px|link=Small Oak]] | |||
| [[File:Small Oak Tall.png|center|100px|link=File:Small Oak Tall.png]] || [[Small Oak]] 3 (tallest) <br>(has [[Short Japanese Maple]] variant counterpart) || 3x3 || yes || no || Oak/Maple || Biome TBD | | [[File:Small Oak Tall.png|center|100px|link=File:Small Oak Tall.png]] || [[Small Oak]] 3 (tallest) <br>(has [[Short Japanese Maple]] variant counterpart) || 3x3 || yes || no || Oak/Maple || Biome TBD | ||
|- | |- | ||
| [[File:Small Oak.png|center|100px|link=Small Oak]] | |||
| [[File:Small Oak Short.png|center|100px|link=File:Small Oak Short.png]] || [[Small Oak]] 2 (shortest)|| 3x3 || yes || no || Oak/Maple || Biome TBD | | [[File:Small Oak Short.png|center|100px|link=File:Small Oak Short.png]] || [[Small Oak]] 2 (shortest)|| 3x3 || yes || no || Oak/Maple || Biome TBD | ||
| Line 110: | Line 144: | ||
|- | |- | ||
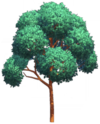
| [[File:Simple Maple.png|center|100px|link=Simple Maple]] || Simple Maple 1 (slender, short, upright)|| 3x3 || yes || no || Maple Tree ||Biome TBD | | [[File:Simple Maple.png|center|100px|link=Simple Maple]] | ||
| img || Simple Maple 1 (slender, short, upright) || 3x3 || yes || no || Maple Tree || Biome TBD | |||
|- | |- | ||
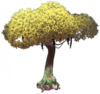
| [[File:Tall Black Maple.png|center|100px|link=Tall Black Maple]] || Tall Black Maple 1 (slender, short, upright) || 3x3 || yes || no || Maple Tree ||Biome TBD | | [[File:Tall Black Maple.png|center|100px|link=Tall Black Maple]] | ||
| img || Tall Black Maple 1 (slender, short, upright) || 3x3 || yes || no || Maple Tree || Biome TBD | |||
|- | |- | ||
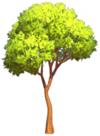
| [[File:Tall Maple.png|center|100px|link=Tall Maple]]||Tall Maple 1 (slender, short, upright)|| 3x3 || yes || no || Maple Tree ||Biome TBD | | [[File:Tall Maple.png|center|100px|link=Tall Maple]] | ||
| img || Tall Maple 1 (slender, short, upright) || 3x3 || yes || no || Maple Tree || Biome TBD | |||
|- | |- | ||
| | |||
| img|| Simple Maple 2 (slender, tall, curved)|| 5x5 || yes, northwards only<ref name="north only">This tree only drops wood towards the north. If the entire northern edge is blocked, the tree will not produce wood.</ref> || no || Maple Tree || Biome TBD | | img|| Simple Maple 2 (slender, tall, curved)|| 5x5 || yes, northwards only<ref name="north only">This tree only drops wood towards the north. If the entire northern edge is blocked, the tree will not produce wood.</ref> || no || Maple Tree || Biome TBD | ||
|- | |- | ||
| | |||
| img|| Tall Black Maple 2 (slender, tall, curved)|| 5x5 || yes, northwards only<ref name="north only"></ref> || no || Maple Tree || Biome TBD | | img|| Tall Black Maple 2 (slender, tall, curved)|| 5x5 || yes, northwards only<ref name="north only"></ref> || no || Maple Tree || Biome TBD | ||
|- | |- | ||
| | |||
| img|| Tall Maple 2 (slender, tall, curved) || 3x3 || yes || yes || Maple Tree || Biome TBD | | img|| Tall Maple 2 (slender, tall, curved) || 3x3 || yes || yes || Maple Tree || Biome TBD | ||
|- | |- | ||
| | |||
| img||Simple Maple 3 (normal thickness, tall, upright)|| 4x4 || yes || no || Maple Tree || Biome TBD | | img||Simple Maple 3 (normal thickness, tall, upright)|| 4x4 || yes || no || Maple Tree || Biome TBD | ||
|- | |- | ||
| | |||
| img||Tall Black Maple 3 (normal thickness, tall, upright)||4x4||yes, to the north and east<ref name="north, east"></ref> || no || Maple Tree || Biome TBD | | img||Tall Black Maple 3 (normal thickness, tall, upright)||4x4||yes, to the north and east<ref name="north, east"></ref> || no || Maple Tree || Biome TBD | ||
|- | |- | ||
| | |||
| img||Tall Maple 3 (normal thickness, tall, upright) || 4x4 || yes, to the north and east<ref name="north, east"></ref> || no || Maple Tree || Biome TBD | | img||Tall Maple 3 (normal thickness, tall, upright) || 4x4 || yes, to the north and east<ref name="north, east"></ref> || no || Maple Tree || Biome TBD | ||
|- | |- | ||
| | |||
| img||Tall Black Maple 4 (slender, short, curved) (Simple Maple and Tall Maple do not have this variant) || 4x4 || yes, to the north and east<ref name="north, east"></ref> || no || Maple Tree || Biome TBD | | img||Tall Black Maple 4 (slender, short, curved) (Simple Maple and Tall Maple do not have this variant) || 4x4 || yes, to the north and east<ref name="north, east"></ref> || no || Maple Tree || Biome TBD | ||
|- | |- | ||
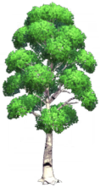
| [[File:Light Birch Tree.png|center|100px|link=Light Birch Tree]] | |||
| img || Light Birch Tree 1 (medium-tall, normal thickness, upright) <br>(has [[Tall Birch Tree]] variant counterpart)|| 3x3 || yes || yes || Birch Tree ||Biome TBD | | img || Light Birch Tree 1 (medium-tall, normal thickness, upright) <br>(has [[Tall Birch Tree]] variant counterpart)|| 3x3 || yes || yes || Birch Tree ||Biome TBD | ||
|- | |- | ||
| [[File:Tall Birch Tree.png|center|100px|link=Tall Birch Tree]] [[File:Tall Birch Tree Tall.png|center|100px|link=File:Tall Birch Tree Tall.png]] || [[Tall Birch Tree]] 1 (medium-tall, normal thickness, upright) <br>(has [[Light Birch Tree]] variant counterpart)|| 3x3 || yes || no || Birch Tree || Biome TBD | | [[File:Tall Birch Tree.png|center|100px|link=Tall Birch Tree]] | ||
| [[File:Tall Birch Tree Tall.png|center|100px|link=File:Tall Birch Tree Tall.png]] || [[Tall Birch Tree]] 1 (medium-tall, normal thickness, upright) <br>(has [[Light Birch Tree]] variant counterpart)|| 3x3 || yes || no || Birch Tree || Biome TBD | |||
|- | |- | ||
| [[File:Light Birch Tree.png|center|100px|link=Light Birch Tree]] [[File:Light Birch Tree Medium Tall.png|center|100px|link=File:Light Birch Tree Medium Tall.png]] || [[Light Birch Tree]] 2 (medium height, slender, upright) || 3x3 || yes || yes || Birch Tree || Biome TBD | | [[File:Light Birch Tree.png|center|100px|link=Light Birch Tree]] | ||
| [[File:Light Birch Tree Medium Tall.png|center|100px|link=File:Light Birch Tree Medium Tall.png]] || [[Light Birch Tree]] 2 (medium height, slender, upright) || 3x3 || yes || yes || Birch Tree || Biome TBD | |||
|- | |- | ||
| [[File:Light Birch Tree.png|center|100px|link=Light Birch Tree]] | |||
| [[File:Light Birch Tree Medium.png|center|100px|link=File:Light Birch Tree Medium.png]] || [[Light Birch Tree]] 3 (medium-short, slender, slightly curved)|| 3x3 || yes || yes || Birch Tree || Biome TBD | | [[File:Light Birch Tree Medium.png|center|100px|link=File:Light Birch Tree Medium.png]] || [[Light Birch Tree]] 3 (medium-short, slender, slightly curved)|| 3x3 || yes || yes || Birch Tree || Biome TBD | ||
|- | |- | ||
| [[File:Light Birch Tree.png|center|100px|link=Light Birch Tree]] | |||
| [[File:Light Birch Tree Short.png|center|100px|link=File:Light Birch Tree Short.png]] || [[Light Birch Tree]] 4 (short, slender, upright) || 4x4 || yes, to the north and east<ref name="north, east"></ref> || yes || Birch Tree || Biome TBD | | [[File:Light Birch Tree Short.png|center|100px|link=File:Light Birch Tree Short.png]] || [[Light Birch Tree]] 4 (short, slender, upright) || 4x4 || yes, to the north and east<ref name="north, east"></ref> || yes || Birch Tree || Biome TBD | ||
|- | |- | ||
| [[File:Light Birch Tree.png|center|100px|link=Light Birch Tree]] | |||
| [[File:Light Birch Tree Dual Trunk Very Tall.png|center|100px|link=File:Light Birch Tree Dual Trunk Very Tall.png]] || [[Light Birch Tree]] 5 (tall, dual trunk) <br>(has [[Tall Birch Tree]] variant counterpart) || 4x6 || yes || yes || Birch Tree || Biome TBD | | [[File:Light Birch Tree Dual Trunk Very Tall.png|center|100px|link=File:Light Birch Tree Dual Trunk Very Tall.png]] || [[Light Birch Tree]] 5 (tall, dual trunk) <br>(has [[Tall Birch Tree]] variant counterpart) || 4x6 || yes || yes || Birch Tree || Biome TBD | ||
|- | |- | ||
| [[File:Tall Birch Tree.png|center|100px|link=Tall Birch Tree]] | |||
| [[File:Tall Birch Tree Dual Trunk Very Tall.png|center|100px|link=File:Tall Birch Tree Dual Trunk Very Tall.png]] || [[Tall Birch Tree]] 3 (tall, dual trunk) <br>(has [[Light Birch Tree]] variant counterpart) || 3x5 || yes || no || Birch Tree || Biome TBD | | [[File:Tall Birch Tree Dual Trunk Very Tall.png|center|100px|link=File:Tall Birch Tree Dual Trunk Very Tall.png]] || [[Tall Birch Tree]] 3 (tall, dual trunk) <br>(has [[Light Birch Tree]] variant counterpart) || 3x5 || yes || no || Birch Tree || Biome TBD | ||
|- | |- | ||
| [[File:Tall Birch Tree.png|center|100px|link=Tall Birch Tree]] | |||
| [[File:Tall Birch Tree Very Tall.png|center|100px|link=File:Tall Birch Tree Very Tall.png]] || [[Tall Birch Tree]] 2 (tall, slender, upright) || 4x4 || yes, to the north and east<ref name="north, east"></ref> || no || Birch Tree || Biome TBD | | [[File:Tall Birch Tree Very Tall.png|center|100px|link=File:Tall Birch Tree Very Tall.png]] || [[Tall Birch Tree]] 2 (tall, slender, upright) || 4x4 || yes, to the north and east<ref name="north, east"></ref> || no || Birch Tree || Biome TBD | ||
| Line 161: | Line 213: | ||
|- | |- | ||
| [[File:Swamp Tree.png|center|100px|link=Swamp Tree]] [[File:Swamp Tree Short.png|center|100px|link=File:Swamp Tree Short.png]] || [[Swamp Tree]] 1 (shortest) || 6x6 || yes, northwards only<ref name="north only"></ref> || yes || Swamp Tree || {{name|Glade of Trust}} | | [[File:Swamp Tree.png|center|100px|link=Swamp Tree]] | ||
| [[File:Swamp Tree Short.png|center|100px|link=File:Swamp Tree Short.png]] || [[Swamp Tree]] 1 (shortest) || 6x6 || yes, northwards only<ref name="north only"></ref> || yes || Swamp Tree || {{name|Glade of Trust}} | |||
|- | |- | ||
| [[File:Swamp Tree.png|center|100px|link=Swamp Tree]] | |||
| [[File:Swamp Tree Medium.png|center|100px|link=File:Swamp Tree Medium.png]] || [[Swamp Tree]] 2 (medium height, flatter canopy top) || 7x7 || no || yes || Swamp Tree || {{name|Glade of Trust}} | | [[File:Swamp Tree Medium.png|center|100px|link=File:Swamp Tree Medium.png]] || [[Swamp Tree]] 2 (medium height, flatter canopy top) || 7x7 || no || yes || Swamp Tree || {{name|Glade of Trust}} | ||
|- | |- | ||
| [[File:Swamp Tree.png|center|100px|link=Swamp Tree]] | |||
| [[File:Swamp Tree Tall.png|center|100px|link=File:Swamp Tree Tall.png]] || [[Swamp Tree]] 3 (tallest) || 9x9 || no || no* (the majority can be placed on tile, but a single square of the 81 units in the 9x9 parameters cannot) || Swamp Tree || {{name|Glade of Trust}} | | [[File:Swamp Tree Tall.png|center|100px|link=File:Swamp Tree Tall.png]] || [[Swamp Tree]] 3 (tallest) || 9x9 || no || no* (the majority can be placed on tile, but a single square of the 81 units in the 9x9 parameters cannot) || Swamp Tree || {{name|Glade of Trust}} | ||
|- | |- | ||
| [[File:Wide Swamp Tree.png|center|100px|link=Wide Swamp Tree]] [[File:Wide Swamp Tree 2.png|center|100px|link=File:Wide Swamp Tree 2.png]] || [[Wide Swamp Tree]] || 8x8 || no || yes || Swamp Tree - Wide || {{name|Glade of Trust}} | | [[File:Wide Swamp Tree.png|center|100px|link=Wide Swamp Tree]] | ||
| [[File:Wide Swamp Tree 2.png|center|100px|link=File:Wide Swamp Tree 2.png]] || [[Wide Swamp Tree]] || 8x8 || no || yes || Swamp Tree - Wide || {{name|Glade of Trust}} | |||
|- | |- | ||
| [[File:Swamp Willow Tree.png|center|100px|link=Swamp Willow Tree]]||Swamp Willow Tree|| 6x6 || no || yes ||Willow - Swamp|| {{name|Glade of Trust}} | | [[File:Swamp Willow Tree.png|center|100px|link=Swamp Willow Tree]] | ||
| img || Swamp Willow Tree|| 6x6 || no || yes ||Willow - Swamp|| {{name|Glade of Trust}} | |||
|- | |||
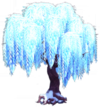
| [[File:Frozen Willow Tree.png|center|100px|link=Frozen Willow Tree]] | |||
| [[File:Frozen Willow Tree 2.png|center|100px|link=File:Frozen Willow Tree 2.png]] || [[Frozen Willow Tree]] || 5x5 || no || no ||Willow - Frozen|| {{name|Frosted Heights}} | |||
|- | |- | ||
| [[File:Large Plaza Tree.png|center|100px|link=Large Plaza Tree]]||Large Plaza Tree||6x6||yes, northwards only<ref name="north only"></ref>||no||Plaza Tree - Large|| {{name|Plaza}} | | [[File:Large Plaza Tree.png|center|100px|link=Large Plaza Tree]] | ||
|img || Large Plaza Tree || 6x6 || yes, northwards only<ref name="north only"></ref> || no || Plaza Tree - Large || {{name|Plaza}} | |||
|- | |- | ||
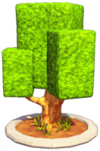
| [[File:Plaza Tree.png|center|100px|link=Plaza Tree]]||Plaza Tree|| 2x2 || yes || yes ||Plaza Tree|| {{name|Plaza}} | | [[File:Plaza Tree.png|center|100px|link=Plaza Tree]] | ||
| img || Plaza Tree || 2x2 || yes || yes || Plaza Tree || {{name|Plaza}} | |||
|- | |- | ||
| [[File:Large Plaza Hedge.png|center|100px|link=Large Plaza Hedge]]||Large Plaza Hedge||6x19||no||yes||Hedge|| {{name|Plaza}} | | [[File:Large Plaza Hedge.png|center|100px|link=Large Plaza Hedge]] | ||
| img || Large Plaza Hedge || 6x19 || no || yes || Hedge || {{name|Plaza}} | |||
|- | |- | ||
| [[File:Small Plaza Hedge.png|center|100px|link=Small Plaza Hedge]]||Small Plaza Hedge||5x14||no||yes||Hedge|| {{name|Plaza}} | | [[File:Small Plaza Hedge.png|center|100px|link=Small Plaza Hedge]] | ||
| img || Small Plaza Hedge || 5x14 || no || yes || Hedge || {{name|Plaza}} | |||
|- | |- | ||
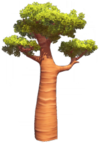
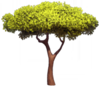
| [[File:Wide Baobab Tree.png|center|100px|link=Wide Baobab Tree]] [[File:Wide Baobab Tree Tall.png|center|100px|link=File:Wide Baobab Tree Tall.png]] || [[Wide Baobab Tree]] 1 (tall, with branch)||4x4||yes, to the north and east<ref name="north, east"></ref>|| no || Baobab Tree || {{name|Sunlit Plateau}} | | [[File:Wide Baobab Tree.png|center|100px|link=Wide Baobab Tree]] | ||
| [[File:Wide Baobab Tree Tall.png|center|100px|link=File:Wide Baobab Tree Tall.png]] || [[Wide Baobab Tree]] 1 (tall, with branch)||4x4||yes, to the north and east<ref name="north, east"></ref>|| no || Baobab Tree || {{name|Sunlit Plateau}} | |||
|- | |- | ||
| [[File:Wide Baobab Tree.png|center|100px|link=Wide Baobab Tree]] | |||
| [[File:Wide Baobab Tree Short.png|center|100px|link=File:Wide Baobab Tree Short.png]] || [[Wide Baobab Tree]] 2 (short)||4x4||yes, to the north and east<ref name="north, east"></ref>|| no || Baobab Tree || {{name|Sunlit Plateau}} | | [[File:Wide Baobab Tree Short.png|center|100px|link=File:Wide Baobab Tree Short.png]] || [[Wide Baobab Tree]] 2 (short)||4x4||yes, to the north and east<ref name="north, east"></ref>|| no || Baobab Tree || {{name|Sunlit Plateau}} | ||
|- | |- | ||
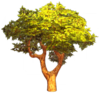
| [[File:Tall Acacia Tree.png|center|100px|link=Tall Acacia Tree]] [[File:Tall Acacia Tree Short.png|center|100px|link=File:Tall Acacia Tree Short.png]] || [[Tall Acacia Tree]] 1 (shortest) || 2x2 || yes || no || Acacia Tree || {{name|Sunlit Plateau}} | | [[File:Tall Acacia Tree.png|center|100px|link=Tall Acacia Tree]] | ||
| [[File:Tall Acacia Tree Short.png|center|100px|link=File:Tall Acacia Tree Short.png]] || [[Tall Acacia Tree]] 1 (shortest) || 2x2 || yes || no || Acacia Tree || {{name|Sunlit Plateau}} | |||
|- | |- | ||
| [[File:Tall Acacia Tree.png|center|100px|link=Tall Acacia Tree]] | |||
| [[File:Tall Acacia Tree Tall.png|center|100px|link=File:Tall Acacia Tree Tall.png]] || [[Tall Acacia Tree]] 2 (tallest) || 2x2 || yes || no || Acacia Tree || {{name|Sunlit Plateau}} | | [[File:Tall Acacia Tree Tall.png|center|100px|link=File:Tall Acacia Tree Tall.png]] || [[Tall Acacia Tree]] 2 (tallest) || 2x2 || yes || no || Acacia Tree || {{name|Sunlit Plateau}} | ||
|- | |- | ||
| [[File:Tall Acacia Tree.png|center|100px|link=Tall Acacia Tree]] | |||
| [[File:Tall Acacia Tree Wide.png|center|100px|link=File:Tall Acacia Tree Wide.png]] ||Tall Acacia Tree 3 (widest)||5x5||yes, to the north, and a single southwest<ref name="north, single southwest">This tree drops wood towards the north, and in a single spot on its southwest corner.</ref>|| no || Acacia Tree || {{name|Sunlit Plateau}} | | [[File:Tall Acacia Tree Wide.png|center|100px|link=File:Tall Acacia Tree Wide.png]] ||Tall Acacia Tree 3 (widest)||5x5||yes, to the north, and a single southwest<ref name="north, single southwest">This tree drops wood towards the north, and in a single spot on its southwest corner.</ref>|| no || Acacia Tree || {{name|Sunlit Plateau}} | ||
|- | |- | ||
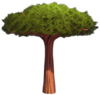
| [[File:Moss-Covered Tree.png|center|100px|link=Moss-Covered Tree]] [[File:Moss-Covered Tree Short.jpg|center|100px|link=File:Moss-Covered Tree Short.jpg]] || [[Moss-Covered Tree]] 1 (short)|| 5x5 || yes || no || Moss-Covered Tree|| {{name|Glade of Trust}} | | [[File:Moss-Covered Tree.png|center|100px|link=Moss-Covered Tree]] | ||
| [[File:Moss-Covered Tree Short.jpg|center|100px|link=File:Moss-Covered Tree Short.jpg]] || [[Moss-Covered Tree]] 1 (short)|| 5x5 || yes || no || Moss-Covered Tree|| {{name|Glade of Trust}} | |||
|- | |- | ||
| [[File:Moss-Covered Tree.png|center|100px|link=Moss-Covered Tree]] | |||
| [[File:Moss-Covered Tree Tall.jpg|center|100px|link=File:Moss-Covered Tree Tall.jpg]] || [[Moss-Covered Tree]] 2 (tall)|| 8x8 || no || no || Moss-Covered Tree || {{name|Glade of Trust}} | | [[File:Moss-Covered Tree Tall.jpg|center|100px|link=File:Moss-Covered Tree Tall.jpg]] || [[Moss-Covered Tree]] 2 (tall)|| 8x8 || no || no || Moss-Covered Tree || {{name|Glade of Trust}} | ||
|- | |- | ||
| [[File:Meager Tree.png|center|100px|link=Meager Tree]] || Meager Tree || 6x6 || yes, northwards only<ref name="north only"></ref>|| no || Lush/Meager Tree || Biome TBD | | [[File:Meager Tree.png|center|100px|link=Meager Tree]] | ||
| img || Meager Tree || 6x6 || yes, northwards only<ref name="north only"></ref>|| no || Lush/Meager Tree || Biome TBD | |||
|- | |- | ||
| [[File:Lush Tree.png|center|100px|link=Lush Tree]] [[File:Lush Tree 2.png|center|100px|link=File:Lush Tree 2.png]] || [[Lush Tree]] || 3x5 || yes || no || Lush/Meager Tree || Biome TBD | | [[File:Lush Tree.png|center|100px|link=Lush Tree]] | ||
| [[File:Lush Tree 2.png|center|100px|link=File:Lush Tree 2.png]] || [[Lush Tree]] || 3x5 || yes || no || Lush/Meager Tree || Biome TBD | |||
|- | |- | ||
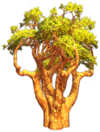
| [[File:Lush Dragon Tree.png|center|100px|link=Lush Dragon Tree]][[File:Lush Dragon Tree 1 Hole.png|center|100px|link=File:Lush Dragon Tree 1 Hole.png]] || [[Lush Dragon Tree]] 1 (shorter, 1 trunk hole) || 3x3 || yes || no || Dragon Tree || {{name|Sunlit Plateau}} | | [[File:Lush Dragon Tree.png|center|100px|link=Lush Dragon Tree]] | ||
| [[File:Lush Dragon Tree 1 Hole.png|center|100px|link=File:Lush Dragon Tree 1 Hole.png]] || [[Lush Dragon Tree]] 1 (shorter, 1 trunk hole) || 3x3 || yes || no || Dragon Tree || {{name|Sunlit Plateau}} | |||
|- | |- | ||
| [[File:Lush Dragon Tree.png|center|100px|link=Lush Dragon Tree]] | |||
| [[File:Lush Dragon Tree 2 Holes.png|center|100px|link=File:Lush Dragon Tree 2 Holes.png]] || [[Lush Dragon Tree]] 2 (taller, 2 trunk holes, branches more visible and upward-extending) || 3x3 || yes || no || Dragon Tree || {{name|Sunlit Plateau}} | | [[File:Lush Dragon Tree 2 Holes.png|center|100px|link=File:Lush Dragon Tree 2 Holes.png]] || [[Lush Dragon Tree]] 2 (taller, 2 trunk holes, branches more visible and upward-extending) || 3x3 || yes || no || Dragon Tree || {{name|Sunlit Plateau}} | ||
|- | |- | ||
| [[File:Sinister Tree.png|center|100px|link=Sinister Tree]] [[File:Sinister Tree.jpg|center|100px|link=File:Sinister Tree.jpg]] || Sinister Tree || 6x6 || yes, northwards only<ref name="north only"></ref> || no || Sinister Tree || {{name|Forgotten Lands}} | | [[File:Sinister Tree.png|center|100px|link=Sinister Tree]] | ||
| [[File:Sinister Tree.jpg|center|100px|link=File:Sinister Tree.jpg]] || Sinister Tree || 6x6 || yes, northwards only<ref name="north only"></ref> || no || Sinister Tree || {{name|Forgotten Lands}} | |||
|- | |- | ||
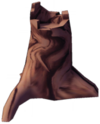
| [[File:Fallen Trunk.png|center|100px|link=Fallen Trunk]]||Fallen Trunk|| 4x2 || no || yes ||Trunk - Fallen||Biome TBD | | [[File:Fallen Trunk.png|center|100px|link=Fallen Trunk]] | ||
| img || Fallen Trunk || 4x2 || no || yes || Trunk - Fallen || Biome TBD | |||
|- | |- | ||
| [[File:Tree Trunk.png|center|100px|link=Tree Trunk]] [[File:Tree Trunk 1.jpg|center|100px|link=File:Tree Trunk 1.jpg]] || [[Tree Trunk]] 1|| 4x4 || no || no || Trunk || Biome TBD | | [[File:Tree Trunk.png|center|100px|link=Tree Trunk]] | ||
| [[File:Tree Trunk 1.jpg|center|100px|link=File:Tree Trunk 1.jpg]] || [[Tree Trunk]] 1|| 4x4 || no || no || Trunk || Biome TBD | |||
|- | |- | ||
| [[File:Tree Trunk.png|center|100px|link=Tree Trunk]] | |||
| [[File:Tree Trunk 2.jpg|center|100px|link=File:Tree Trunk 2.jpg]]||[[Tree Trunk]] 2 (medium height, slender)|| 2x2 || no || no || Trunk || Biome TBD | | [[File:Tree Trunk 2.jpg|center|100px|link=File:Tree Trunk 2.jpg]]||[[Tree Trunk]] 2 (medium height, slender)|| 2x2 || no || no || Trunk || Biome TBD | ||
|- | |- | ||
| [[File:Tree Trunk.png|center|100px|link=Tree Trunk]] | |||
| [[File:Tree Trunk 3.jpg|center|100px|link=File:Tree Trunk 3.jpg]] || [[Tree Trunk]] 3 (tallest, with leafy branch) || 4x5 || no || no || Trunk || Biome TBD | | [[File:Tree Trunk 3.jpg|center|100px|link=File:Tree Trunk 3.jpg]] || [[Tree Trunk]] 3 (tallest, with leafy branch) || 4x5 || no || no || Trunk || Biome TBD | ||
|- | |- | ||
| [[File:Squat Tree Stump.png|center|100px|link=Squat Tree Stump]] || Squat Tree Stump || 2x2 || no || yes || Stump - Squat || Biome TBD | | [[File:Squat Tree Stump.png|center|100px|link=Squat Tree Stump]] | ||
| img || Squat Tree Stump || 2x2 || no || yes || Stump - Squat || Biome TBD | |||
|- | |- | ||
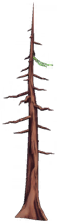
| [[File:Dead Pine Tree.png|center|100px|link=Dead Pine Tree]] [[File:Dead Pine Tree Tall.png|center|100px|link=File:Dead Pine Tree Tall.png]] || [[Dead Pine Tree]] 1 (tall, with small leaf) || 4x4 || yes, to the north and east<ref name="north, east"></ref> || no || Dead Pine Tree || Biome TBD | | [[File:Dead Pine Tree.png|center|100px|link=Dead Pine Tree]] | ||
| [[File:Dead Pine Tree Tall.png|center|100px|link=File:Dead Pine Tree Tall.png]] || [[Dead Pine Tree]] 1 (tall, with small leaf) || 4x4 || yes, to the north and east<ref name="north, east"></ref> || no || Dead Pine Tree || Biome TBD | |||
|- | |- | ||
| [[File:Dead Pine Tree.png|center|100px|link=Dead Pine Tree]] | |||
| [[File:Dead Pine Tree Short.png|center|100px|link=File:Dead Pine Tree Short.png]] || [[Dead Pine Tree]] 2 (short)|| 3x3 || yes || no || Dead Pine Tree || Biome TBD | | [[File:Dead Pine Tree Short.png|center|100px|link=File:Dead Pine Tree Short.png]] || [[Dead Pine Tree]] 2 (short)|| 3x3 || yes || no || Dead Pine Tree || Biome TBD | ||
|- | |- | ||
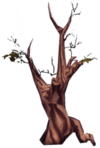
| [[File:Three-Limbed Tree.png|center|100px|link=Three-Limbed Tree]] [[File:Three-Limbed Tree Tall.png|center|100px|link=File:Three-Limbed Tree Tall.png]] || [[Three-Limbed Tree]] 1 (tall) || 3x4 || yes || no || Three-Limbed Tree || Biome TBD | | [[File:Three-Limbed Tree.png|center|100px|link=Three-Limbed Tree]] | ||
| [[File:Three-Limbed Tree Tall.png|center|100px|link=File:Three-Limbed Tree Tall.png]] || [[Three-Limbed Tree]] 1 (tall) || 3x4 || yes || no || Three-Limbed Tree || Biome TBD | |||
|- | |- | ||
| [[File:Three-Limbed Tree.png|center|100px|link=Three-Limbed Tree]] | |||
| [[File:Three-Limbed Tree Short.png|center|100px|link=File:Three-Limbed Tree Short.png]] || [[Three-Limbed Tree]] 2 (short) || 4x4 || yes || no || Three-Limbed Tree || Biome TBD | | [[File:Three-Limbed Tree Short.png|center|100px|link=File:Three-Limbed Tree Short.png]] || [[Three-Limbed Tree]] 2 (short) || 4x4 || yes || no || Three-Limbed Tree || Biome TBD | ||
| Line 248: | Line 333: | ||
|- | |- | ||
| [[File:Frozen Twisted Dead Tree.png|center|100px|link=Frozen Twisted Dead Tree]] [[File:Frozen Twisted Dead Tree 1.jpg|center|100px|link=File:Frozen Twisted Dead Tree 1.jpg]] || [[Frozen Twisted Dead Tree]] 1 (multi-tiered, looks closest to thumbnail, but no frost) || 5x6 || yes, to the north and east<ref name="north, east"></ref> || no || Twisted Dead Tree || {{name|Forgotten Lands}} | | [[File:Frozen Twisted Dead Tree.png|center|100px|link=Frozen Twisted Dead Tree]] | ||
| [[File:Frozen Twisted Dead Tree 1.jpg|center|100px|link=File:Frozen Twisted Dead Tree 1.jpg]] || [[Frozen Twisted Dead Tree]] 1 (multi-tiered, looks closest to thumbnail, but no frost) || 5x6 || yes, to the north and east<ref name="north, east"></ref> || no || Twisted Dead Tree || {{name|Forgotten Lands}} | |||
|- | |- | ||
| [[File:Frozen Twisted Dead Tree.png|center|100px|link=Frozen Twisted Dead Tree]] | |||
| [[File:Frozen Twisted Dead Tree 2.jpg|center|100px|link=File:Frozen Twisted Dead Tree 2.jpg]] || [[Frozen Twisted Dead Tree]] 2 (normalish red tree variant) || 3x3 || yes || no || Twisted Dead Tree || {{name|Forgotten Lands}} | | [[File:Frozen Twisted Dead Tree 2.jpg|center|100px|link=File:Frozen Twisted Dead Tree 2.jpg]] || [[Frozen Twisted Dead Tree]] 2 (normalish red tree variant) || 3x3 || yes || no || Twisted Dead Tree || {{name|Forgotten Lands}} | ||
|- | |- | ||
| [[File:Frozen Twisted Dead Tree.png|center|100px|link=Frozen Twisted Dead Tree]] | |||
| [[File:Frozen Twisted Dead Tree 3.jpg|center|100px|link=File:Frozen Twisted Dead Tree 3.jpg]] || [[Frozen Twisted Dead Tree]] 3 (spiky variant) || 5x6 || yes, to the north, east, and a single southwest<ref name="north, east, single southwest">This tree drops wood towards the north, east, and in a single spot on its southwest corner.</ref> || no || Twisted Dead Tree || {{name|Forgotten Lands}} | | [[File:Frozen Twisted Dead Tree 3.jpg|center|100px|link=File:Frozen Twisted Dead Tree 3.jpg]] || [[Frozen Twisted Dead Tree]] 3 (spiky variant) || 5x6 || yes, to the north, east, and a single southwest<ref name="north, east, single southwest">This tree drops wood towards the north, east, and in a single spot on its southwest corner.</ref> || no || Twisted Dead Tree || {{name|Forgotten Lands}} | ||
|} | |} | ||
Revision as of 22:31, 21 April 2023
Trees
| Landscaping Menu Image |
Image | Name | Size | Produces wood? | Can be placed on tile? | Landscaping Subtype | Biome Unlock
|
|---|---|---|---|---|---|---|---|
 |
 |
Bare-Limbed Tree 1 (medium height, medium dark wood) | 3x3 | yes | no | Bare-Limbed Tree | Biome TBD |
|
 |
Bare-Limbed Tree 2 (tall, dark wood) | 3x3 | yes | no | Bare-Limbed Tree | Biome TBD
|
 |
img | Bent Palm Tree 1 (shortest) (has Bent Sunlit Plateau Palm Tree variant counterpart) |
2x2 | yes | yes | Palm Tree - Bent | |
 |
img | Bent Sunlit Plateau Palm Tree (has Bent Palm Tree variant counterpart) |
2x2 | yes | yes | Palm Tree - Bent | |
| img | Bent Palm Tree 2 (medium height) (has Tall Sunlit Plateau Palm Tree variant counterpart) |
3x3 | yes | no | Palm Tree - Tall | ||
 |
img | Tall Sunlit Plateau Palm Tree (has Bent Palm Tree variant counterpart) |
3x3 | yes | no | Palm Tree - Tall | |
| img | Bent Palm Tree 3 (tallest) (has Curved Sunlit Plateau Palm Tree variant counterpart) |
2x2 | yes | yes | Palm Tree - Curved | ||
 |
img | Curved Sunlit Plateau Palm Tree (has Bent Palm Tree variant counterpart) |
2x2 | yes | yes | Palm Tree - Curved | |
 |
img | Round Palm Tree | 4x4 | yes, to the north and east[1] | no | Palm Tree - Round | |
 |
img | Round Sunlit Plateau Palm Tree | 4x4 | yes, to the north and east[1] | no | Palm Tree - Round | |
 |
img | Dead Bush | 2x2 | no | no | Dead Bush | Biome TBD |
 |
img | Frozen Dead Bush | 2x2 | no | no | Dead Bush | Biome TBD |
 |
img | Scraggly Bush | 2x2 | no | no | Dead Bush | Biome TBD |
 |
img | Snowy Dead Tree 1 (tall, sort of pronged) | 3x3 | yes | no | Dead Tree | |
 |
 |
Dead Forgotten Lands Tree 1 (tall, sort of pronged) | 3x3 | yes | no | Dead Tree | |
|
img | Snowy Dead Tree 2 (shorter, pronged, but more spindly) | 3x3 | yes | no | Dead Tree | |
|
 |
Dead Forgotten Lands Tree 2 (shorter, pronged, but more spindly) | 3x3 | yes | no | Dead Tree |
|
 |
 |
Fir 1 (short) (has High Snowy Fir variant counterpart) |
3x3 | yes | no | Fir | |
 |
 |
High Snowy Fir 1 (short) (has Fir variant counterpart) |
3x3 | yes | no | Fir |
|
|
 |
Fir 2 (medium height) (has Slender Sinister Fir variant counterpart) |
3x3 | yes | no | Fir | |
 |
 |
Slender Sinister Fir 3 (medium height) (has Fir variant counterpart) |
3x3 | yes | no | Fir |
|
|
 |
Fir 3 (tall) (has High Snowy Fir and Slender Sinister Fir variant counterparts) |
3x3 | yes | no | Fir | |
|
 |
High Snowy Fir 2 (tall) (has Fir and Slender Sinister Fir variant counterparts) |
3x3 | yes | no | Fir | |
|
 |
Slender Sinister Fir 2 (tall) (has Fir and High Snowy Fir variant counterparts) |
3x3 | yes | yes | Fir |
|
|
 |
High Snowy Fir 3 (very tall) (has Slender Sinister Fir variant counterpart) |
3x3 | yes | no | Fir | |
|
 |
Slender Sinister Fir 1 (very tall) (has High Snowy Fir variant counterpart) |
3x3 | yes | no | Fir |
|
 |
img | Lush Sinister Fir | 4x4 | yes, to the north and east[1] | no | Fir - Lush |
|
 |
 |
Short Japanese Maple 1 (medium-tall) (has Small Oak variant counterpart) |
3x3 | yes | no | Oak/Maple | Biome TBD |
 |
 |
Small Oak 1 (medium-tall) (has Short Japanese Maple variant counterpart) |
3x3 | yes | no | Oak/Maple | Biome TBD |
|
 |
Short Japanese Maple 2 (short) | 1x1 | yes | yes | Oak/Maple | Biome TBD
|
|
 |
Short Japanese Maple 3 (tallest) (has Small Oak variant counterpart) |
4x4 | yes | no | Oak/Maple | Biome TBD |
|
 |
Small Oak 3 (tallest) (has Short Japanese Maple variant counterpart) |
3x3 | yes | no | Oak/Maple | Biome TBD
|
|
 |
Small Oak 2 (shortest) | 3x3 | yes | no | Oak/Maple | Biome TBD
|
 |
img | Simple Maple 1 (slender, short, upright) | 3x3 | yes | no | Maple Tree | Biome TBD |
 |
img | Tall Black Maple 1 (slender, short, upright) | 3x3 | yes | no | Maple Tree | Biome TBD |
 |
img | Tall Maple 1 (slender, short, upright) | 3x3 | yes | no | Maple Tree | Biome TBD
|
| img | Simple Maple 2 (slender, tall, curved) | 5x5 | yes, northwards only[2] | no | Maple Tree | Biome TBD | |
| img | Tall Black Maple 2 (slender, tall, curved) | 5x5 | yes, northwards only[2] | no | Maple Tree | Biome TBD | |
| img | Tall Maple 2 (slender, tall, curved) | 3x3 | yes | yes | Maple Tree | Biome TBD
| |
| img | Simple Maple 3 (normal thickness, tall, upright) | 4x4 | yes | no | Maple Tree | Biome TBD | |
| img | Tall Black Maple 3 (normal thickness, tall, upright) | 4x4 | yes, to the north and east[1] | no | Maple Tree | Biome TBD | |
| img | Tall Maple 3 (normal thickness, tall, upright) | 4x4 | yes, to the north and east[1] | no | Maple Tree | Biome TBD
| |
| img | Tall Black Maple 4 (slender, short, curved) (Simple Maple and Tall Maple do not have this variant) | 4x4 | yes, to the north and east[1] | no | Maple Tree | Biome TBD
| |
 |
img | Light Birch Tree 1 (medium-tall, normal thickness, upright) (has Tall Birch Tree variant counterpart) |
3x3 | yes | yes | Birch Tree | Biome TBD |
 |
 |
Tall Birch Tree 1 (medium-tall, normal thickness, upright) (has Light Birch Tree variant counterpart) |
3x3 | yes | no | Birch Tree | Biome TBD |
|
 |
Light Birch Tree 2 (medium height, slender, upright) | 3x3 | yes | yes | Birch Tree | Biome TBD |
|
 |
Light Birch Tree 3 (medium-short, slender, slightly curved) | 3x3 | yes | yes | Birch Tree | Biome TBD |
|
 |
Light Birch Tree 4 (short, slender, upright) | 4x4 | yes, to the north and east[1] | yes | Birch Tree | Biome TBD |
|
 |
Light Birch Tree 5 (tall, dual trunk) (has Tall Birch Tree variant counterpart) |
4x6 | yes | yes | Birch Tree | Biome TBD |
|
 |
Tall Birch Tree 3 (tall, dual trunk) (has Light Birch Tree variant counterpart) |
3x5 | yes | no | Birch Tree | Biome TBD |
|
 |
Tall Birch Tree 2 (tall, slender, upright) | 4x4 | yes, to the north and east[1] | no | Birch Tree | Biome TBD
|
 |
 |
Swamp Tree 1 (shortest) | 6x6 | yes, northwards only[2] | yes | Swamp Tree | |
|
 |
Swamp Tree 2 (medium height, flatter canopy top) | 7x7 | no | yes | Swamp Tree | |
|
 |
Swamp Tree 3 (tallest) | 9x9 | no | no* (the majority can be placed on tile, but a single square of the 81 units in the 9x9 parameters cannot) | Swamp Tree | |
 |
 |
Wide Swamp Tree | 8x8 | no | yes | Swamp Tree - Wide |
|
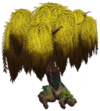 |
img | Swamp Willow Tree | 6x6 | no | yes | Willow - Swamp | |
 |
 |
Frozen Willow Tree | 5x5 | no | no | Willow - Frozen |
|
 |
img | Large Plaza Tree | 6x6 | yes, northwards only[2] | no | Plaza Tree - Large | |
 |
img | Plaza Tree | 2x2 | yes | yes | Plaza Tree |
|
| img | Large Plaza Hedge | 6x19 | no | yes | Hedge | ||
| img | Small Plaza Hedge | 5x14 | no | yes | Hedge |
| |
 |
 |
Wide Baobab Tree 1 (tall, with branch) | 4x4 | yes, to the north and east[1] | no | Baobab Tree | |
|
 |
Wide Baobab Tree 2 (short) | 4x4 | yes, to the north and east[1] | no | Baobab Tree |
|
 |
 |
Tall Acacia Tree 1 (shortest) | 2x2 | yes | no | Acacia Tree | |
|
 |
Tall Acacia Tree 2 (tallest) | 2x2 | yes | no | Acacia Tree | |
|
 |
Tall Acacia Tree 3 (widest) | 5x5 | yes, to the north, and a single southwest[3] | no | Acacia Tree |
|
 |
 |
Moss-Covered Tree 1 (short) | 5x5 | yes | no | Moss-Covered Tree | |
|
 |
Moss-Covered Tree 2 (tall) | 8x8 | no | no | Moss-Covered Tree |
|
 |
img | Meager Tree | 6x6 | yes, northwards only[2] | no | Lush/Meager Tree | Biome TBD |
 |
 |
Lush Tree | 3x5 | yes | no | Lush/Meager Tree | Biome TBD |
 |
 |
Lush Dragon Tree 1 (shorter, 1 trunk hole) | 3x3 | yes | no | Dragon Tree | |
|
 |
Lush Dragon Tree 2 (taller, 2 trunk holes, branches more visible and upward-extending) | 3x3 | yes | no | Dragon Tree | |
 |
 |
Sinister Tree | 6x6 | yes, northwards only[2] | no | Sinister Tree | |
 |
img | Fallen Trunk | 4x2 | no | yes | Trunk - Fallen | Biome TBD |
 |
 |
Tree Trunk 1 | 4x4 | no | no | Trunk | Biome TBD |
|
 |
Tree Trunk 2 (medium height, slender) | 2x2 | no | no | Trunk | Biome TBD |
|
 |
Tree Trunk 3 (tallest, with leafy branch) | 4x5 | no | no | Trunk | Biome TBD
|
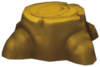 |
img | Squat Tree Stump | 2x2 | no | yes | Stump - Squat | Biome TBD
|
 |
 |
Dead Pine Tree 1 (tall, with small leaf) | 4x4 | yes, to the north and east[1] | no | Dead Pine Tree | Biome TBD |
|
 |
Dead Pine Tree 2 (short) | 3x3 | yes | no | Dead Pine Tree | Biome TBD |
 |
 |
Three-Limbed Tree 1 (tall) | 3x4 | yes | no | Three-Limbed Tree | Biome TBD |
|
 |
Three-Limbed Tree 2 (short) | 4x4 | yes | no | Three-Limbed Tree | Biome TBD
|
 |
 |
Frozen Twisted Dead Tree 1 (multi-tiered, looks closest to thumbnail, but no frost) | 5x6 | yes, to the north and east[1] | no | Twisted Dead Tree | |
|
 |
Frozen Twisted Dead Tree 2 (normalish red tree variant) | 3x3 | yes | no | Twisted Dead Tree | |
|
 |
Frozen Twisted Dead Tree 3 (spiky variant) | 5x6 | yes, to the north, east, and a single southwest[4] | no | Twisted Dead Tree |
|
- ↑ 1.00 1.01 1.02 1.03 1.04 1.05 1.06 1.07 1.08 1.09 1.10 1.11 This tree only drops wood towards the north and east. If the entire northern and eastern edges are blocked, the tree will not produce wood.
- ↑ 2.0 2.1 2.2 2.3 2.4 2.5 This tree only drops wood towards the north. If the entire northern edge is blocked, the tree will not produce wood.
- ↑ This tree drops wood towards the north, and in a single spot on its southwest corner.
- ↑ This tree drops wood towards the north, east, and in a single spot on its southwest corner.