Sticks: Difference between revisions
Jump to navigation
Jump to search
(→Trees: previous edit added wood change to wrong row, fixing) |
(Add surrounding stub article content) |
||
| Line 1: | Line 1: | ||
=== | {{stub|Staging content - WIP}} | ||
'''Wood''' refers to .... | |||
Explanation that it doesn't matter what trees are planted in the Biome... | |||
Explanation of times/rates of wood drops? with references. | |||
==Wood Types by Biome== | |||
{| class="wikitable sortable" | |||
|- | |||
! Biome || Softwood || Hardwood || Dry Wood || Dark Wood | |||
|- | |||
| style="" | {{name|Plaza}} || 15 || 0 || 0 || 0 | |||
|- | |||
| style="" | {{name|Peaceful Meadow}} || 15 || 0 || 0 || 0 | |||
|- | |||
| style="" | {{name|Dazzle Beach}} || 0 || 0 || 0 || 0 | |||
|- | |||
| style="" | {{name|Forest of Valor}} || 10? || 10? || 0 || 0 | |||
|- | |||
| style="" | {{name|Glade of Trust}} || 8 || 12 || 0 || 0 | |||
|- | |||
| style="" | {{name|Sunlit Plateau}} || 0 || 12 || 8 || 0 | |||
|- | |||
| style="" | {{name|Frosted Heights}} || 0 || 10 || 10 || 0 | |||
|- | |||
| style="" | {{name|Forgotten Lands}} || 0 || 0 || 12 || 8 | |||
|} | |||
==Tree Variants== | |||
:''Main article: [[Landscaping]]'' | |||
TODO... | |||
<!-- Table of trees, which ones produce wood, and to which directions--> | |||
{| class="wikitable sortable" id='recipe-table' | {| class="wikitable sortable" id='recipe-table' | ||
| Line 342: | Line 374: | ||
| [[File:Frozen Twisted Dead Tree 3.jpg|center|100px|link=File:Frozen Twisted Dead Tree 3.jpg]] || [[Frozen Twisted Dead Tree]] 3 (spiky variant) || 5x6 || yes, to the north, east, and a single southwest<ref name="north, east, single southwest">This tree drops wood towards the north, east, and in a single spot on its southwest corner.</ref> || no || Twisted Dead Tree || {{name|Forgotten Lands}} | | [[File:Frozen Twisted Dead Tree 3.jpg|center|100px|link=File:Frozen Twisted Dead Tree 3.jpg]] || [[Frozen Twisted Dead Tree]] 3 (spiky variant) || 5x6 || yes, to the north, east, and a single southwest<ref name="north, east, single southwest">This tree drops wood towards the north, east, and in a single spot on its southwest corner.</ref> || no || Twisted Dead Tree || {{name|Forgotten Lands}} | ||
|} | |||
==References== | |||
<references/> | |||
==History== | |||
{{history|1.0|Added}} | |||
{{history|1.2|Wood Spawning behaviors changed<!-- TODO: details - previously all biomes would spawn all wood types unlocked before it, i.e. Trees no longer spawn [[Softwood]] or [[Hardwood]]-->}} | |||
<!--__NOTOC__--> | |||
Revision as of 16:30, 13 June 2023
| Article Stub
This article is marked as a stub for the following reason:
|
Wood refers to ....
Explanation that it doesn't matter what trees are planted in the Biome...
Explanation of times/rates of wood drops? with references.
Wood Types by Biome
| Biome | Softwood | Hardwood | Dry Wood | Dark Wood |
|---|---|---|---|---|
| 15 | 0 | 0 | 0 | |
| 15 | 0 | 0 | 0 | |
| 0 | 0 | 0 | 0 | |
| 10? | 10? | 0 | 0 | |
| 8 | 12 | 0 | 0 | |
| 0 | 12 | 8 | 0 | |
| 0 | 10 | 10 | 0 | |
| 0 | 0 | 12 | 8 |
Tree Variants
- Main article: Landscaping
TODO...
| Landscaping Menu Image |
Image | Name | Size | Produces wood? | Can be placed on tile? | Landscaping Subtype | Biome Unlock
|
|---|---|---|---|---|---|---|---|
 |
 |
Bare-Limbed Tree 1 (medium height, medium dark wood) | 3x3 | yes | no | Bare-Limbed Tree | Biome TBD |
|
 |
Bare-Limbed Tree 2 (tall, dark wood) | 3x3 | yes | no | Bare-Limbed Tree | Biome TBD
|
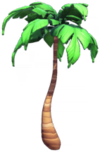 |
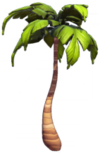
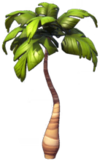
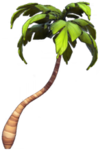
img | Bent Palm Tree 1 (shortest) (Alternate Colors: Bent Sunlit Plateau Palm Tree) |
2x2 | yes | yes | Palm Tree - Bent | |
 |
img | Bent Sunlit Plateau Palm Tree (Alternate Colors: Bent Palm Tree 1 (shortest)) |
2x2 | yes | yes | Palm Tree - Bent | |
| img | Bent Palm Tree 2 (medium height) (Alternate Colors: Tall Sunlit Plateau Palm Tree) |
3x3 | yes | no | Palm Tree - Tall | ||
 |
img | Tall Sunlit Plateau Palm Tree (Alternate Colors: Bent Palm Tree 2 (medium height)) |
3x3 | yes | no | Palm Tree - Tall | |
| img | Bent Palm Tree 3 (tallest) (Alternate Colors: Curved Sunlit Plateau Palm Tree) |
2x2 | yes | yes | Palm Tree - Curved | ||
 |
img | Curved Sunlit Plateau Palm Tree (Alternate Colors: Bent Palm Tree 3 (tallest)) |
2x2 | yes | yes | Palm Tree - Curved | |
 |
img | Round Palm Tree (Alternate Colors: Round Sunlit Plateau Palm Tree) |
4x4 | yes, to the north and east[1] | no | Palm Tree - Round | |
 |
img | Round Sunlit Plateau Palm Tree (Alternate Colors: Round Palm Tree) |
4x4 | yes, to the north and east[1] | no | Palm Tree - Round | |
 |
img | Dead Bush | 2x2 | no | no | Dead Bush | Biome TBD |
 |
img | Frozen Dead Bush | 2x2 | no | no | Dead Bush | Biome TBD |
 |
img | Scraggly Bush | 2x2 | no | no | Dead Bush | Biome TBD |
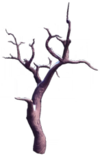 |
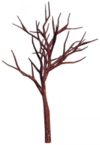
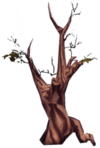
img | Snowy Dead Tree 1 (tall, sort of pronged) | 3x3 | yes | no | Dead Tree | |
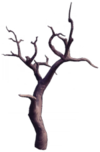 |
 |
Dead Forgotten Lands Tree 1 (tall, sort of pronged) (Alternate Colors: Snowy Dead Tree 1 (tall, sort of pronged)) |
3x3 | yes | no | Dead Tree | |
|
img | Snowy Dead Tree 2 (shorter, pronged, but more spindly) (Alternate Colors: Dead Forgotten Lands Tree 2 (shorter, pronged, but more spindly)) |
3x3 | yes | no | Dead Tree | |
|
 |
Dead Forgotten Lands Tree 2 (shorter, pronged, but more spindly) | 3x3 | yes | no | Dead Tree |
|
 |
 |
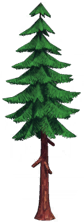
Fir 1 (short) (Alternate Colors: High Snowy Fir 1 (short)) |
3x3 | yes | no | Fir | |
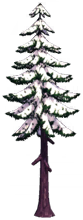 |
 |
High Snowy Fir 1 (short) (Alternate Colors: Fir 1 (short)) |
3x3 | yes | no | Fir |
|
|
 |
Fir 2 (medium height) (Alternate Colors: Slender Sinister Fir 3 (medium height)) |
3x3 | yes | no | Fir | |
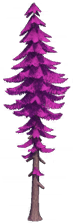 |
 |
Slender Sinister Fir 3 (medium height) (Alternate Colors: Fir 2 (medium height)) |
3x3 | yes | no | Fir |
|
|
 |
Fir 3 (tall) (Alternate Colors: High Snowy Fir 2 (tall) and Slender Sinister Fir 2 (tall)) |
3x3 | yes | no | Fir | |
|
 |
High Snowy Fir 2 (tall) (Alternate Colors: Fir 3 (tall) and Slender Sinister Fir 2 (tall)) |
3x3 | yes | no | Fir | |
|
 |
Slender Sinister Fir 2 (tall) (Alternate Colors: Fir 3 (tall) and High Snowy Fir 2 (tall)) |
3x3 | yes | yes | Fir |
|
|
 |
High Snowy Fir 3 (very tall) (Alternate Colors: Slender Sinister Fir 1 (very tall)) |
3x3 | yes | no | Fir | |
|
 |
Slender Sinister Fir 1 (very tall) (Alternate Colors: High Snowy Fir 3 (very tall)) |
3x3 | yes | no | Fir |
|
 |
img | Lush Sinister Fir | 4x4 | yes, to the north and east[1] | no | Fir - Lush |
|
 |
 |
Short Japanese Maple 1 (medium-tall) (Alternate Colors: Small Oak 1 (medium-tall)) |
3x3 | yes | no | Oak/Maple | Biome TBD |
 |
 |
Small Oak 1 (medium-tall) (Alternate Colors: Short Japanese Maple 1 (medium-tall)) |
3x3 | yes | no | Oak/Maple | Biome TBD |
|
 |
Short Japanese Maple 2 (short) | 1x1 | yes | yes | Oak/Maple | Biome TBD
|
|
 |
Short Japanese Maple 3 (tallest) (Alternate Colors: Small Oak 3 (tallest)) |
4x4 | yes, to the north and east[1] | no | Oak/Maple | Biome TBD |
|
 |
Small Oak 3 (tallest) (Alternate Colors: Short Japanese Maple 3 (tallest)) |
3x3 | yes | no | Oak/Maple | Biome TBD
|
|
 |
Small Oak 2 (shortest) | 3x3 | yes | no | Oak/Maple | Biome TBD
|
 |
img | Simple Maple 1 (slender, short, upright) | 3x3 | yes | no | Maple Tree | Biome TBD |
 |
img | Tall Black Maple 1 (slender, short, upright) | 3x3 | yes | no | Maple Tree | Biome TBD |
 |
img | Tall Maple 1 (slender, short, upright) | 3x3 | yes | no | Maple Tree | Biome TBD
|
| img | Simple Maple 2 (slender, tall, curved) | 5x5 | yes, northwards only[2] | no | Maple Tree | Biome TBD | |
| img | Tall Black Maple 2 (slender, tall, curved) | 5x5 | yes, northwards only[2] | no | Maple Tree | Biome TBD | |
| img | Tall Maple 2 (slender, tall, curved) | 3x3 | yes | yes | Maple Tree | Biome TBD
| |
| img | Simple Maple 3 (normal thickness, tall, upright) | 4x4 | yes | no | Maple Tree | Biome TBD | |
| img | Tall Black Maple 3 (normal thickness, tall, upright) | 4x4 | yes, to the north and east[1] | no | Maple Tree | Biome TBD | |
| img | Tall Maple 3 (normal thickness, tall, upright) | 4x4 | yes, to the north and east[1] | no | Maple Tree | Biome TBD
| |
| img | Tall Black Maple 4 (slender, short, curved) (Simple Maple and Tall Maple do not have this variant) | 4x4 | yes, to the north and east[1] | no | Maple Tree | Biome TBD
| |
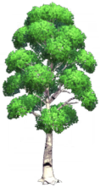 |
img | Light Birch Tree 1 (medium-tall, normal thickness, upright) (has Tall Birch Tree variant counterpart) |
3x3 | yes | yes | Birch Tree | Biome TBD |
 |
 |
Tall Birch Tree 1 (medium-tall, normal thickness, upright) (has Light Birch Tree variant counterpart) |
3x3 | yes | no | Birch Tree | Biome TBD |
|
 |
Light Birch Tree 2 (medium height, slender, upright) | 3x3 | yes | yes | Birch Tree | Biome TBD |
|
 |
Light Birch Tree 3 (medium-short, slender, slightly curved) | 3x3 | yes | yes | Birch Tree | Biome TBD |
|
 |
Light Birch Tree 4 (short, slender, upright) | 4x4 | yes, to the north and east[1] | yes | Birch Tree | Biome TBD |
|
 |
Light Birch Tree 5 (tall, dual trunk) (Alternate Colors: Tall Birch Tree 3 (tall, dual trunk)) |
4x6 | yes | yes | Birch Tree | Biome TBD |
|
 |
Tall Birch Tree 3 (tall, dual trunk) (Alternate Colors: Light Birch Tree 5 (tall, dual trunk)) |
3x5 | yes | no | Birch Tree | Biome TBD |
|
 |
Tall Birch Tree 2 (tall, slender, upright) | 4x4 | yes, to the north and east[1] | no | Birch Tree | Biome TBD
|
 |
 |
Swamp Tree 1 (shortest) | 6x6 | yes, northwards only[2] | yes | Swamp Tree | |
|
 |
Swamp Tree 2 (medium height, flatter canopy top) | 7x7 | no | yes | Swamp Tree | |
|
 |
Swamp Tree 3 (tallest) | 9x9 | no | no* (the majority can be placed on tile, but a single square of the 81 units in the 9x9 parameters cannot) | Swamp Tree | |
 |
 |
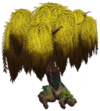
Wide Swamp Tree | 8x8 | no | yes | Swamp Tree - Wide |
|
 |
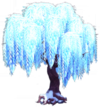
img | Swamp Willow Tree | 6x6 | no | yes | Willow - Swamp | |
 |
 |
Frozen Willow Tree | 5x5 | no | no | Willow - Frozen |
|
 |
img | Large Plaza Tree | 6x6 | yes, northwards only[2] | no | Plaza Tree - Large | |
 |
img | Plaza Tree | 2x2 | yes | yes | Plaza Tree |
|
| img | Large Plaza Hedge | 6x19 | no | yes | Hedge | ||
| img | Small Plaza Hedge | 5x14 | no | yes | Hedge |
| |
 |
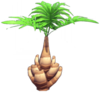
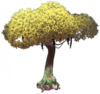
 |
Wide Baobab Tree 1 (tall, with branch) | 4x4 | yes, to the north and east[1] | no | Baobab Tree | |
|
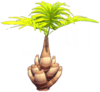
 |
Wide Baobab Tree 2 (short) | 4x4 | yes, to the north and east[1] | no | Baobab Tree |
|
 |
 |
Tall Acacia Tree 1 (shortest) | 2x2 | yes | no | Acacia Tree | |
|
 |
Tall Acacia Tree 2 (tallest) | 2x2 | yes | no | Acacia Tree | |
|
 |
Tall Acacia Tree 3 (widest) | 5x5 | yes, to the north, and a single southwest[3] | no | Acacia Tree |
|
 |
 |
Moss-Covered Tree 1 (short) | 5x5 | yes | no | Moss-Covered Tree | |
|
 |
Moss-Covered Tree 2 (tall) | 8x8 | no | no | Moss-Covered Tree |
|
 |
img | Meager Tree | 6x6 | yes, northwards only[2] | no | Lush/Meager Tree | Biome TBD |
 |
 |
Lush Tree | 3x5 | yes | no | Lush/Meager Tree | Biome TBD |
 |
 |
Lush Dragon Tree 1 (shorter, 1 trunk hole) | 3x3 | yes | no | Dragon Tree | |
|
 |
Lush Dragon Tree 2 (taller, 2 trunk holes, branches more visible and upward-extending) | 3x3 | yes | no | Dragon Tree | |
 |
 |
Sinister Tree | 6x6 | yes, northwards only[2] | no | Sinister Tree | |
 |
img | Fallen Trunk | 4x2 | no | yes | Trunk - Fallen | Biome TBD |
 |
 |
Tree Trunk 1 | 4x4 | no | no | Trunk | Biome TBD |
|
 |
Tree Trunk 2 (medium height, slender) | 2x2 | no | no | Trunk | Biome TBD |
|
 |
Tree Trunk 3 (tallest, with leafy branch) | 4x5 | no | no | Trunk | Biome TBD
|
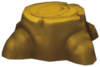 |
img | Squat Tree Stump | 2x2 | no | yes | Stump - Squat | Biome TBD
|
 |
 |
Dead Pine Tree 1 (tall, with small leaf) | 4x4 | yes, to the north and east[1] | no | Dead Pine Tree | Biome TBD |
|
 |
Dead Pine Tree 2 (short) | 3x3 | yes | no | Dead Pine Tree | Biome TBD |
 |
 |
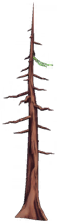
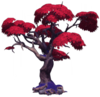
Three-Limbed Tree 1 (tall) | 3x4 | yes | no | Three-Limbed Tree | Biome TBD |
|
 |
Three-Limbed Tree 2 (short) | 4x4 | yes | no | Three-Limbed Tree | Biome TBD
|
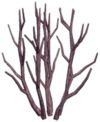
 |
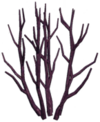
 |
Frozen Twisted Dead Tree 1 (multi-tiered, looks closest to thumbnail, but no frost) | 5x6 | yes, to the north and east[1] | no | Twisted Dead Tree | |
|
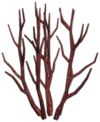
 |
Frozen Twisted Dead Tree 2 (normalish red tree variant) | 3x3 | yes | no | Twisted Dead Tree | |
|
 |
Frozen Twisted Dead Tree 3 (spiky variant) | 5x6 | yes, to the north, east, and a single southwest[4] | no | Twisted Dead Tree |
References
- ↑ 1.00 1.01 1.02 1.03 1.04 1.05 1.06 1.07 1.08 1.09 1.10 1.11 1.12 This tree only drops wood towards the north and east. If the entire northern and eastern edges are blocked, the tree will not produce wood.
- ↑ 2.0 2.1 2.2 2.3 2.4 2.5 This tree only drops wood towards the north. If the entire northern edge is blocked, the tree will not produce wood.
- ↑ This tree drops wood towards the north, and in a single spot on its southwest corner.
- ↑ This tree drops wood towards the north, east, and in a single spot on its southwest corner.
History