Sticks: Difference between revisions
(→Trees: Short Japanese Maple 3 only drops wood to north, east, not around) |
|||
| (22 intermediate revisions by 2 users not shown) | |||
| Line 1: | Line 1: | ||
=== | {{Infobox | ||
|image=Softwood.png | |||
|width= | |||
|description= | |||
|type=Foraging | |||
|category=Crafting Material | |||
|buyprice=<!--5, 10, 25--> | |||
|sellprice=<!--5, 10, 25, 50--> | |||
|found= | |||
{{inlineIcon|Foraging|size=20|link=Foraging}}<br> | |||
:{{inlineIcon|Everywhere|iconOnly}} All Biomes<br>except {{name|Dazzle Beach}} | |||
{{inlineIcon|Kristoff's Stall|size=20|link=Kristoff's Stall}}<br> | |||
|size=2x2 | |||
|placement=surfaces | |||
|stackMax=99 | |||
}} {{cleanup|A screenshot of the different types of wood side by side}} | |||
{{TOC Right}} | |||
'''Sticks''' refers to piles of wood that can be [[Foraging|foraged]] in Dreamlight Valley.<!--This term is used in the The Fairy Godmother quest [[A Lost Book]]--> | |||
The type of Sticks (i.e. Wood) that spawns is dependent on the Biome, not on the type of [[Landscaping#Trees|Tree]]s present. However, different Trees, and their variants, have different patterns of whether and where they drop Sticks. | |||
{{cleanup|Explanation of times/rates of wood drops? with references.}} | |||
[[Sticks]] are mentioned in one of [[Olaf]]'s [[Daily Discussions#Olaf|Daily Discussion]]<!--[[Olaf#Daily Discussions|Daily Discussion]]--> topics labeled "''How's your day going?''". | |||
==Wood Types== | |||
{| class="wikitable sortable" | |||
|- | |||
! Wood Type || Price || Forage Location || Purchase Location | |||
|- | |||
| style="" | {{name|Softwood|size=50}} | |||
| {{price|5}} | |||
| | |||
{{name|Plaza|15}}<br> | |||
{{name|Peaceful Meadow|15}}<br> | |||
{{name|Forest of Valor|10}}<br> | |||
{{name|Glade of Trust|8}} | |||
| {{inlineIcon|Kristoff's Stall|link=Kristoff's Stall}} (max 20) | |||
|- | |||
| style="" | {{name|Hardwood|size=50}} | |||
| {{price|10}} | |||
| | |||
{{name|Forest of Valor|10}}<br> | |||
{{name|Glade of Trust|12}}<br> | |||
{{name|Sunlit Plateau|12}}<br> | |||
{{name|Frosted Heights|10}}<br> | |||
| {{inlineIcon|Kristoff's Stall|link=Kristoff's Stall}} (max 20) | |||
|- | |||
| style="" | {{name|Dry Wood|size=50}} | |||
| {{price|25}} | |||
| | |||
{{name|Sunlit Plateau|8}}<br> | |||
{{name|Frosted Heights|10}}<br> | |||
{{name|Forgotten Lands|12}}<br> | |||
| {{inlineIcon|Kristoff's Stall|link=Kristoff's Stall}} (max 20) | |||
|- | |||
| style="" | {{name|Dark Wood|size=50}} | |||
| {{price|50}} | |||
| {{name|Forgotten Lands|8}} | |||
| n/a | |||
|} | |||
==Wood Types by Biome== | |||
{| class="wikitable sortable centered" | |||
|- | |||
! Biome || {{name|Softwood}} || {{name|Hardwood}} || {{name|Dry Wood}} || {{name|Dark Wood}} | |||
|- | |||
| style="" | {{name|Plaza}} || 15 || - || - || - | |||
|- | |||
| style="" | {{name|Peaceful Meadow}} || 15 || - || - || - | |||
|- | |||
| style="" | {{name|Dazzle Beach}} || - || - || - || - | |||
|- | |||
| style="" | {{name|Forest of Valor}} || 10 || 10 || - || - | |||
|- | |||
| style="" | {{name|Glade of Trust}} || 8 || 12 || - || - | |||
|- | |||
| style="" | {{name|Sunlit Plateau}} || - || 12 || 8 || - | |||
|- | |||
| style="" | {{name|Frosted Heights}} || - || 10 || 10 || - | |||
|- | |||
| style="" | {{name|Forgotten Lands}} || - || - || 12 || 8 | |||
<!--|- | |||
| style="" | '''Total''' || '''48''' || '''44''' || '''30''' || '''8'''--> | |||
|} | |||
<!-- | |||
Alternate layout: | |||
{| class="wikitable sortable" | |||
|- | |||
! Wood Type | |||
! {{name|Plaza}} | |||
! {{name|Peaceful Meadow}} | |||
! {{name|Dazzle Beach}} | |||
! {{name|Forest of Valor}} | |||
! {{name|Glade of Trust}} | |||
! {{name|Sunlit Plateau}} | |||
! {{name|Frosted Heights}} | |||
! {{name|Forgotten Lands}} | |||
|- | |||
| style="" | {{name|Softwood}} || 0 || 0 || 0 || 0 || 0 || 0 || 0 || 0 | |||
|} | |||
--> | |||
==Tree Variants== | |||
<!--:''Main article: [[Landscaping]]''--> | |||
The below table lists all variants of [[Landscaping#Trees|Tree]]s available in the game. The name listed in the "Name" column is not an official name, but one used by the wiki in order to identify the different variants. | |||
{{cleanup|Screenshot images for all tree variants}} {{cleanup|Verification of which directions trees produce wood, and which trees can double-up in wood drop directions.}} | |||
{| class="wikitable sortable" id='recipe-table' | {| class="wikitable sortable" id='recipe-table' | ||
! Landscaping<br>Menu Image | ! Landscaping<br>Menu Image | ||
| Line 6: | Line 111: | ||
! style="width: 400px;" |Name | ! style="width: 400px;" |Name | ||
! Size | ! Size | ||
! style="width: | ! style="width: 80px;" | Produces wood? | ||
! style="width: | ! style="width: 80px;" | Can be placed on tile? | ||
! Landscaping Subtype | ! class="landscapingSubtype" |Landscaping Subtype | ||
! Biome Unlock | ! Biome Unlock | ||
|- | |- | ||
| [[File:Bare-Limbed Tree.png|center| | | class="menuThumbnail" | [[File:Bare-Limbed Tree.png|center|80px|link=Bare-Limbed Tree]] | ||
| [[File:Bare-Limbed Tree Medium Brown.png|center| | | class="screenshotThumbnail" | [[File:Bare-Limbed Tree Medium Brown.png|center|80px|link=File:Bare-Limbed Tree Medium Brown.png]] | ||
| class="variantName" | [[Bare-Limbed Tree]] 1 (medium height, medium dark wood) | |||
| class="size" | 3x3 | |||
| class="producesWood" | yes | |||
| class="placeOnTile" | no | |||
| class="landscapingSubtype" | Bare-Limbed Tree | |||
| class="biomeUnlock" | Biome TBD | |||
|- | |- | ||
| [[File:Bare-Limbed Tree.png|center| | | class="menuThumbnail" | [[File:Bare-Limbed Tree.png|center|80px|link=Bare-Limbed Tree]] | ||
| [[File:Bare-Limbed Tree Tall Dark.png|center| | | class="screenshotThumbnail" | [[File:Bare-Limbed Tree Tall Dark.png|center|80px|link=File:Bare-Limbed Tree Tall Dark.png]] | ||
| class="variantName" | [[Bare-Limbed Tree]] 2 (tall, dark wood) | |||
| class="size" | 3x3 | |||
| class="producesWood" | yes | |||
| class="placeOnTile" | no | |||
| class="landscapingSubtype" | Bare-Limbed Tree | |||
| class="biomeUnlock" | Biome TBD | |||
|- | |- | ||
| [[File:Bent Palm Tree.png|center| | | class="menuThumbnail" | [[File:Bent Palm Tree.png|center|80px|link=Bent Palm Tree]] | ||
| img || Bent Palm Tree 1 (shortest) <br> | | class="screenshotThumbnail" | <!--img--> | ||
| class="variantName" | [[Bent Palm Tree]] 1 (shortest) <br>Alternate Colors: [[Bent Sunlit Plateau Palm Tree]] | |||
| class="size" | 2x2 | |||
| class="producesWood" | yes | |||
| class="placeOnTile" | yes | |||
| class="landscapingSubtype" | Palm Tree - Bent | |||
| class="biomeUnlock" | {{name|Dazzle Beach}} | |||
|- | |- | ||
| [[File:Bent Sunlit Plateau Palm Tree.png|center| | | class="menuThumbnail" | [[File:Bent Sunlit Plateau Palm Tree.png|center|80px|link=Bent Sunlit Plateau Palm Tree]] | ||
| img || Bent Sunlit Plateau Palm Tree <br> | | class="screenshotThumbnail" | <!--img--> | ||
| class="variantName" | [[Bent Sunlit Plateau Palm Tree]] <br>Alternate Colors: [[Bent Palm Tree]] 1 (shortest) | |||
| class="size" | 2x2 | |||
| class="producesWood" | yes | |||
| class="placeOnTile" | yes | |||
| class="landscapingSubtype" | Palm Tree - Bent | |||
| class="biomeUnlock" | {{name|Sunlit Plateau}} | |||
|- | |- | ||
| | | class="menuThumbnail" | [[File:Bent Palm Tree.png|center|80px|link=Bent Palm Tree]] | ||
| img || Bent Palm Tree 2 (medium height) <br> | | class="screenshotThumbnail" | <!--img--> | ||
| class="variantName" | [[Bent Palm Tree]] 2 (medium height) <br>Alternate Colors: [[Tall Sunlit Plateau Palm Tree]] | |||
| class="size" | 3x3 | |||
| class="producesWood" | yes | |||
| class="placeOnTile" | no | |||
| class="landscapingSubtype" | Palm Tree - Tall | |||
| class="biomeUnlock" | {{name|Dazzle Beach}} | |||
|- | |- | ||
| [[File:Tall Sunlit Plateau Palm Tree.png|center| | | class="menuThumbnail" | [[File:Tall Sunlit Plateau Palm Tree.png|center|80px|link=Tall Sunlit Plateau Palm Tree]] | ||
| img || Tall Sunlit Plateau Palm Tree <br> | | class="screenshotThumbnail" | <!--img--> | ||
| class="variantName" | [[Tall Sunlit Plateau Palm Tree]] <br>Alternate Colors: [[Bent Palm Tree]] 2 (medium height) | |||
| class="size" | 3x3 | |||
| class="producesWood" | yes | |||
| class="placeOnTile" | no | |||
| class="landscapingSubtype" | Palm Tree - Tall | |||
| class="biomeUnlock" | {{name|Sunlit Plateau}} | |||
|- | |- | ||
| | | class="menuThumbnail" | [[File:Bent Palm Tree.png|center|80px|link=Bent Palm Tree]] | ||
| img || Bent Palm Tree 3 (tallest) <br> | | class="screenshotThumbnail" | <!--img--> | ||
| class="variantName" | [[Bent Palm Tree]] 3 (tallest) <br>Alternate Colors: [[Curved Sunlit Plateau Palm Tree]] | |||
| class="size" | 2x2 | |||
| class="producesWood" | yes | |||
| class="placeOnTile" | yes | |||
| class="landscapingSubtype" | Palm Tree - Curved | |||
| class="biomeUnlock" | {{name|Dazzle Beach}} | |||
|- | |- | ||
| [[File:Curved Sunlit Plateau Palm Tree.png|center| | | class="menuThumbnail" | [[File:Curved Sunlit Plateau Palm Tree.png|center|80px|link=Curved Sunlit Plateau Palm Tree]] | ||
| img || Curved Sunlit Plateau Palm Tree <br> | | class="screenshotThumbnail" | <!--img--> | ||
| class="variantName" | [[Curved Sunlit Plateau Palm Tree]] <br>Alternate Colors: [[Bent Palm Tree]] 3 (tallest) | |||
| class="size" | 2x2 | |||
| class="producesWood" | yes | |||
| class="placeOnTile" | yes | |||
| class="landscapingSubtype" | Palm Tree - Curved | |||
| class="biomeUnlock" | {{name|Sunlit Plateau}} | |||
|- | |- | ||
| [[File:Round Palm Tree.png|center| | | class="menuThumbnail" | [[File:Round Palm Tree.png|center|80px|link=Round Palm Tree]] | ||
| img || [[Round Palm Tree]] <br> | | class="screenshotThumbnail" | <!--img--> | ||
| class="variantName" | [[Round Palm Tree]] <br>Alternate Colors: [[Round Sunlit Plateau Palm Tree]] | |||
| class="size" | 4x4 | |||
| class="producesWood" | yes, to the north and east<ref name="north, east"></ref> | |||
| class="placeOnTile" | no | |||
| class="landscapingSubtype" | Palm Tree - Round | |||
| class="biomeUnlock" | {{name|Dazzle Beach}} | |||
|- | |- | ||
| [[File:Round Sunlit Plateau Palm Tree.png|center| | | class="menuThumbnail" | [[File:Round Sunlit Plateau Palm Tree.png|center|80px|link=Round Sunlit Plateau Palm Tree]] | ||
| img || [[Round Sunlit Plateau Palm Tree]] <br> | | class="screenshotThumbnail" | <!--img--> | ||
| class="variantName" | [[Round Sunlit Plateau Palm Tree]] <br>Alternate Colors: [[Round Palm Tree]] | |||
| class="size" | 4x4 | |||
| class="producesWood" | yes, to the north and east<ref name="north, east"></ref> | |||
| class="placeOnTile" | no | |||
| class="landscapingSubtype" | Palm Tree - Round | |||
| class="biomeUnlock" | {{name|Sunlit Plateau}} | |||
|- | |- | ||
| [[File:Dead Bush.png|center| | | class="menuThumbnail" | [[File:Dead Bush.png|center|80px|link=Dead Bush]] | ||
| img || [[Dead Bush]] || 2x2 || no || no || Dead Bush || Biome TBD | | class="screenshotThumbnail" | <!--img--> | ||
| class="variantName" | [[Dead Bush]] | |||
| class="size" | 2x2 | |||
| class="producesWood" | no | |||
| class="placeOnTile" | no | |||
| class="landscapingSubtype" | Dead Bush | |||
| class="biomeUnlock" | Biome TBD | |||
|- | |- | ||
| [[File:Frozen Dead Bush.png|center| | | class="menuThumbnail" | [[File:Frozen Dead Bush.png|center|80px|link=Frozen Dead Bush]] | ||
| img || [[Frozen Dead Bush]] || 2x2 || no || no || Dead Bush || Biome TBD | | class="screenshotThumbnail" | <!--img--> | ||
| class="variantName" | [[Frozen Dead Bush]] | |||
| class="size" | 2x2 | |||
| class="producesWood" | no | |||
| class="placeOnTile" | no | |||
| class="landscapingSubtype" | Dead Bush | |||
| class="biomeUnlock" | Biome TBD | |||
|- | |- | ||
| [[File:Scraggly Bush.png|center| | | class="menuThumbnail" | [[File:Scraggly Bush.png|center|80px|link=Scraggly Bush]] | ||
| img || [[Scraggly Bush]] || 2x2 || no || no || Dead Bush || Biome TBD | | class="screenshotThumbnail" | <!--img--> | ||
| class="variantName" | [[Scraggly Bush]] | |||
| class="size" | 2x2 | |||
| class="producesWood" | no | |||
| class="placeOnTile" | no | |||
| class="landscapingSubtype" | Dead Bush | |||
| class="biomeUnlock" | Biome TBD | |||
|- | |- | ||
| [[File:Snowy Dead Tree.png|center| | | class="menuThumbnail" | [[File:Snowy Dead Tree.png|center|80px|link=Snowy Dead Tree]] | ||
| img || [[Snowy Dead Tree]] 1 (tall, sort of pronged)|| 3x3 || yes || no || Dead Tree || {{name|Frosted Heights}} | | class="screenshotThumbnail" | <!--img--> | ||
| class="variantName" | [[Snowy Dead Tree]] 1 (tall, sort of pronged) | |||
| class="size" | 3x3 | |||
| class="producesWood" | yes | |||
| class="placeOnTile" | no | |||
| class="landscapingSubtype" | Dead Tree | |||
| class="biomeUnlock" | {{name|Frosted Heights}} | |||
|- | |- | ||
| [[File:Dead Forgotten Lands Tree.png|center| | | class="menuThumbnail" | [[File:Dead Forgotten Lands Tree.png|center|80px|link=Dead Forgotten Lands Tree]] | ||
| [[File:Dead Forgotten Lands Tree Tall.png|center| | | class="screenshotThumbnail" | [[File:Dead Forgotten Lands Tree Tall.png|center|80px|link=File:Dead Forgotten Lands Tree Tall.png]] | ||
| class="variantName" | [[Dead Forgotten Lands Tree]] 1 (tall, sort of pronged) <br>Alternate Colors: [[Snowy Dead Tree]] 1 (tall, sort of pronged) | |||
| class="size" | 3x3 | |||
| class="producesWood" | yes | |||
| class="placeOnTile" | no | |||
| class="landscapingSubtype" | Dead Tree | |||
| class="biomeUnlock" | {{name|Forgotten Lands}} | |||
|- | |- | ||
| [[File:Snowy Dead Tree.png|center| | | class="menuThumbnail" | [[File:Snowy Dead Tree.png|center|80px|link=Snowy Dead Tree]] | ||
| img || [[Snowy Dead Tree]] 2 (shorter, pronged, but more spindly)<br> | | class="screenshotThumbnail" | <!--img--> | ||
| class="variantName" | [[Snowy Dead Tree]] 2 (shorter, pronged, but more spindly)<br>Alternate Colors: [[Dead Forgotten Lands Tree]] 2 (shorter, pronged, but more spindly) | |||
| class="size" | 3x3 | |||
| class="producesWood" | yes | |||
| class="placeOnTile" | no | |||
| class="landscapingSubtype" | Dead Tree | |||
| class="biomeUnlock" | {{name|Frosted Heights}} | |||
|- | |- | ||
| [[File:Dead Forgotten Lands Tree.png|center| | | class="menuThumbnail" | [[File:Dead Forgotten Lands Tree.png|center|80px|link=Dead Forgotten Lands Tree]] | ||
| [[File:Dead Forgotten Lands Tree Short.png|center| | | class="screenshotThumbnail" | [[File:Dead Forgotten Lands Tree Short.png|center|80px|link=File:Dead Forgotten Lands Tree Short.png]] | ||
| class="variantName" | [[Dead Forgotten Lands Tree]] 2 (shorter, pronged, but more spindly) | |||
| class="size" | 3x3 | |||
| class="producesWood" | yes | |||
| class="placeOnTile" | no | |||
| class="landscapingSubtype" | Dead Tree | |||
| class="biomeUnlock" | {{name|Forgotten Lands}} | |||
|- | |- | ||
| [[File:Fir.png|center| | | class="menuThumbnail" | [[File:Fir.png|center|80px|link=Fir]] | ||
| [[File:Fir Short.png|center| | | class="screenshotThumbnail" | [[File:Fir Short.png|center|80px|link=File:Fir Short.png]] | ||
| class="variantName" | [[Fir]] 1 (short) <br>Alternate Colors: [[High Snowy Fir]] 1 (short) | |||
| class="size" | 3x3 | |||
| class="producesWood" | yes | |||
| class="placeOnTile" | no | |||
| class="landscapingSubtype" | Fir | |||
| class="biomeUnlock" | {{name|Forest of Valor}} | |||
|- | |- | ||
| [[File:High Snowy Fir.png|center| | | class="menuThumbnail" | [[File:High Snowy Fir.png|center|80px|link=High Snowy Fir]] | ||
| [[File:High Snowy Fir Short.png|center| | | class="screenshotThumbnail" | [[File:High Snowy Fir Short.png|center|80px|link=File:High Snowy Fir Short.png]] | ||
| class="variantName" | [[High Snowy Fir]] 1 (short) <br>Alternate Colors: [[Fir]] 1 (short) | |||
| class="size" | 3x3 | |||
| class="producesWood" | yes | |||
| class="placeOnTile" | no | |||
| class="landscapingSubtype" | Fir | |||
| class="biomeUnlock" | {{name|Frosted Heights}} | |||
|- | |- | ||
| [[File:Fir.png|center| | | class="menuThumbnail" | [[File:Fir.png|center|80px|link=Fir]] | ||
| [[File:Fir Medium.png|center| | | class="screenshotThumbnail" | [[File:Fir Medium.png|center|80px|link=File:Fir Medium.png]] | ||
| class="variantName" | [[Fir]] 2 (medium height) <br>Alternate Colors: [[Slender Sinister Fir]] 3 (medium height) | |||
| class="size" | 3x3 | |||
| class="producesWood" | yes | |||
| class="placeOnTile" | no | |||
| class="landscapingSubtype" | Fir | |||
| class="biomeUnlock" | {{name|Forest of Valor}} | |||
|- | |- | ||
| [[File:Slender Sinister Fir.png|center| | | class="menuThumbnail" | [[File:Slender Sinister Fir.png|center|80px|link=Slender Sinister Fir]] | ||
| [[File:Slender Sinister Fir Medium.png|center| | | class="screenshotThumbnail" | [[File:Slender Sinister Fir Medium.png|center|80px|link=File:Slender Sinister Fir Medium.png]] | ||
| class="variantName" | [[Slender Sinister Fir]] 3 (medium height) <br>Alternate Colors: [[Fir]] 2 (medium height) | |||
| class="size" | 3x3 | |||
| class="producesWood" | yes | |||
| class="placeOnTile" | no | |||
| class="landscapingSubtype" | Fir | |||
| class="biomeUnlock" | {{name|Forgotten Lands}} | |||
|- | |- | ||
| [[File:Fir.png|center| | | class="menuThumbnail" | [[File:Fir.png|center|80px|link=Fir]] | ||
| [[File:Fir Tall.png|center| | | class="screenshotThumbnail" | [[File:Fir Tall.png|center|80px|link=File:Fir Tall.png]] | ||
| class="variantName" | [[Fir]] 3 (tall) <br>Alternate Colors: [[High Snowy Fir]] 2 (tall) and [[Slender Sinister Fir]] 2 (tall) | |||
| class="size" | 3x3 | |||
| class="producesWood" | yes | |||
| class="placeOnTile" | no | |||
| class="landscapingSubtype" | Fir | |||
| class="biomeUnlock" | {{name|Forest of Valor}} | |||
|- | |- | ||
| [[File:High Snowy Fir.png|center| | | class="menuThumbnail" | [[File:High Snowy Fir.png|center|80px|link=High Snowy Fir]] | ||
| [[File:High Snowy Fir Tall.png|center| | | class="screenshotThumbnail" | [[File:High Snowy Fir Tall.png|center|80px|link=File:High Snowy Fir Tall.png]] | ||
| class="variantName" | [[High Snowy Fir]] 2 (tall) <br>Alternate Colors: [[Fir]] 3 (tall) and [[Slender Sinister Fir]] 2 (tall) | |||
| class="size" | 3x3 | |||
| class="producesWood" | yes | |||
| class="placeOnTile" | no | |||
| class="landscapingSubtype" | Fir | |||
| class="biomeUnlock" | {{name|Frosted Heights}} | |||
|- | |- | ||
| [[File:Slender Sinister Fir.png|center| | | class="menuThumbnail" | [[File:Slender Sinister Fir.png|center|80px|link=Slender Sinister Fir]] | ||
| [[File:Slender Sinister Fir Tall.png|center| | | class="screenshotThumbnail" | [[File:Slender Sinister Fir Tall.png|center|80px|link=File:Slender Sinister Fir Tall.png]] | ||
| class="variantName" | [[Slender Sinister Fir]] 2 (tall) <br>Alternate Colors: [[Fir]] 3 (tall) and [[High Snowy Fir]] 2 (tall) | |||
| class="size" | 3x3 | |||
| class="producesWood" | yes | |||
| class="placeOnTile" | yes | |||
| class="landscapingSubtype" | Fir | |||
| class="biomeUnlock" | {{name|Forgotten Lands}} | |||
|- | |- | ||
| [[File:High Snowy Fir.png|center| | | class="menuThumbnail" | [[File:High Snowy Fir.png|center|80px|link=High Snowy Fir]] | ||
| [[File:High Snowy Fir Very Tall.png|center| | | class="screenshotThumbnail" | [[File:High Snowy Fir Very Tall.png|center|80px|link=File:High Snowy Fir Very Tall.png]] | ||
| class="variantName" | [[High Snowy Fir]] 3 (very tall) <br>Alternate Colors: [[Slender Sinister Fir]] 1 (very tall) | |||
| class="size" | 3x3 | |||
| class="producesWood" | yes | |||
| class="placeOnTile" | no | |||
| class="landscapingSubtype" | Fir | |||
| class="biomeUnlock" | {{name|Frosted Heights}} | |||
|- | |- | ||
| [[File:Slender Sinister Fir.png|center| | | class="menuThumbnail" | [[File:Slender Sinister Fir.png|center|80px|link=Slender Sinister Fir]] | ||
| [[File:Slender Sinister Fir Very Tall.png|center| | | class="screenshotThumbnail" | [[File:Slender Sinister Fir Very Tall.png|center|80px|link=File:Slender Sinister Fir Very Tall.png]] | ||
| class="variantName" | [[Slender Sinister Fir]] 1 (very tall) <br>Alternate Colors: [[High Snowy Fir]] 3 (very tall) | |||
| class="size" | 3x3 | |||
| class="producesWood" | yes | |||
| class="placeOnTile" | no | |||
| class="landscapingSubtype" | Fir | |||
| class="biomeUnlock" | {{name|Forgotten Lands}} | |||
|- | |- | ||
| [[File:Lush Sinister Fir.png|center| | | class="menuThumbnail" | [[File:Lush Sinister Fir.png|center|80px|link=Lush Sinister Fir]] | ||
| | | class="screenshotThumbnail" | | ||
| class="variantName" | [[Lush Sinister Fir]] | |||
| class="size" | 4x4 | |||
| class="producesWood" | yes, to the north and east<ref name="north, east">This tree only drops wood towards the north and east. If the entire northern and eastern edges are blocked, the tree will not produce wood.</ref> | |||
| class="placeOnTile" | no | |||
| class="landscapingSubtype" | Fir - Lush | |||
| class="biomeUnlock" | {{name|Forgotten Lands}} | |||
|- | |- | ||
| [[File:Short Japanese Maple.png|center| | | class="menuThumbnail" | [[File:Short Japanese Maple.png|center|80px|link=Short Japanese Maple]] | ||
| [[File:Short Japanese Maple Medium.png|center| | | class="screenshotThumbnail" | [[File:Short Japanese Maple Medium.png|center|80px|link=File:Short Japanese Maple Medium.png]] | ||
| class="variantName" | [[Short Japanese Maple]] 1 (medium-tall) <br>Alternate Colors: [[Small Oak]] 1 (medium-tall) | |||
| class="size" | 3x3 | |||
| class="producesWood" | yes | |||
| class="placeOnTile" | no | |||
| class="landscapingSubtype" | Oak/Maple | |||
| class="biomeUnlock" | Biome TBD | |||
|- | |- | ||
| [[File:Small Oak.png|center| | | class="menuThumbnail" | [[File:Small Oak.png|center|80px|link=Small Oak]] | ||
| [[File:Small Oak Medium.png|center| | | class="screenshotThumbnail" | [[File:Small Oak Medium.png|center|80px|link=File:Small Oak Medium.png]] | ||
| class="variantName" | [[Small Oak]] 1 (medium-tall) <br>Alternate Colors: [[Short Japanese Maple]] 1 (medium-tall) | |||
| class="size" | 3x3 | |||
| class="producesWood" | yes | |||
| class="placeOnTile" | no | |||
| class="landscapingSubtype" | Oak/Maple | |||
| class="biomeUnlock" | Biome TBD | |||
|- | |- | ||
| [[File:Short Japanese Maple.png|center| | | class="menuThumbnail" | [[File:Short Japanese Maple.png|center|80px|link=Short Japanese Maple]] | ||
| [[File:Short Japanese Maple Short.png|center| | | class="screenshotThumbnail" | [[File:Short Japanese Maple Short.png|center|80px|link=File:Short Japanese Maple Short.png]] | ||
| class="variantName" | [[Short Japanese Maple]] 2 (short) | |||
| class="size" | 1x1 | |||
| class="producesWood" | yes | |||
| class="placeOnTile" | yes | |||
| class="landscapingSubtype" | Oak/Maple | |||
| class="biomeUnlock" | Biome TBD | |||
|- | |- | ||
| [[File:Short Japanese Maple.png|center| | | class="menuThumbnail" | [[File:Short Japanese Maple.png|center|80px|link=Short Japanese Maple]] | ||
| [[File:Short Japanese Maple Tall.png|center| | | class="screenshotThumbnail" | [[File:Short Japanese Maple Tall.png|center|80px|link=File:Short Japanese Maple Tall.png]] | ||
| class="variantName" | [[Short Japanese Maple]] 3 (tallest) <br>Alternate Colors: [[Small Oak]] 3 (tallest) | |||
| class="size" | 4x4 | |||
| class="producesWood" | yes, to the north and east<ref name="north, east"></ref> | |||
| class="placeOnTile" | no | |||
| class="landscapingSubtype" | Oak/Maple | |||
| class="biomeUnlock" | Biome TBD | |||
|- | |- | ||
| [[File:Small Oak.png|center| | | class="menuThumbnail" | [[File:Small Oak.png|center|80px|link=Small Oak]] | ||
| [[File:Small Oak Tall.png|center| | | class="screenshotThumbnail" | [[File:Small Oak Tall.png|center|80px|link=File:Small Oak Tall.png]] | ||
| class="variantName" | [[Small Oak]] 3 (tallest) <br>Alternate Colors: [[Short Japanese Maple]] 3 (tallest) | |||
| class="size" | 3x3 | |||
| class="producesWood" | yes | |||
| class="placeOnTile" | no | |||
| class="landscapingSubtype" | Oak/Maple | |||
| class="biomeUnlock" | Biome TBD | |||
|- | |- | ||
| [[File:Small Oak.png|center| | | class="menuThumbnail" | [[File:Small Oak.png|center|80px|link=Small Oak]] | ||
| [[File:Small Oak Short.png|center| | | class="screenshotThumbnail" | [[File:Small Oak Short.png|center|80px|link=File:Small Oak Short.png]] | ||
| class="variantName" | [[Small Oak]] 2 (shortest) | |||
| class="size" | 3x3 | |||
| class="producesWood" | yes | |||
| class="placeOnTile" | no | |||
| class="landscapingSubtype" | Oak/Maple | |||
| class="biomeUnlock" | Biome TBD | |||
|- | |- | ||
| [[File:Simple Maple.png|center| | | class="menuThumbnail" | [[File:Simple Maple.png|center|80px|link=Simple Maple]] | ||
| img || Simple Maple 1 (slender, short, upright) || 3x3 || yes || no || Maple Tree || Biome TBD | | class="screenshotThumbnail" | <!--img--> | ||
| class="variantName" | [[Simple Maple]] 1 (slender, short, upright) | |||
| class="size" | 3x3 | |||
| class="producesWood" | yes | |||
| class="placeOnTile" | no | |||
| class="landscapingSubtype" | Maple Tree | |||
| class="biomeUnlock" | Biome TBD | |||
|- | |- | ||
| [[File:Tall Black Maple.png|center| | | class="menuThumbnail" | [[File:Tall Black Maple.png|center|80px|link=Tall Black Maple]] | ||
| img || Tall Black Maple 1 (slender, short, upright) || 3x3 || yes || no || Maple Tree || Biome TBD | | class="screenshotThumbnail" | <!--img--> | ||
| class="variantName" | [[Tall Black Maple]] 1 (slender, short, upright) | |||
| class="size" | 3x3 | |||
| class="producesWood" | yes | |||
| class="placeOnTile" | no | |||
| class="landscapingSubtype" | Maple Tree | |||
| class="biomeUnlock" | Biome TBD | |||
|- | |- | ||
| [[File:Tall Maple.png|center| | | class="menuThumbnail" | [[File:Tall Maple.png|center|80px|link=Tall Maple]] | ||
| img || Tall Maple 1 (slender, short, upright) || 3x3 || yes || no || Maple Tree || Biome TBD | | class="screenshotThumbnail" | <!--img--> | ||
| class="variantName" | [[Tall Maple]] 1 (slender, short, upright) | |||
| class="size" | 3x3 | |||
| class="producesWood" | yes | |||
| class="placeOnTile" | no | |||
| class="landscapingSubtype" | Maple Tree | |||
| class="biomeUnlock" | Biome TBD | |||
|- | |- | ||
| | | class="menuThumbnail" | [[File:Simple Maple.png|center|80px|link=Simple Maple]] | ||
| img|| Simple Maple 2 (slender, tall, curved)|| 5x5 || yes, northwards only<ref name="north only">This tree only drops wood towards the north. If the entire northern edge is blocked, the tree will not produce wood.</ref> || no || Maple Tree || Biome TBD | | class="screenshotThumbnail" | <!--img--> | ||
| class="variantName" | [[Simple Maple]] 2 (slender, tall, curved) | |||
| class="size" | 5x5 | |||
| class="producesWood" | yes, northwards only<ref name="north only">This tree only drops wood towards the north. If the entire northern edge is blocked, the tree will not produce wood.</ref> | |||
| class="placeOnTile" | no | |||
| class="landscapingSubtype" | Maple Tree | |||
| class="biomeUnlock" | Biome TBD | |||
|- | |- | ||
| | | class="menuThumbnail" | [[File:Tall Black Maple.png|center|80px|link=Tall Black Maple]] | ||
| img|| Tall Black Maple 2 (slender, tall, curved)|| 5x5 || yes, northwards only<ref name="north only"></ref> || no || Maple Tree || Biome TBD | | class="screenshotThumbnail" | <!--img--> | ||
| class="variantName" | [[Tall Black Maple]] 2 (slender, tall, curved) | |||
| class="size" | 5x5 | |||
| class="producesWood" | yes, northwards only<ref name="north only"></ref> | |||
| class="placeOnTile" | no | |||
| class="landscapingSubtype" | Maple Tree | |||
| class="biomeUnlock" | Biome TBD | |||
|- | |- | ||
| | | class="menuThumbnail" | [[File:Tall Maple.png|center|80px|link=Tall Maple]] | ||
| img|| Tall Maple 2 (slender, tall, curved) || 3x3 || yes || yes || Maple Tree || Biome TBD | | class="screenshotThumbnail" | <!--img--> | ||
| class="variantName" | [[Tall Maple]] 2 (slender, tall, curved) | |||
| class="size" | 3x3 | |||
| class="producesWood" | yes | |||
| class="placeOnTile" | yes | |||
| class="landscapingSubtype" | Maple Tree | |||
| class="biomeUnlock" | Biome TBD | |||
|- | |- | ||
| | | class="menuThumbnail" | [[File:Simple Maple.png|center|80px|link=Simple Maple]] | ||
| img||Simple Maple 3 (normal thickness, tall, upright)|| 4x4 || yes || no || Maple Tree || Biome TBD | | class="screenshotThumbnail" | <!--img--> | ||
| class="variantName" | [[Simple Maple]] 3 (normal thickness, tall, upright) | |||
| class="size" | 4x4 | |||
| class="producesWood" | yes | |||
| class="placeOnTile" | no | |||
| class="landscapingSubtype" | Maple Tree | |||
| class="biomeUnlock" | Biome TBD | |||
|- | |- | ||
| | | class="menuThumbnail" | [[File:Tall Black Maple.png|center|80px|link=Tall Black Maple]] | ||
| img||Tall Black Maple 3 (normal thickness, tall, upright) || 4x4 || yes, to the north and east<ref name="north, east"></ref> || no || Maple Tree || Biome TBD | | class="screenshotThumbnail" | <!--img--> | ||
| class="variantName" | [[Tall Black Maple]] 3 (normal thickness, tall, upright) | |||
| class="size" | 4x4 | |||
| class="producesWood" | yes, to the north and east<ref name="north, east"></ref> | |||
| class="placeOnTile" | no | |||
| class="landscapingSubtype" | Maple Tree | |||
| class="biomeUnlock" | Biome TBD | |||
|- | |- | ||
| | | class="menuThumbnail" | [[File:Tall Maple.png|center|80px|link=Tall Maple]] | ||
| img||Tall Maple 3 (normal thickness, tall, upright) || 4x4 || yes, to the north and east<ref name="north, east"></ref> || no || Maple Tree || Biome TBD | | class="screenshotThumbnail" | <!--img--> | ||
| class="variantName" | [[Tall Maple]] 3 (normal thickness, tall, upright) | |||
| class="size" | 4x4 | |||
| class="producesWood" | yes, to the north and east<ref name="north, east"></ref> | |||
| class="placeOnTile" | no | |||
| class="landscapingSubtype" | Maple Tree | |||
| class="biomeUnlock" | Biome TBD | |||
|- | |- | ||
| | | class="menuThumbnail" | [[File:Tall Black Maple.png|center|80px|link=Tall Black Maple]] | ||
| img||Tall Black Maple 4 (slender, short, curved) (Simple Maple and Tall Maple do not have this variant) || 4x4 || yes, to the north and east<ref name="north, east"></ref> || no || Maple Tree || Biome TBD | | class="screenshotThumbnail" | <!--img--> | ||
| class="variantName" | [[Tall Black Maple]] 4 (slender, short, curved)<br>(Simple Maple and Tall Maple do not have this variant) | |||
| class="size" | 4x4 | |||
| class="producesWood" | yes, to the north and east<ref name="north, east"></ref> | |||
| class="placeOnTile" | no | |||
| class="landscapingSubtype" | Maple Tree | |||
| class="biomeUnlock" | Biome TBD | |||
|- | |- | ||
| [[File:Light Birch Tree.png|center| | | class="menuThumbnail" | [[File:Light Birch Tree.png|center|80px|link=Light Birch Tree]] | ||
| img || Light Birch Tree 1 (medium-tall, normal thickness, upright) <br> | | class="screenshotThumbnail" | <!--img--> | ||
| class="variantName" | [[Light Birch Tree]] 1 (medium-tall, normal thickness, upright) <br>Alternate Colors: [[Tall Birch Tree]] 1 | |||
| class="size" | 3x3 | |||
| class="producesWood" | yes | |||
| class="placeOnTile" | yes | |||
| class="landscapingSubtype" | Birch Tree | |||
| class="biomeUnlock" | Biome TBD | |||
|- | |- | ||
| [[File:Tall Birch Tree.png|center| | | class="menuThumbnail" | [[File:Tall Birch Tree.png|center|80px|link=Tall Birch Tree]] | ||
| [[File:Tall Birch Tree Tall.png|center| | | class="screenshotThumbnail" | [[File:Tall Birch Tree Tall.png|center|80px|link=File:Tall Birch Tree Tall.png]] | ||
| class="variantName" | [[Tall Birch Tree]] 1 (medium-tall, normal thickness, upright) <br>Alternate Colors: [[Light Birch Tree]] 1 | |||
| class="size" | 3x3 | |||
| class="producesWood" | yes | |||
| class="placeOnTile" | no | |||
| class="landscapingSubtype" | Birch Tree | |||
| class="biomeUnlock" | Biome TBD | |||
|- | |- | ||
| [[File:Light Birch Tree.png|center| | | class="menuThumbnail" | [[File:Light Birch Tree.png|center|80px|link=Light Birch Tree]] | ||
| [[File:Light Birch Tree Medium Tall.png|center| | | class="screenshotThumbnail" | [[File:Light Birch Tree Medium Tall.png|center|80px|link=File:Light Birch Tree Medium Tall.png]] | ||
| class="variantName" | [[Light Birch Tree]] 2 (medium height, slender, upright) | |||
| class="size" | 3x3 | |||
| class="producesWood" | yes | |||
| class="placeOnTile" | yes | |||
| class="landscapingSubtype" | Birch Tree | |||
| class="biomeUnlock" | Biome TBD | |||
|- | |- | ||
| [[File:Light Birch Tree.png|center| | | class="menuThumbnail" | [[File:Light Birch Tree.png|center|80px|link=Light Birch Tree]] | ||
| [[File:Light Birch Tree Medium.png|center| | | class="screenshotThumbnail" | [[File:Light Birch Tree Medium.png|center|80px|link=File:Light Birch Tree Medium.png]] | ||
| class="variantName" | [[Light Birch Tree]] 3 (medium-short, slender, slightly curved) | |||
| class="size" | 3x3 | |||
| class="producesWood" | yes | |||
| class="placeOnTile" | yes | |||
| class="landscapingSubtype" | Birch Tree | |||
| class="biomeUnlock" | Biome TBD | |||
|- | |- | ||
| [[File:Light Birch Tree.png|center| | | class="menuThumbnail" | [[File:Light Birch Tree.png|center|80px|link=Light Birch Tree]] | ||
| [[File:Light Birch Tree Short.png|center| | | class="screenshotThumbnail" | [[File:Light Birch Tree Short.png|center|80px|link=File:Light Birch Tree Short.png]] | ||
| class="variantName" | [[Light Birch Tree]] 4 (short, slender, upright) | |||
| class="size" | 4x4 | |||
| class="producesWood" | yes, to the north and east<ref name="north, east"></ref> | |||
| class="placeOnTile" | yes | |||
| class="landscapingSubtype" | Birch Tree | |||
| class="biomeUnlock" | Biome TBD | |||
|- | |- | ||
| [[File:Light Birch Tree.png|center| | | class="menuThumbnail" | [[File:Light Birch Tree.png|center|80px|link=Light Birch Tree]] | ||
| [[File:Light Birch Tree Dual Trunk Very Tall.png|center| | | class="screenshotThumbnail" | [[File:Light Birch Tree Dual Trunk Very Tall.png|center|80px|link=File:Light Birch Tree Dual Trunk Very Tall.png]] | ||
| class="variantName" | [[Light Birch Tree]] 5 (tall, dual trunk) <br>Alternate Colors: [[Tall Birch Tree]] 3 (tall, dual trunk) | |||
| class="size" | 4x6 | |||
| class="producesWood" | yes | |||
| class="placeOnTile" | yes | |||
| class="landscapingSubtype" | Birch Tree | |||
| class="biomeUnlock" | Biome TBD | |||
|- | |- | ||
| [[File:Tall Birch Tree.png|center| | | class="menuThumbnail" | [[File:Tall Birch Tree.png|center|80px|link=Tall Birch Tree]] | ||
| [[File:Tall Birch Tree Dual Trunk Very Tall.png|center| | | class="screenshotThumbnail" | [[File:Tall Birch Tree Dual Trunk Very Tall.png|center|80px|link=File:Tall Birch Tree Dual Trunk Very Tall.png]] | ||
| class="variantName" | [[Tall Birch Tree]] 3 (tall, dual trunk) <br>Alternate Colors: [[Light Birch Tree]] 5 (tall, dual trunk) | |||
| class="size" | 3x5 | |||
| class="producesWood" | yes | |||
| class="placeOnTile" | no | |||
| class="landscapingSubtype" | Birch Tree | |||
| class="biomeUnlock" | Biome TBD | |||
|- | |- | ||
| [[File:Tall Birch Tree.png|center| | | class="menuThumbnail" | [[File:Tall Birch Tree.png|center|80px|link=Tall Birch Tree]] | ||
| [[File:Tall Birch Tree Very Tall.png|center| | | class="screenshotThumbnail" | [[File:Tall Birch Tree Very Tall.png|center|80px|link=File:Tall Birch Tree Very Tall.png]] | ||
| class="variantName" | [[Tall Birch Tree]] 2 (tall, slender, upright) | |||
| class="size" | 4x4 | |||
| class="producesWood" | yes, to the north and east<ref name="north, east"></ref> | |||
| class="placeOnTile" | no | |||
| class="landscapingSubtype" | Birch Tree | |||
| class="biomeUnlock" | Biome TBD | |||
|- | |- | ||
| [[File:Swamp Tree.png|center| | | class="menuThumbnail" | [[File:Swamp Tree.png|center|80px|link=Swamp Tree]] | ||
| [[File:Swamp Tree Short.png|center| | | class="screenshotThumbnail" | [[File:Swamp Tree Short.png|center|80px|link=File:Swamp Tree Short.png]] | ||
| class="variantName" | [[Swamp Tree]] 1 (shortest) | |||
| class="size" | 6x6 | |||
| class="producesWood" | yes, northwards only<ref name="north only"></ref> | |||
| class="placeOnTile" | yes | |||
| class="landscapingSubtype" | Swamp Tree | |||
| class="biomeUnlock" | {{name|Glade of Trust}} | |||
|- | |- | ||
| [[File:Swamp Tree.png|center| | | class="menuThumbnail" | [[File:Swamp Tree.png|center|80px|link=Swamp Tree]] | ||
| [[File:Swamp Tree Medium.png|center| | | class="screenshotThumbnail" | [[File:Swamp Tree Medium.png|center|80px|link=File:Swamp Tree Medium.png]] | ||
| class="variantName" | [[Swamp Tree]] 2 (medium height, flatter canopy top) | |||
| class="size" | 7x7 | |||
| class="producesWood" | no | |||
| class="placeOnTile" | yes | |||
| class="landscapingSubtype" | Swamp Tree | |||
| class="biomeUnlock" | {{name|Glade of Trust}} | |||
|- | |- | ||
| [[File:Swamp Tree.png|center| | | class="menuThumbnail" | [[File:Swamp Tree.png|center|80px|link=Swamp Tree]] | ||
| [[File:Swamp Tree Tall.png|center| | | class="screenshotThumbnail" | [[File:Swamp Tree Tall.png|center|80px|link=File:Swamp Tree Tall.png]] | ||
| class="variantName" | [[Swamp Tree]] 3 (tallest) | |||
| class="size" | 9x9 | |||
| class="producesWood" | no | |||
| class="placeOnTile" | no* (the majority can be placed on tile, but a single square of the 81 units in the 9x9 parameters cannot) | |||
| class="landscapingSubtype" | Swamp Tree | |||
| class="biomeUnlock" | {{name|Glade of Trust}} | |||
|- | |- | ||
| [[File:Wide Swamp Tree.png|center| | | class="menuThumbnail" | [[File:Wide Swamp Tree.png|center|80px|link=Wide Swamp Tree]] | ||
| [[File:Wide Swamp Tree 2.png|center| | | class="screenshotThumbnail" | [[File:Wide Swamp Tree 2.png|center|80px|link=File:Wide Swamp Tree 2.png]] | ||
| class="variantName" | [[Wide Swamp Tree]] | |||
| class="size" | 8x8 | |||
| class="producesWood" | no | |||
| class="placeOnTile" | yes | |||
| class="landscapingSubtype" | Swamp Tree - Wide | |||
| class="biomeUnlock" | {{name|Glade of Trust}} | |||
|- | |- | ||
| [[File:Swamp Willow Tree.png|center| | | class="menuThumbnail" | [[File:Swamp Willow Tree.png|center|80px|link=Swamp Willow Tree]] | ||
| img || Swamp Willow Tree|| 6x6 || no || yes ||Willow - Swamp|| {{name|Glade of Trust}} | | class="screenshotThumbnail" | <!--img--> | ||
| class="variantName" | [[Swamp Willow Tree]] | |||
| class="size" | 6x6 | |||
| class="producesWood" | no | |||
| class="placeOnTile" | yes | |||
| class="landscapingSubtype" | Willow - Swamp | |||
| class="biomeUnlock" | {{name|Glade of Trust}} | |||
|- | |- | ||
| [[File:Frozen Willow Tree.png|center| | | class="menuThumbnail" | [[File:Frozen Willow Tree.png|center|80px|link=Frozen Willow Tree]] | ||
| [[File:Frozen Willow Tree 2.png|center| | | class="screenshotThumbnail" | [[File:Frozen Willow Tree 2.png|center|80px|link=File:Frozen Willow Tree 2.png]] | ||
| class="variantName" | [[Frozen Willow Tree]] | |||
| class="size" | 5x5 | |||
| class="producesWood" | no | |||
| class="placeOnTile" | no | |||
| class="landscapingSubtype" | Willow - Frozen | |||
| class="biomeUnlock" | {{name|Frosted Heights}} | |||
|- | |- | ||
| [[File:Large Plaza Tree.png|center| | | class="menuThumbnail" | [[File:Large Plaza Tree.png|center|80px|link=Large Plaza Tree]] | ||
|img || Large Plaza Tree || 6x6 || yes, northwards only<ref name="north only"></ref> || no || Plaza Tree - Large || {{name|Plaza}} | | class="screenshotThumbnail" | <!--img--> | ||
| class="variantName" | [[Large Plaza Tree]] | |||
| class="size" | 6x6 | |||
| class="producesWood" | yes, northwards only<ref name="north only"></ref> | |||
| class="placeOnTile" | no | |||
| class="landscapingSubtype" | Plaza Tree - Large | |||
| class="biomeUnlock" | {{name|Plaza}} | |||
|- | |- | ||
| [[File:Plaza Tree.png|center| | | class="menuThumbnail" | [[File:Plaza Tree.png|center|80px|link=Plaza Tree]] | ||
| img || Plaza Tree || 2x2 || yes || yes || Plaza Tree || {{name|Plaza}} | | class="screenshotThumbnail" | <!--img--> | ||
| class="variantName" | [[Plaza]] Tree | |||
| class="size" | 2x2 | |||
| class="producesWood" | yes | |||
| class="placeOnTile" | yes | |||
| class="landscapingSubtype" | Plaza Tree | |||
| class="biomeUnlock" | {{name|Plaza}} | |||
|- | |- | ||
| [[File:Large Plaza Hedge.png|center| | | class="menuThumbnail" | [[File:Large Plaza Hedge.png|center|80px|link=Large Plaza Hedge]] | ||
| img || Large Plaza Hedge || 6x19 || no || yes || Hedge || {{name|Plaza}} | | class="screenshotThumbnail" | <!--img--> | ||
| class="variantName" | [[Large Plaza Hedge]] | |||
| class="size" | 6x19 | |||
| class="producesWood" | no | |||
| class="placeOnTile" | yes | |||
| class="landscapingSubtype" | Hedge | |||
| class="biomeUnlock" | {{name|Plaza}} | |||
|- | |- | ||
| [[File:Small Plaza Hedge.png|center| | | class="menuThumbnail" | [[File:Small Plaza Hedge.png|center|80px|link=Small Plaza Hedge]] | ||
| img || Small Plaza Hedge || 5x14 || no || yes || Hedge || {{name|Plaza}} | | class="screenshotThumbnail" | <!--img--> | ||
| class="variantName" | [[Small Plaza Hedge]] | |||
| class="size" | 5x14 | |||
| class="producesWood" | no | |||
| class="placeOnTile" | yes | |||
| class="landscapingSubtype" | Hedge | |||
| class="biomeUnlock" | {{name|Plaza}} | |||
|- | |- | ||
| [[File:Wide Baobab Tree.png|center| | | class="menuThumbnail" | [[File:Wide Baobab Tree.png|center|80px|link=Wide Baobab Tree]] | ||
| [[File:Wide Baobab Tree Tall.png|center| | | class="screenshotThumbnail" | [[File:Wide Baobab Tree Tall.png|center|80px|link=File:Wide Baobab Tree Tall.png]] | ||
| class="variantName" | [[Wide Baobab Tree]] 1 (tall, with branch) | |||
| class="size" | 4x4 | |||
| class="producesWood" | yes, to the north and east<ref name="north, east"></ref> | |||
| class="placeOnTile" | no | |||
| class="landscapingSubtype" | Baobab Tree | |||
| class="biomeUnlock" | {{name|Sunlit Plateau}} | |||
|- | |- | ||
| [[File:Wide Baobab Tree.png|center| | | class="menuThumbnail" | [[File:Wide Baobab Tree.png|center|80px|link=Wide Baobab Tree]] | ||
| [[File:Wide Baobab Tree Short.png|center| | | class="screenshotThumbnail" | [[File:Wide Baobab Tree Short.png|center|80px|link=File:Wide Baobab Tree Short.png]] | ||
| class="variantName" | [[Wide Baobab Tree]] 2 (short) | |||
| class="size" | 4x4 | |||
| class="producesWood" | yes, to the north and east<ref name="north, east"></ref> | |||
| class="placeOnTile" | no | |||
| class="landscapingSubtype" | Baobab Tree | |||
| class="biomeUnlock" | {{name|Sunlit Plateau}} | |||
|- | |- | ||
| [[File:Tall Acacia Tree.png|center| | | class="menuThumbnail" | [[File:Tall Acacia Tree.png|center|80px|link=Tall Acacia Tree]] | ||
| [[File:Tall Acacia Tree Short.png|center| | | class="screenshotThumbnail" | [[File:Tall Acacia Tree Short.png|center|80px|link=File:Tall Acacia Tree Short.png]] | ||
| class="variantName" | [[Tall Acacia Tree]] 1 (shortest) | |||
| class="size" | 2x2 | |||
| class="producesWood" | yes | |||
| class="placeOnTile" | no | |||
| class="landscapingSubtype" | Acacia Tree | |||
| class="biomeUnlock" | {{name|Sunlit Plateau}} | |||
|- | |- | ||
| [[File:Tall Acacia Tree.png|center| | | class="menuThumbnail" | [[File:Tall Acacia Tree.png|center|80px|link=Tall Acacia Tree]] | ||
| [[File:Tall Acacia Tree Tall.png|center| | | class="screenshotThumbnail" | [[File:Tall Acacia Tree Tall.png|center|80px|link=File:Tall Acacia Tree Tall.png]] | ||
| class="variantName" | [[Tall Acacia Tree]] 2 (tallest) | |||
| class="size" | 2x2 | |||
| class="producesWood" | yes | |||
| class="placeOnTile" | no | |||
| class="landscapingSubtype" | Acacia Tree | |||
| class="biomeUnlock" | {{name|Sunlit Plateau}} | |||
|- | |- | ||
| [[File:Tall Acacia Tree.png|center| | | class="menuThumbnail" | [[File:Tall Acacia Tree.png|center|80px|link=Tall Acacia Tree]] | ||
| [[File:Tall Acacia Tree Wide.png|center| | | class="screenshotThumbnail" | [[File:Tall Acacia Tree Wide.png|center|80px|link=File:Tall Acacia Tree Wide.png]] | ||
| class="variantName" | [[Tall Acacia Tree]] 3 (widest) | |||
| class="size" | 5x5 | |||
| class="producesWood" | yes, to the north, and a single southwest<ref name="north, single southwest">This tree drops wood towards the north, and in a single spot on its southwest corner.</ref> | |||
| class="placeOnTile" | no | |||
| class="landscapingSubtype" | Acacia Tree | |||
| class="biomeUnlock" | {{name|Sunlit Plateau}} | |||
|- | |- | ||
| [[File:Moss-Covered Tree.png|center| | | class="menuThumbnail" | [[File:Moss-Covered Tree.png|center|80px|link=Moss-Covered Tree]] | ||
| [[File:Moss-Covered Tree Short.jpg|center| | | class="screenshotThumbnail" | [[File:Moss-Covered Tree Short.jpg|center|80px|link=File:Moss-Covered Tree Short.jpg]] | ||
| class="variantName" | [[Moss-Covered Tree]] 1 (short) | |||
| class="size" | 5x5 | |||
| class="producesWood" | yes | |||
| class="placeOnTile" | no | |||
| class="landscapingSubtype" | Moss-Covered Tree | |||
| class="biomeUnlock" | {{name|Glade of Trust}} | |||
|- | |- | ||
| [[File:Moss-Covered Tree.png|center| | | class="menuThumbnail" | [[File:Moss-Covered Tree.png|center|80px|link=Moss-Covered Tree]] | ||
| [[File:Moss-Covered Tree Tall.jpg|center| | | class="screenshotThumbnail" | [[File:Moss-Covered Tree Tall.jpg|center|80px|link=File:Moss-Covered Tree Tall.jpg]] | ||
| class="variantName" | [[Moss-Covered Tree]] 2 (tall) | |||
| class="size" | 8x8 | |||
| class="producesWood" | no | |||
| class="placeOnTile" | no | |||
| class="landscapingSubtype" | Moss-Covered Tree | |||
| class="biomeUnlock" | {{name|Glade of Trust}} | |||
|- | |- | ||
| [[File:Meager Tree.png|center| | | class="menuThumbnail" | [[File:Meager Tree.png|center|80px|link=Meager Tree]] | ||
| img || Meager Tree || 6x6 || yes, northwards only<ref name="north only"></ref>|| no || Lush/Meager Tree || Biome TBD | | class="screenshotThumbnail" | <!--img--> | ||
| class="variantName" | [[Meager Tree]] | |||
| class="size" | 6x6 | |||
| class="producesWood" | yes, northwards only<ref name="north only"></ref> | |||
| class="placeOnTile" | no | |||
| class="landscapingSubtype" | Lush/Meager Tree | |||
| class="biomeUnlock" | Biome TBD | |||
|- | |- | ||
| [[File:Lush Tree.png|center| | | class="menuThumbnail" | [[File:Lush Tree.png|center|80px|link=Lush Tree]] | ||
| [[File:Lush Tree 2.png|center| | | class="screenshotThumbnail" | [[File:Lush Tree 2.png|center|80px|link=File:Lush Tree 2.png]] | ||
| class="variantName" | [[Lush Tree]] | |||
| class="size" | 3x5 | |||
| class="producesWood" | yes | |||
| class="placeOnTile" | no | |||
| class="landscapingSubtype" | Lush/Meager Tree | |||
| class="biomeUnlock" | Biome TBD | |||
|- | |- | ||
| [[File:Lush Dragon Tree.png|center| | | class="menuThumbnail" | [[File:Lush Dragon Tree.png|center|80px|link=Lush Dragon Tree]] | ||
| [[File:Lush Dragon Tree 1 Hole.png|center| | | class="screenshotThumbnail" | [[File:Lush Dragon Tree 1 Hole.png|center|80px|link=File:Lush Dragon Tree 1 Hole.png]] | ||
| class="variantName" | [[Lush Dragon Tree]] 1 (shorter, 1 trunk hole) | |||
| class="size" | 3x3 | |||
| class="producesWood" | yes | |||
| class="placeOnTile" | no | |||
| class="landscapingSubtype" | Dragon Tree | |||
| class="biomeUnlock" | {{name|Sunlit Plateau}} | |||
|- | |- | ||
| [[File:Lush Dragon Tree.png|center| | | class="menuThumbnail" | [[File:Lush Dragon Tree.png|center|80px|link=Lush Dragon Tree]] | ||
| [[File:Lush Dragon Tree 2 Holes.png|center| | | class="screenshotThumbnail" | [[File:Lush Dragon Tree 2 Holes.png|center|80px|link=File:Lush Dragon Tree 2 Holes.png]] | ||
| class="variantName" | [[Lush Dragon Tree]] 2 (taller, 2 trunk holes, branches more visible and upward-extending) | |||
| class="size" | 3x3 | |||
| class="producesWood" | yes | |||
| class="placeOnTile" | no | |||
| class="landscapingSubtype" | Dragon Tree | |||
| class="biomeUnlock" | {{name|Sunlit Plateau}} | |||
|- | |- | ||
| [[File:Sinister Tree.png|center| | | class="menuThumbnail" | [[File:Sinister Tree.png|center|80px|link=Sinister Tree]] | ||
| [[File:Sinister Tree.jpg|center| | | class="screenshotThumbnail" | [[File:Sinister Tree.jpg|center|80px|link=File:Sinister Tree.jpg]] | ||
| class="variantName" | Sinister Tree | |||
| class="size" | 6x6 | |||
| class="producesWood" | yes, northwards only<ref name="north only"></ref> | |||
| class="placeOnTile" | no | |||
| class="landscapingSubtype" | Sinister Tree | |||
| class="biomeUnlock" | {{name|Forgotten Lands}} | |||
|- | |- | ||
| [[File:Fallen Trunk.png|center| | | class="menuThumbnail" | [[File:Fallen Trunk.png|center|80px|link=Fallen Trunk]] | ||
| img || Fallen Trunk || 4x2 || no || yes || Trunk - Fallen || Biome TBD | | class="screenshotThumbnail" | <!--img--> | ||
| class="variantName" | [[Fallen Trunk]] | |||
| class="size" | 4x2 | |||
| class="producesWood" | no | |||
| class="placeOnTile" | yes | |||
| class="landscapingSubtype" | Trunk - Fallen | |||
| class="biomeUnlock" | Biome TBD | |||
|- | |- | ||
| [[File:Tree Trunk.png|center| | | class="menuThumbnail" | [[File:Tree Trunk.png|center|80px|link=Tree Trunk]] | ||
| [[File:Tree Trunk 1.jpg|center| | | class="screenshotThumbnail" | [[File:Tree Trunk 1.jpg|center|80px|link=File:Tree Trunk 1.jpg]] | ||
| class="variantName" | [[Tree Trunk]] 1 | |||
| class="size" | 4x4 | |||
| class="producesWood" | no | |||
| class="placeOnTile" | no | |||
| class="landscapingSubtype" | Trunk | |||
| class="biomeUnlock" | Biome TBD | |||
|- | |- | ||
| [[File:Tree Trunk.png|center| | | class="menuThumbnail" | [[File:Tree Trunk.png|center|80px|link=Tree Trunk]] | ||
| [[File:Tree Trunk 2.jpg|center| | | class="screenshotThumbnail" | [[File:Tree Trunk 2.jpg|center|80px|link=File:Tree Trunk 2.jpg]] | ||
| class="variantName" | [[Tree Trunk]] 2 (medium height, slender) | |||
| class="size" | 2x2 | |||
| class="producesWood" | no | |||
| class="placeOnTile" | no | |||
| class="landscapingSubtype" | Trunk | |||
| class="biomeUnlock" | Biome TBD | |||
|- | |- | ||
| [[File:Tree Trunk.png|center| | | class="menuThumbnail" | [[File:Tree Trunk.png|center|80px|link=Tree Trunk]] | ||
| [[File:Tree Trunk 3.jpg|center| | | class="screenshotThumbnail" | [[File:Tree Trunk 3.jpg|center|80px|link=File:Tree Trunk 3.jpg]] | ||
| class="variantName" | [[Tree Trunk]] 3 (tallest, with leafy branch) | |||
| class="size" | 4x5 | |||
| class="producesWood" | no | |||
| class="placeOnTile" | no | |||
| class="landscapingSubtype" | Trunk | |||
| class="biomeUnlock" | Biome TBD | |||
|- | |- | ||
| [[File:Squat Tree Stump.png|center| | | class="menuThumbnail" | [[File:Squat Tree Stump.png|center|80px|link=Squat Tree Stump]] | ||
| img || Squat Tree Stump || 2x2 || no || yes || Stump - Squat || Biome TBD | | class="screenshotThumbnail" | <!--img--> | ||
| class="variantName" | [[Squat Tree Stump]] | |||
| class="size" | 2x2 | |||
| class="producesWood" | no | |||
| class="placeOnTile" | yes | |||
| class="landscapingSubtype" | Stump - Squat | |||
| class="biomeUnlock" | Biome TBD | |||
|- | |- | ||
| [[File:Dead Pine Tree.png|center| | | class="menuThumbnail" | [[File:Dead Pine Tree.png|center|80px|link=Dead Pine Tree]] | ||
| [[File:Dead Pine Tree Tall.png|center| | | class="screenshotThumbnail" | [[File:Dead Pine Tree Tall.png|center|80px|link=File:Dead Pine Tree Tall.png]] | ||
| class="variantName" | [[Dead Pine Tree]] 1 (tall, with small leaf) | |||
| class="size" | 4x4 | |||
| class="producesWood" | yes, to the north and east<ref name="north, east"></ref> | |||
| class="placeOnTile" | no | |||
| class="landscapingSubtype" | Dead Pine Tree | |||
| class="biomeUnlock" | Biome TBD | |||
|- | |- | ||
| [[File:Dead Pine Tree.png|center| | | class="menuThumbnail" | [[File:Dead Pine Tree.png|center|80px|link=Dead Pine Tree]] | ||
| [[File:Dead Pine Tree Short.png|center| | | class="screenshotThumbnail" | [[File:Dead Pine Tree Short.png|center|80px|link=File:Dead Pine Tree Short.png]] | ||
| class="variantName" | [[Dead Pine Tree]] 2 (short) | |||
| class="size" | 3x3 | |||
| class="producesWood" | yes | |||
| class="placeOnTile" | no | |||
| class="landscapingSubtype" | Dead Pine Tree | |||
| class="biomeUnlock" | Biome TBD | |||
|- | |- | ||
| [[File:Three-Limbed Tree.png|center| | | class="menuThumbnail" | [[File:Three-Limbed Tree.png|center|80px|link=Three-Limbed Tree]] | ||
| [[File:Three-Limbed Tree Tall.png|center| | | class="screenshotThumbnail" | [[File:Three-Limbed Tree Tall.png|center|80px|link=File:Three-Limbed Tree Tall.png]] | ||
| class="variantName" | [[Three-Limbed Tree]] 1 (tall) | |||
| class="size" | 3x4 | |||
| class="producesWood" | yes | |||
| class="placeOnTile" | no | |||
| class="landscapingSubtype" | Three-Limbed Tree | |||
| class="biomeUnlock" | Biome TBD | |||
|- | |- | ||
| [[File:Three-Limbed Tree.png|center| | | class="menuThumbnail" | [[File:Three-Limbed Tree.png|center|80px|link=Three-Limbed Tree]] | ||
| [[File:Three-Limbed Tree Short.png|center| | | class="screenshotThumbnail" | [[File:Three-Limbed Tree Short.png|center|80px|link=File:Three-Limbed Tree Short.png]] | ||
| class="variantName" | [[Three-Limbed Tree]] 2 (short) | |||
| class="size" | 4x4 | |||
| class="producesWood" | yes | |||
| class="placeOnTile" | no | |||
| class="landscapingSubtype" | Three-Limbed Tree | |||
| class="biomeUnlock" | Biome TBD | |||
|- | |- | ||
| [[File:Frozen Twisted Dead Tree.png|center| | | class="menuThumbnail" | [[File:Frozen Twisted Dead Tree.png|center|80px|link=Frozen Twisted Dead Tree]] | ||
| [[File:Frozen Twisted Dead Tree 1.jpg|center| | | class="screenshotThumbnail" | [[File:Frozen Twisted Dead Tree 1.jpg|center|80px|link=File:Frozen Twisted Dead Tree 1.jpg]] | ||
| class="variantName" | [[Frozen Twisted Dead Tree]] 1 (multi-tiered) | |||
| class="size" | 5x6 | |||
| class="producesWood" | yes, to the north and east<ref name="north, east"></ref> | |||
| class="placeOnTile" | no | |||
| class="landscapingSubtype" | Twisted Dead Tree | |||
| class="biomeUnlock" | {{name|Forgotten Lands}} | |||
|- | |- | ||
| [[File:Frozen Twisted Dead Tree.png|center| | | class="menuThumbnail" | [[File:Frozen Twisted Dead Tree.png|center|80px|link=Frozen Twisted Dead Tree]] | ||
| [[File:Frozen Twisted Dead Tree 2.jpg|center| | | class="screenshotThumbnail" | [[File:Frozen Twisted Dead Tree 2.jpg|center|80px|link=File:Frozen Twisted Dead Tree 2.jpg]] | ||
| class="variantName" | [[Frozen Twisted Dead Tree]] 2 (round) | |||
| class="size" | 3x3 | |||
| class="producesWood" | yes | |||
| class="placeOnTile" | no | |||
| class="landscapingSubtype" | Twisted Dead Tree | |||
| class="biomeUnlock" | {{name|Forgotten Lands}} | |||
|- | |- | ||
| [[File:Frozen Twisted Dead Tree.png|center| | | class="menuThumbnail" | [[File:Frozen Twisted Dead Tree.png|center|80px|link=Frozen Twisted Dead Tree]] | ||
| [[File:Frozen Twisted Dead Tree 3.jpg|center| | | class="screenshotThumbnail" | [[File:Frozen Twisted Dead Tree 3.jpg|center|80px|link=File:Frozen Twisted Dead Tree 3.jpg]] | ||
| class="variantName" | [[Frozen Twisted Dead Tree]] 3 (spiky) | |||
| class="size" | 5x6 | |||
| class="producesWood" | yes, to the north, east, and a single southwest<ref name="north, east, single southwest">This tree drops wood towards the north, east, and in a single spot on its southwest corner.</ref> | |||
| class="placeOnTile" | no | |||
| class="landscapingSubtype" | Twisted Dead Tree | |||
| class="biomeUnlock" | {{name|Forgotten Lands}} | |||
|} | |||
|} | <references/> | ||
==History== | |||
{{history|1.0|Added}} | |||
{{history|1.2|Wood spawning behaviors changed: changed to fixed number of wood that will spawn per Biome, rather than random. [[Softwood]] no longer spawns in Sunlit Plateau, Frosted Heights, or Forgotten Lands. [[Hardwood]] no longer spawns in Forgotten Lands.<!--Improved wood distribution across all biomes. This change will make it so that the wood you find in each biome feels less random. While spawn rates will be slightly less frequent than before, each biome will now have a fixed set of wood that can spawn and will appear in consistent amounts, taking the guesswork out of gathering.-->}} | |||
<!--__NOTOC__--> | |||
Latest revision as of 17:58, 15 September 2023
| Sticks | |
|---|---|
 | |
| Information | |
| Type: | |
| Categories: | |
| Placement: | 2x2 (Surfaces) |
| Found: |
|
Sticks refers to piles of wood that can be foraged in Dreamlight Valley.
The type of Sticks (i.e. Wood) that spawns is dependent on the Biome, not on the type of Trees present. However, different Trees, and their variants, have different patterns of whether and where they drop Sticks.
Sticks are mentioned in one of Olaf's Daily Discussion topics labeled "How's your day going?".
Wood Types
| Wood Type | Price | Forage Location | Purchase Location |
|---|---|---|---|
 Softwood Softwood
|
|
||
 Hardwood Hardwood
|
|
||
 Dry Wood Dry Wood
|
|
||
 Dark Wood Dark Wood
|
n/a |
Wood Types by Biome
| Biome | ||||
|---|---|---|---|---|
| 15 | - | - | - | |
| 15 | - | - | - | |
| - | - | - | - | |
| 10 | 10 | - | - | |
| 8 | 12 | - | - | |
| - | 12 | 8 | - | |
| - | 10 | 10 | - | |
| - | - | 12 | 8 |
Tree Variants
The below table lists all variants of Trees available in the game. The name listed in the "Name" column is not an official name, but one used by the wiki in order to identify the different variants.
| Landscaping Menu Image |
Image | Name | Size | Produces wood? | Can be placed on tile? | Landscaping Subtype | Biome Unlock |
|---|---|---|---|---|---|---|---|
 |
 |
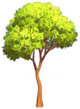
Bare-Limbed Tree 1 (medium height, medium dark wood) | 3x3 | yes | no | Bare-Limbed Tree | Biome TBD |
|
 |
Bare-Limbed Tree 2 (tall, dark wood) | 3x3 | yes | no | Bare-Limbed Tree | Biome TBD
|
 |
Bent Palm Tree 1 (shortest) Alternate Colors: Bent Sunlit Plateau Palm Tree |
2x2 | yes | yes | Palm Tree - Bent | ||
 |
Bent Sunlit Plateau Palm Tree Alternate Colors: Bent Palm Tree 1 (shortest) |
2x2 | yes | yes | Palm Tree - Bent | ||
|
Bent Palm Tree 2 (medium height) Alternate Colors: Tall Sunlit Plateau Palm Tree |
3x3 | yes | no | Palm Tree - Tall | ||
 |
Tall Sunlit Plateau Palm Tree Alternate Colors: Bent Palm Tree 2 (medium height) |
3x3 | yes | no | Palm Tree - Tall | ||
|
Bent Palm Tree 3 (tallest) Alternate Colors: Curved Sunlit Plateau Palm Tree |
2x2 | yes | yes | Palm Tree - Curved | ||
 |
Curved Sunlit Plateau Palm Tree Alternate Colors: Bent Palm Tree 3 (tallest) |
2x2 | yes | yes | Palm Tree - Curved | ||
 |
Round Palm Tree Alternate Colors: Round Sunlit Plateau Palm Tree |
4x4 | yes, to the north and east[1] | no | Palm Tree - Round | ||
 |
Round Sunlit Plateau Palm Tree Alternate Colors: Round Palm Tree |
4x4 | yes, to the north and east[1] | no | Palm Tree - Round | ||
 |
Dead Bush | 2x2 | no | no | Dead Bush | Biome TBD | |
 |
Frozen Dead Bush | 2x2 | no | no | Dead Bush | Biome TBD | |
 |
Scraggly Bush | 2x2 | no | no | Dead Bush | Biome TBD | |
 |
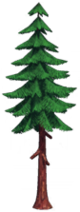
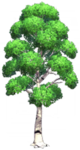
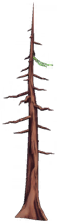
Snowy Dead Tree 1 (tall, sort of pronged) | 3x3 | yes | no | Dead Tree | ||
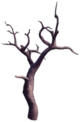 |
 |
Dead Forgotten Lands Tree 1 (tall, sort of pronged) Alternate Colors: Snowy Dead Tree 1 (tall, sort of pronged) |
3x3 | yes | no | Dead Tree | |
|
Snowy Dead Tree 2 (shorter, pronged, but more spindly) Alternate Colors: Dead Forgotten Lands Tree 2 (shorter, pronged, but more spindly) |
3x3 | yes | no | Dead Tree | ||
|
 |
Dead Forgotten Lands Tree 2 (shorter, pronged, but more spindly) | 3x3 | yes | no | Dead Tree |
|
 |
 |
Fir 1 (short) Alternate Colors: High Snowy Fir 1 (short) |
3x3 | yes | no | Fir | |
 |
 |
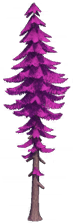
High Snowy Fir 1 (short) Alternate Colors: Fir 1 (short) |
3x3 | yes | no | Fir |
|
|
 |
Fir 2 (medium height) Alternate Colors: Slender Sinister Fir 3 (medium height) |
3x3 | yes | no | Fir | |
 |
 |
Slender Sinister Fir 3 (medium height) Alternate Colors: Fir 2 (medium height) |
3x3 | yes | no | Fir |
|
|
 |
Fir 3 (tall) Alternate Colors: High Snowy Fir 2 (tall) and Slender Sinister Fir 2 (tall) |
3x3 | yes | no | Fir | |
|
 |
High Snowy Fir 2 (tall) Alternate Colors: Fir 3 (tall) and Slender Sinister Fir 2 (tall) |
3x3 | yes | no | Fir | |
|
 |
Slender Sinister Fir 2 (tall) Alternate Colors: Fir 3 (tall) and High Snowy Fir 2 (tall) |
3x3 | yes | yes | Fir |
|
|
 |
High Snowy Fir 3 (very tall) Alternate Colors: Slender Sinister Fir 1 (very tall) |
3x3 | yes | no | Fir | |
|
 |
Slender Sinister Fir 1 (very tall) Alternate Colors: High Snowy Fir 3 (very tall) |
3x3 | yes | no | Fir | |
 |
Lush Sinister Fir | 4x4 | yes, to the north and east[1] | no | Fir - Lush |
| |
 |
 |
Short Japanese Maple 1 (medium-tall) Alternate Colors: Small Oak 1 (medium-tall) |
3x3 | yes | no | Oak/Maple | Biome TBD |
 |
 |
Small Oak 1 (medium-tall) Alternate Colors: Short Japanese Maple 1 (medium-tall) |
3x3 | yes | no | Oak/Maple | Biome TBD
|
|
 |
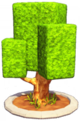
Short Japanese Maple 2 (short) | 1x1 | yes | yes | Oak/Maple | Biome TBD
|
|
 |
Short Japanese Maple 3 (tallest) Alternate Colors: Small Oak 3 (tallest) |
4x4 | yes, to the north and east[1] | no | Oak/Maple | Biome TBD |
|
 |
Small Oak 3 (tallest) Alternate Colors: Short Japanese Maple 3 (tallest) |
3x3 | yes | no | Oak/Maple | Biome TBD
|
|
 |
Small Oak 2 (shortest) | 3x3 | yes | no | Oak/Maple | Biome TBD
|
 |
Simple Maple 1 (slender, short, upright) | 3x3 | yes | no | Maple Tree | Biome TBD | |
 |
Tall Black Maple 1 (slender, short, upright) | 3x3 | yes | no | Maple Tree | Biome TBD | |
 |
Tall Maple 1 (slender, short, upright) | 3x3 | yes | no | Maple Tree | Biome TBD
| |
|
Simple Maple 2 (slender, tall, curved) | 5x5 | yes, northwards only[2] | no | Maple Tree | Biome TBD | |
|
Tall Black Maple 2 (slender, tall, curved) | 5x5 | yes, northwards only[2] | no | Maple Tree | Biome TBD | |
|
Tall Maple 2 (slender, tall, curved) | 3x3 | yes | yes | Maple Tree | Biome TBD
| |
|
Simple Maple 3 (normal thickness, tall, upright) | 4x4 | yes | no | Maple Tree | Biome TBD | |
|
Tall Black Maple 3 (normal thickness, tall, upright) | 4x4 | yes, to the north and east[1] | no | Maple Tree | Biome TBD | |
|
Tall Maple 3 (normal thickness, tall, upright) | 4x4 | yes, to the north and east[1] | no | Maple Tree | Biome TBD
| |
|
Tall Black Maple 4 (slender, short, curved) (Simple Maple and Tall Maple do not have this variant) |
4x4 | yes, to the north and east[1] | no | Maple Tree | Biome TBD
| |
 |
Light Birch Tree 1 (medium-tall, normal thickness, upright) Alternate Colors: Tall Birch Tree 1 |
3x3 | yes | yes | Birch Tree | Biome TBD | |
 |
 |
Tall Birch Tree 1 (medium-tall, normal thickness, upright) Alternate Colors: Light Birch Tree 1 |
3x3 | yes | no | Birch Tree | Biome TBD |
|
 |
Light Birch Tree 2 (medium height, slender, upright) | 3x3 | yes | yes | Birch Tree | Biome TBD |
|
 |
Light Birch Tree 3 (medium-short, slender, slightly curved) | 3x3 | yes | yes | Birch Tree | Biome TBD |
|
 |
Light Birch Tree 4 (short, slender, upright) | 4x4 | yes, to the north and east[1] | yes | Birch Tree | Biome TBD |
|
 |
Light Birch Tree 5 (tall, dual trunk) Alternate Colors: Tall Birch Tree 3 (tall, dual trunk) |
4x6 | yes | yes | Birch Tree | Biome TBD |
|
 |
Tall Birch Tree 3 (tall, dual trunk) Alternate Colors: Light Birch Tree 5 (tall, dual trunk) |
3x5 | yes | no | Birch Tree | Biome TBD |
|
 |
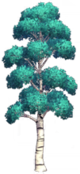
Tall Birch Tree 2 (tall, slender, upright) | 4x4 | yes, to the north and east[1] | no | Birch Tree | Biome TBD
|
 |
 |
Swamp Tree 1 (shortest) | 6x6 | yes, northwards only[2] | yes | Swamp Tree | |
|
 |
Swamp Tree 2 (medium height, flatter canopy top) | 7x7 | no | yes | Swamp Tree | |
|
 |
Swamp Tree 3 (tallest) | 9x9 | no | no* (the majority can be placed on tile, but a single square of the 81 units in the 9x9 parameters cannot) | Swamp Tree | |
 |
 |
Wide Swamp Tree | 8x8 | no | yes | Swamp Tree - Wide |
|
 |
Swamp Willow Tree | 6x6 | no | yes | Willow - Swamp | ||
 |
 |
Frozen Willow Tree | 5x5 | no | no | Willow - Frozen |
|
 |
Large Plaza Tree | 6x6 | yes, northwards only[2] | no | Plaza Tree - Large | ||
 |
Plaza Tree | 2x2 | yes | yes | Plaza Tree |
| |
| Large Plaza Hedge | 6x19 | no | yes | Hedge | |||
| Small Plaza Hedge | 5x14 | no | yes | Hedge |
| ||
 |
 |
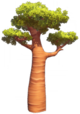
Wide Baobab Tree 1 (tall, with branch) | 4x4 | yes, to the north and east[1] | no | Baobab Tree | |
|
 |
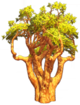
Wide Baobab Tree 2 (short) | 4x4 | yes, to the north and east[1] | no | Baobab Tree |
|
 |
 |
Tall Acacia Tree 1 (shortest) | 2x2 | yes | no | Acacia Tree | |
|
 |
Tall Acacia Tree 2 (tallest) | 2x2 | yes | no | Acacia Tree | |
|
 |
Tall Acacia Tree 3 (widest) | 5x5 | yes, to the north, and a single southwest[3] | no | Acacia Tree | |
 |
 |
Moss-Covered Tree 1 (short) | 5x5 | yes | no | Moss-Covered Tree | |
|
 |
Moss-Covered Tree 2 (tall) | 8x8 | no | no | Moss-Covered Tree |
|
 |
Meager Tree | 6x6 | yes, northwards only[2] | no | Lush/Meager Tree | Biome TBD | |
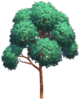
 |
 |
Lush Tree | 3x5 | yes | no | Lush/Meager Tree | Biome TBD |
 |
 |
Lush Dragon Tree 1 (shorter, 1 trunk hole) | 3x3 | yes | no | Dragon Tree | |
|
 |
Lush Dragon Tree 2 (taller, 2 trunk holes, branches more visible and upward-extending) | 3x3 | yes | no | Dragon Tree | |
 |
 |
Sinister Tree | 6x6 | yes, northwards only[2] | no | Sinister Tree | |
 |
Fallen Trunk | 4x2 | no | yes | Trunk - Fallen | Biome TBD | |
 |
 |
Tree Trunk 1 | 4x4 | no | no | Trunk | Biome TBD |
|
 |
Tree Trunk 2 (medium height, slender) | 2x2 | no | no | Trunk | Biome TBD |
|
 |
Tree Trunk 3 (tallest, with leafy branch) | 4x5 | no | no | Trunk | Biome TBD
|
 |
Squat Tree Stump | 2x2 | no | yes | Stump - Squat | Biome TBD
| |
 |
 |
Dead Pine Tree 1 (tall, with small leaf) | 4x4 | yes, to the north and east[1] | no | Dead Pine Tree | Biome TBD |
|
 |
Dead Pine Tree 2 (short) | 3x3 | yes | no | Dead Pine Tree | Biome TBD |
 |
 |
Three-Limbed Tree 1 (tall) | 3x4 | yes | no | Three-Limbed Tree | Biome TBD |
|
 |
Three-Limbed Tree 2 (short) | 4x4 | yes | no | Three-Limbed Tree | Biome TBD
|
 |
 |
Frozen Twisted Dead Tree 1 (multi-tiered) | 5x6 | yes, to the north and east[1] | no | Twisted Dead Tree | |
|
 |
Frozen Twisted Dead Tree 2 (round) | 3x3 | yes | no | Twisted Dead Tree | |
|
 |
Frozen Twisted Dead Tree 3 (spiky) | 5x6 | yes, to the north, east, and a single southwest[4] | no | Twisted Dead Tree |
- ↑ 1.00 1.01 1.02 1.03 1.04 1.05 1.06 1.07 1.08 1.09 1.10 1.11 1.12 This tree only drops wood towards the north and east. If the entire northern and eastern edges are blocked, the tree will not produce wood.
- ↑ 2.0 2.1 2.2 2.3 2.4 2.5 This tree only drops wood towards the north. If the entire northern edge is blocked, the tree will not produce wood.
- ↑ This tree drops wood towards the north, and in a single spot on its southwest corner.
- ↑ This tree drops wood towards the north, east, and in a single spot on its southwest corner.
History
- 1.0: Added
- 1.2: Wood spawning behaviors changed: changed to fixed number of wood that will spawn per Biome, rather than random. Softwood no longer spawns in Sunlit Plateau, Frosted Heights, or Forgotten Lands. Hardwood no longer spawns in Forgotten Lands.