Mining: Difference between revisions
(→Resources: Remove description column for better readability of pertinent information) |
(→Dreamlight and Memories: add EI memory colors) |
||
| (9 intermediate revisions by 4 users not shown) | |||
| Line 1: | Line 1: | ||
{{infobox | {{infobox | ||
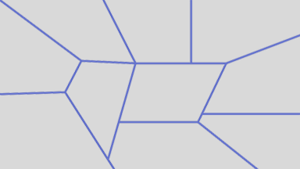
|image= | |image=Mining Screenshot.png | ||
|width= | |width=350px | ||
|description= | |description= | ||
|type=Activity | |type={{inlineIcon|Mining|iconOnly}} [[:Category:Activities|Activity]] [[Category:Activities]] | ||
|tool={{name|Pickaxe}} | |tool={{name|Pickaxe}} | ||
|energy={{price|40|energy}} | |energy={{price|40|energy}} | ||
|friendship={{price|150|friendship}} per Rock Spot mined to completion<br>{{price|300|friendship}} if [[Roles|Mining Role]] | |||
}} | }} | ||
'''Mining''' is an activity which involves using the [[pickaxe]] on the stones, obstacles, and rock spots throughout the valley to collect resources and valuable gems. | '''Mining''' is an activity which involves using the [[pickaxe]] on the stones, obstacles, and rock spots throughout the valley to collect resources and valuable gems. | ||
| Line 33: | Line 34: | ||
|[[Stone]] | |[[Stone]] | ||
|{{price|2}} | |{{price|2}} | ||
| | |All Biomes | ||
|- | |- | ||
|[[File:Coal Ore.png|center|50px|link=Coal Ore]] | |[[File:Coal Ore.png|center|50px|link=Coal Ore]] | ||
|[[Coal Ore]] | |[[Coal Ore]] | ||
|{{price|5}} | |{{price|5}} | ||
| | |All Biomes | ||
|- | |- | ||
|[[File:Iron Ore.png|center|50px|link=Iron Ore]] | |[[File:Iron Ore.png|center|50px|link=Iron Ore]] | ||
| Line 67: | Line 66: | ||
| | | | ||
{{name|Forgotten Lands}} | {{name|Forgotten Lands}} | ||
|- | |||
|[[File:Copper.png|center|50px|link=Copper]] | |||
|[[Copper]] | |||
|{{price|15}} | |||
| | |||
{{name|Ancient's Landing}}<br> | |||
{{name|Glittering Dunes}}<br> | |||
{{name|Wild Tangle}} | |||
|- | |||
|[[File:Quartz.png|center|50px|link=Quartz]] | |||
|[[Quartz]] | |||
|{{price|20}} | |||
| | |||
{{name|Ancient's Landing}} | |||
|- | |||
|[[File:Tin.png|center|50px|link=Tin]] | |||
|[[Tin]] | |||
|{{price|25}} | |||
| | |||
{{name|Glittering Dunes}} | |||
|- | |||
|[[File:Zinc.png|center|50px|link=Zinc]] | |||
|[[Zinc]] | |||
|{{price|30}} | |||
| | |||
{{name|Wild Tangle}} | |||
|} | |} | ||
| Line 81: | Line 106: | ||
!Location | !Location | ||
|- | |- | ||
|[[File:Amethyst.png|center| | |[[File:Amethyst.png|center|50x50px|link=Amethyst]] | ||
|[[Amethyst]] | |[[Amethyst]] | ||
|{{price|500}} | |{{price|500}} | ||
| Line 88: | Line 113: | ||
{{name|Frosted Heights}} | {{name|Frosted Heights}} | ||
|- | |- | ||
|[[File:Shiny Amethyst.png|center| | |[[File:Shiny Amethyst.png|center|50x50px|link=Shiny Amethyst]] | ||
|[[Shiny Amethyst]] | |[[Shiny Amethyst]] | ||
|{{price|2000}} | |{{price|2000}} | ||
| Line 95: | Line 120: | ||
{{name|Frosted Heights}} | {{name|Frosted Heights}} | ||
|- | |- | ||
|[[File:Aquamarine.png|center| | |[[File:Aquamarine.png|center|50x50px|link=Aquamarine]] | ||
|[[Aquamarine]] | |[[Aquamarine]] | ||
|{{price|250}} | |{{price|250}} | ||
| Line 102: | Line 127: | ||
{{name|Forest of Valor}} | {{name|Forest of Valor}} | ||
|- | |- | ||
|[[File:Shiny Aquamarine.png|center| | |[[File:Shiny Aquamarine.png|center|50x50px|link=Shiny Aquamarine]] | ||
|[[Shiny Aquamarine]] | |[[Shiny Aquamarine]] | ||
|{{price|1000}} | |{{price|1000}} | ||
| Line 109: | Line 134: | ||
{{name|Forest of Valor}} | {{name|Forest of Valor}} | ||
|- | |- | ||
|[[File:Citrine.png|center| | |[[File:Citrine.png|center|50x50px|link=Citrine]] | ||
|[[Citrine]] | |[[Citrine]] | ||
|{{price|380}} | |{{price|380}} | ||
| Line 116: | Line 141: | ||
{{name|Glade of Trust}} | {{name|Glade of Trust}} | ||
|- | |- | ||
|[[File:Shiny Citrine.png|center| | |[[File:Shiny Citrine.png|center|50x50px|link=Shiny Citrine]] | ||
|[[Shiny Citrine]] | |[[Shiny Citrine]] | ||
|{{price|1520}} | |{{price|1520}} | ||
| Line 123: | Line 148: | ||
{{name|Glade of Trust}} | {{name|Glade of Trust}} | ||
|- | |- | ||
|[[File:Diamond.png|center| | |[[File:Diamond.png|center|50x50px|link=Diamond]] | ||
|[[Diamond]] | |[[Diamond]] | ||
|{{price|600}} | |{{price|600}} | ||
| Line 129: | Line 154: | ||
{{name|Forgotten Lands}} | {{name|Forgotten Lands}} | ||
|- | |- | ||
|[[File:Shiny Diamond.png|center| | |[[File:Shiny Diamond.png|center|50x50px|link=Shiny Diamond]] | ||
|[[Shiny Diamond]]. | |[[Shiny Diamond]]. | ||
|{{price|2400}} | |{{price|2400}} | ||
| Line 135: | Line 160: | ||
{{name|Forgotten Lands}} | {{name|Forgotten Lands}} | ||
|- | |- | ||
|[[File:Emerald.png|center| | |[[File:Emerald.png|center|50x50px|link=Emerald]] | ||
|[[Emerald]] | |[[Emerald]] | ||
|{{price|325}} | |{{price|325}} | ||
| Line 142: | Line 167: | ||
{{name|Glade of Trust}} | {{name|Glade of Trust}} | ||
|- | |- | ||
|[[File:Shiny Emerald.png|center| | |[[File:Shiny Emerald.png|center|50x50px|link=Shiny Emerald]] | ||
|[[Shiny Emerald]] | |[[Shiny Emerald]] | ||
|{{price|1300}} | |{{price|1300}} | ||
| Line 149: | Line 174: | ||
{{name|Glade of Trust}} | {{name|Glade of Trust}} | ||
|- | |- | ||
|[[File:Garnet.png|center| | |[[File:Garnet.png|center|50x50px|link=Garnet]] | ||
|[[Garnet]] | |[[Garnet]] | ||
|{{price|160}} | |{{price|160}} | ||
| Line 156: | Line 181: | ||
{{name|Plaza}} | {{name|Plaza}} | ||
|- | |- | ||
|[[File:Shiny Garnet.png|center| | |[[File:Shiny Garnet.png|center|50x50px|link=Shiny Garnet]] | ||
|[[Shiny Garnet]] | |[[Shiny Garnet]] | ||
|{{price|640}} | |{{price|640}} | ||
| Line 163: | Line 188: | ||
{{name|Plaza}} | {{name|Plaza}} | ||
|- | |- | ||
|[[File:Onyx.png|center| | |[[File:Onyx.png|center|50x50px|link=Onyx]] | ||
|[[Onyx]] | |[[Onyx]] | ||
|{{price|300}} | |{{price|300}} | ||
| | |All Biomes | ||
|- | |- | ||
|[[File:Peridot.png|center| | |[[File:Peridot.png|center|50x50px|link=Peridot]] | ||
|[[Peridot]] | |[[Peridot]] | ||
|{{price|200}} | |{{price|200}} | ||
| Line 176: | Line 200: | ||
{{name|Peaceful Meadow}} | {{name|Peaceful Meadow}} | ||
|- | |- | ||
|[[File:Shiny Peridot.png|center| | |[[File:Shiny Peridot.png|center|50x50px|link=Shiny Peridot]] | ||
|[[Shiny Peridot]] | |[[Shiny Peridot]] | ||
|{{price|800}} | |{{price|800}} | ||
| Line 183: | Line 207: | ||
{{name|Peaceful Meadow}} | {{name|Peaceful Meadow}} | ||
|- | |- | ||
|[[File:Ruby.png|center| | |[[File:Ruby.png|center|50x50px|link=Ruby]] | ||
|[[Ruby]] | |[[Ruby]] | ||
|{{price|350}} | |{{price|350}} | ||
| Line 189: | Line 213: | ||
{{name|Vitalys Mine}} | {{name|Vitalys Mine}} | ||
|- | |- | ||
|[[File:Shiny Ruby.png|center| | |[[File:Shiny Ruby.png|center|50x50px|link=Shiny Ruby]] | ||
|[[Shiny Ruby]] | |[[Shiny Ruby]] | ||
|{{price|1400}} | |{{price|1400}} | ||
| Line 195: | Line 219: | ||
{{name|Vitalys Mine}} | {{name|Vitalys Mine}} | ||
|- | |- | ||
|[[File:Sapphire.png|center| | |[[File:Sapphire.png|center|50x50px|link=Sapphire]] | ||
|[[Sapphire]] | |[[Sapphire]] | ||
|{{price|350}} | |{{price|350}} | ||
| Line 201: | Line 225: | ||
{{name|Vitalys Mine}} | {{name|Vitalys Mine}} | ||
|- | |- | ||
|[[File:Shiny Sapphire.png|center| | |[[File:Shiny Sapphire.png|center|50x50px|link=Shiny Sapphire]] | ||
|[[Shiny Sapphire]] | |[[Shiny Sapphire]] | ||
|{{price|1400}} | |{{price|1400}} | ||
| Line 207: | Line 231: | ||
{{name|Vitalys Mine}} | {{name|Vitalys Mine}} | ||
|- | |- | ||
|[[File:Topaz.png|center| | |[[File:Topaz.png|center|50x50px|link=Topaz]] | ||
|[[Topaz]] | |[[Topaz]] | ||
|{{price|240}} | |{{price|240}} | ||
| Line 213: | Line 237: | ||
{{name|Plaza}} | {{name|Plaza}} | ||
|- | |- | ||
|[[File:Shiny Topaz.png|center| | |[[File:Shiny Topaz.png|center|50x50px|link=Shiny Topaz]] | ||
|[[Shiny Topaz]] | |[[Shiny Topaz]] | ||
|{{price|960}} | |{{price|960}} | ||
| Line 219: | Line 243: | ||
{{name|Plaza}} | {{name|Plaza}} | ||
|- | |- | ||
|[[File:Tourmaline.png|center| | |[[File:Tourmaline.png|center|50x50px|link=Tourmaline]] | ||
|[[Tourmaline]] | |[[Tourmaline]] | ||
|{{price|420}} | |{{price|420}} | ||
| Line 226: | Line 250: | ||
{{name|Sunlit Plateau}} | {{name|Sunlit Plateau}} | ||
|- | |- | ||
|[[File:Shiny Tourmaline.png|center| | |[[File:Shiny Tourmaline.png|center|50x50px|link=Shiny Tourmaline]] | ||
|[[Shiny Tourmaline]] | |[[Shiny Tourmaline]] | ||
|{{price|1680}} | |{{price|1680}} | ||
| Line 233: | Line 257: | ||
{{name|Sunlit Plateau}} | {{name|Sunlit Plateau}} | ||
|- | |- | ||
|[[File:Vitalys Crystal.png|center| | |[[File:Vitalys Crystal.png|center|50x50px|link=Vitalys Crystal]] | ||
|[[Vitalys Crystal]] | |[[Vitalys Crystal]] | ||
|{{price|12}} | |{{price|12}} | ||
| | | | ||
{{name|Vitalys Mine}} | {{name|Vitalys Mine}} | ||
|- | |- | ||
|[[File:Blue Zircon.png|center| | |[[File:Alexandrite.png|center|50x50px|link=Alexandrite]] | ||
|[[Alexandrite]] | |||
|{{price|350}} | |||
| | |||
{{name|Glittering Dunes|link=Glittering Dunes{{!}}The Wastes}}<br> | |||
{{name|Glittering Dunes|link=Glittering Dunes{{!}}The Oasis}} | |||
|- | |||
|[[File:Shiny Alexandrite.png|center|50x50px|link=Shiny Alexandrite]] | |||
|[[Shiny Alexandrite]] | |||
|{{price|1400}} | |||
| | |||
{{name|Glittering Dunes|link=Glittering Dunes{{!}}The Wastes}}<br> | |||
{{name|Glittering Dunes|link=Glittering Dunes{{!}}The Oasis}} | |||
|- | |||
|[[File:Blue Zircon.png|center|50x50px|link=Blue Zircon]] | |||
|[[Blue Zircon]] | |[[Blue Zircon]] | ||
|{{price|500}} | |||
| | |||
{{name|Wild Tangle|link=Wild Tangle{{!}}The Lagoon}} | |||
|- | |||
|[[File:Shiny Blue Zircon.png|center|50x50px|link=Shiny Blue Zircon]] | |||
|[[Shiny Blue Zircon]] | |||
|{{price|2000}} | |||
| | |||
{{name|Wild Tangle|link=Wild Tangle{{!}}The Lagoon}} | |||
|- | |||
|[[File:Bumblestone.png|center|50x50px|link=Bumblestone]] | |||
|[[Bumblestone]] | |||
|{{price|400}} | |||
| | |||
{{name|Glittering Dunes|link=Glittering Dunes{{!}}The Borderlands}} | |||
|- | |||
|[[File:Shiny Bumblestone.png|center|50x50px|link=Shiny Bumblestone]] | |||
|[[Shiny Bumblestone]] | |||
|{{price|1600}} | |||
| | |||
{{name|Glittering Dunes|link=Glittering Dunes{{!}}The Borderlands}} | |||
|- | |||
|[[File:Evergem.png|center|50x50px|link=Evergem]] | |||
|[[Evergem]] | |||
|{{price|300}} | |||
| | |||
{{name|Ancient's Landing|link=Ancient's Landing{{!}}The Ruins}} | |||
|- | |||
|[[File:Shiny Evergem.png|center|50x50px|link=Shiny Evergem]] | |||
|[[Shiny Evergem]] | |||
|{{price|1200}} | |||
| | |||
{{name|Ancient's Landing|link=Ancient's Landing{{!}}The Ruins}} | |||
|- | |||
|[[File:Jade.png|center|50x50px|link=Jade]] | |||
|[[Jade]] | |||
|{{price|250}} | |||
| | |||
{{name|Ancient's Landing|link=Ancient's Landing{{!}}The Courtyard}}<br> | |||
{{name|Ancient's Landing|link=Ancient's Landing{{!}}The Overlook}} | |||
|- | |||
|[[File:Shiny Jade.png|center|50x50px|link=Shiny Jade]] | |||
|[[Shiny Jade]] | |||
|{{price|1000}} | |||
| | |||
{{name|Ancient's Landing|link=Ancient's Landing{{!}}The Courtyard}}<br> | |||
{{name|Ancient's Landing|link=Ancient's Landing{{!}}The Overlook}} | |||
|- | |||
|[[File:Spinel.png|center|50x50px|link=Spinel]] | |||
|[[Spinel]] | |||
|{{price|450}} | |||
| | | | ||
| | {{name|Wild Tangle|link=Wild Tangle{{!}}The Promenade}}<br> | ||
| | {{name|Wild Tangle|link=Wild Tangle{{!}}The Grove}} | ||
|- | |- | ||
|[[File: | |[[File:Shiny Spinel.png|center|50x50px|link=Shiny Spinel]] | ||
|[[ | |[[Shiny Spinel]] | ||
|{{price|1800}} | |||
| | | | ||
| | {{name|Wild Tangle|link=Wild Tangle{{!}}The Promenade}}<br> | ||
| | {{name|Wild Tangle|link=Wild Tangle{{!}}The Grove}} | ||
|} | |} | ||
==Dreamlight and Memories== | ==Dreamlight and Memories== | ||
There are two rotating [[Dreamlight#Dreamlight Duties|Dreamlight Duties]] directly related to Mining: "Mine 2 Minerals" and "Mine 4 Rock Spots". Mining comprises its own tab of [[Dreamlight#Mining|Dreamlight Achievements]]. There are | There are two rotating [[Dreamlight#Dreamlight Duties|Dreamlight Duties]] directly related to Mining: "Mine 2 Minerals" and "Mine 4 Rock Spots". Mining comprises its own tab of [[Dreamlight#Mining|Dreamlight Achievements]]. There are 11 [[Memories]] consisting of 10 Memory Pieces each that can only be found by mining. | ||
<div id="memorygallery"> | <div id="memorygallery"> | ||
| Line 272: | Line 352: | ||
{{Memory|Mickey & Friends Memory 3|5|color=pink|type=hidden|link=Memories#Mickey & Friends}} | {{Memory|Mickey & Friends Memory 3|5|color=pink|type=hidden|link=Memories#Mickey & Friends}} | ||
{{Memory|The Sword in the Stone Memory 4|5|color=red|type=hidden|link=Memories#The Sword in the Stone}} | {{Memory|The Sword in the Stone Memory 4|5|color=red|type=hidden|link=Memories#The Sword in the Stone}} | ||
{{Memory|Nightmare Before Christmas Memory 4|4|color=red|type=hidden}} | |||
{{Memory|Encanto Memory 4|4|color=red|type=hidden}} | |||
{{Memory|Lilo & Stitch Memory 5|4|color=red|type=hidden}} | |||
{{Memory|Aladdin Memory 1|6|color=yellow|type=hidden}} | |||
{{Memory|The Princess and the Frog Memory 1|4|color=red|type=hidden}} | |||
</div> | </div> | ||
{{SEO}} | {{SEO}} | ||
[[Category: Collections | [[Category: Collections]] | ||
Latest revision as of 22:21, 24 January 2024
| Mining | |
|---|---|
 | |
| Information | |
| Type: | |
| Tool: | |
| Energy: | |
| Companion Friendship Reward: |
|
Mining is an activity which involves using the pickaxe on the stones, obstacles, and rock spots throughout the valley to collect resources and valuable gems.
Resources and gems are used to make refined materials, furniture, and other items through crafting. They can also be sold for Star Coins or gifted to villagers to raise Friendship.
How to Mine
Each biome has mining nodes which can be mined by interacting with them while the pickaxe is equipped. A mining node will usually drop resources with each swing of the pickaxe, up to five times, and the final swing of the pickaxe may drop a gem. Each swing of the pickaxe consumes 40 energy. There's a rare chance when mining that Onyx will drop, which is a rare resource used to craft pickaxe polish. Pickaxe polish guarantees receiving a gem from each swing.
Energy Cost
- Main article: Energy
Each swing of the Pickaxe requires ![]() 40. Each rock node typically requires 2-5 swings to mine, which requires between 80-200 energy.
40. Each rock node typically requires 2-5 swings to mine, which requires between 80-200 energy.
Villager Companions
When reaching level 2 Friendship with a Villager, they can be assigned a Role. Villagers who have been assigned the Mining Role will gain extra Friendship for every node mined. They also have a chance to drop the last item mined before the node is exhausted while they're following. Extra materials they produce will be dropped on the ground, and can be picked up by running over them.
Each level of friendship increases the rate which extra materials will drop. It's not only effective for leveling up Friendship with these characters, but extremely helpful for offering bonus materials when mining. Be sure to always bring a Companion along when mining!
Resources
| Image | Name | Sell Price | Locations |
|---|---|---|---|
 |
Stone | All Biomes | |
 |
Coal Ore | All Biomes | |
 |
Iron Ore |
| |
 |
Gold Nugget | ||
 |
Crystal | ||
| Copper | |||
| Quartz | |||
| Tin | |||
| Zinc |
Gems
Gems are rare minerals what can be found by mining nodes with the pickaxe.
Each gem also has a "shiny" version which is larger and sells for 4x more coins. Sometimes nodes will have gems appear on them, and sometimes the gems will not appear until mined.
There are 2 largely overlapping categorizations related to Gems: Gems and Minerals. Minerals include all of the following listed in the table below. Gems include all of the following listed in the table below, with the exception of Vitalys Crystal, which only counts as a Mineral. Although Crystal is also a byproduct of mining, it is not categorized as either a Gem or a Mineral.
| Image | Name | Sell Price | Location |
|---|---|---|---|
 |
Amethyst | ||
 |
Shiny Amethyst | ||
 |
Aquamarine | ||
 |
Shiny Aquamarine | ||
 |
Citrine | ||
 |
Shiny Citrine | ||
 |
Diamond | ||
 |
Shiny Diamond. | ||
 |
Emerald | ||
 |
Shiny Emerald | ||
 |
Garnet | ||
 |
Shiny Garnet | ||
| Onyx | All Biomes | ||
 |
Peridot | ||
 |
Shiny Peridot | ||
 |
Ruby | ||
 |
Shiny Ruby | ||
 |
Sapphire | ||
 |
Shiny Sapphire | ||
 |
Topaz | ||
 |
Shiny Topaz | ||
 |
Tourmaline | ||
 |
Shiny Tourmaline | ||
 |
Vitalys Crystal | ||
 |
Alexandrite | ||
| Shiny Alexandrite | |||
 |
Blue Zircon | ||
 |
Shiny Blue Zircon | ||
 |
Bumblestone | ||
| Shiny Bumblestone | |||
 |
Evergem | ||
| Shiny Evergem | |||
| Jade | |||
| Shiny Jade | |||
| Spinel | |||
| Shiny Spinel |
Dreamlight and Memories
There are two rotating Dreamlight Duties directly related to Mining: "Mine 2 Minerals" and "Mine 4 Rock Spots". Mining comprises its own tab of Dreamlight Achievements. There are 11 Memories consisting of 10 Memory Pieces each that can only be found by mining.