Fishing: Difference between revisions
Marblemadmax (talk | contribs) |
|||
| (33 intermediate revisions by 8 users not shown) | |||
| Line 42: | Line 42: | ||
==Fish Types== | ==Fish Types== | ||
{| class="wikitable sortable" id='recipe-table' | {| class="wikitable sortable" id='recipe-table' <!--0: none, 1 none/white, 2: white, 3: white/blue, 4: blue/white, 5: blue, 6: gold--> | ||
!Image | ! Image | ||
!Name | ! Name | ||
! Sell Price | |||
!Sell Price | ! Energy | ||
!Energy | ! Ripples | ||
!Locations | ! Locations | ||
![[Cooking#Versatile Ingredients|Cooking Ingredient]]<br>Category | |||
!style="width: 350px;" | Notes | !style="width: 350px;" | Notes | ||
|- | |- | ||
|[[File:Anglerfish.png|center|50px|link=Anglerfish]] | | [[File:Anglerfish.png|center|50px|link=Anglerfish]] | ||
|[[Anglerfish]] | | [[Anglerfish]] | ||
| data-sort-value=" | | {{price|1500}} | ||
|{{ | | {{energy|2000}} | ||
|{{ | | data-sort-value="6" | {{pool|Gold}} | ||
| | | {{name|Forgotten Lands}} | ||
| {{inlineIcon|Fish|link=:Category:Fish}} | |||
| | | | ||
|- | |- | ||
|[[File:Bass.png|center|50px|link=Bass]] | | [[File:Bass.png|center|50px|link=Bass]] | ||
|[[Bass]] | | [[Bass]] | ||
| data-sort-value=" | | {{price|25}} | ||
| {{energy|150}} | |||
| data-sort-value="1" | {{pool|None}} or {{pool|White}} | |||
| | | | ||
{{name|Peaceful Meadow}}<br> | {{name|Peaceful Meadow}}<br> | ||
{{name|Forest of Valor}}<br> | {{name|Forest of Valor}}<br> | ||
{{name|Sunlit Plateau}}<br> | {{name|Sunlit Plateau}}<br> | ||
{{name|Frosted Heights}} | {{name|Frosted Heights}}<br> | ||
{{name|Glittering Dunes|link=Glittering Dunes{{!}}Oasis}}<br> | |||
{{name|Wild Tangle}} | |||
| {{inlineIcon|Fish|link=:Category:Fish}} | |||
| | | | ||
|- | |- | ||
|[[File:Bream.png|center|50px|link=Bream]] | | [[File:Bream.png|center|50px|link=Bream]] | ||
|[[Bream]] | | [[Bream]] | ||
| data-sort-value=" | | {{price|280}} | ||
|{{ | | {{energy|1300}} | ||
|{{ | | data-sort-value="5" | {{pool|Blue}} | ||
| | | {{name|Peaceful Meadow}} | ||
| {{inlineIcon|Fish|link=:Category:Fish}} | |||
| | | | ||
|- | |- | ||
|[[File:Brilliant Blue Starfish.png|center|50px|link=Brilliant Blue Starfish]] | | [[File:Brilliant Blue Starfish.png|center|50px|link=Brilliant Blue Starfish]] | ||
|[[Brilliant Blue Starfish]] | | [[Brilliant Blue Starfish]] | ||
| {{price|875}} | |||
|{{price|875}} | | {{energy|1650}} | ||
|{{energy|1650}} | | data-sort-value="6" | {{pool|Gold}} | ||
| | |||
{{ | |||
| | | | ||
{{name|Glittering Dunes|link=Glittering Dunes{{!}}The Oasis}} | |||
| {{inlineIcon|Seafood|link=:Category:Seafood}} | |||
| <!--Requires night (6pm-5am)--> {{cleanup|Needs verification}} | |||
|- | |- | ||
|[[File:Carp.png|center|50px|link=Carp]] | | [[File:Carp.png|center|50px|link=Carp]] | ||
|[[Carp]] | | [[Carp]] | ||
| data-sort-value=" | | {{price|400}} | ||
| {{energy|800}} | |||
| data-sort-value="4" | {{pool|Blue}}, can be {{pool|White}} | |||
| | | | ||
{{name|Forest of Valor}}<br> | {{name|Forest of Valor}}<br> | ||
{{name|Sunlit Plateau}} | {{name|Sunlit Plateau}} | ||
| {{inlineIcon|Fish|link=:Category:Fish}} | |||
| | | | ||
|- | |- | ||
|[[File:Catfish.png|center|50px|link=Catfish]] | | [[File:Catfish.png|center|50px|link=Catfish]] | ||
|[[Catfish]] | | [[Catfish]] | ||
| {{price|550}} | |||
|{{ | | {{energy|1200}} | ||
|{{ | | data-sort-value="6" | {{pool|Gold}} | ||
|{{name|Peaceful Meadow}} | |{{name|Peaceful Meadow}} | ||
| {{inlineIcon|Fish|link=:Category:Fish}} | |||
| | | | ||
|- | |- | ||
|[[File:Cod.png|center|50px|link=Cod]] | | [[File:Cod.png|center|50px|link=Cod]] | ||
|[[Cod]] | | [[Cod]] | ||
| data-sort-value=" | | {{price|35}} | ||
| {{energy|150}} | |||
| data-sort-value="1" | {{pool|None}} or {{pool|White}} | |||
| | | | ||
{{name|Dazzle Beach}}<br> | {{name|Dazzle Beach}}<br> | ||
{{name|Forgotten Lands}}<br> | {{name|Forgotten Lands}}<br> | ||
{{name|Glade of Trust}} | {{name|Glade of Trust}}<br> | ||
{{name|Ancient's Landing|link=Ancient's Landing{{!}}The Docks}}<br> | |||
{{name|Ancient's Landing|link=Ancient's Landing{{!}}The Overlook}} | |||
| {{inlineIcon|Fish|link=:Category:Fish}} | |||
| | |||
|- | |||
| [[File:Crab.png|center|50px|link=Crab]] | |||
| [[Crab]] | |||
| {{price|600}} | |||
| {{energy|1550}} | |||
| data-sort-value="4" | {{pool|Blue}}, can be {{pool|White}} | |||
| {{name|Frosted Heights}} | |||
| {{inlineIcon|Seafood|link=:Category:Seafood}} | |||
| | |||
|- | |||
| [[File:Dunebopper.png|center|50px|link=Dunebopper]] | |||
| [[Dunebopper]] | |||
| {{price|550}} | |||
| {{energy|1100}} | |||
| data-sort-value="5" | {{pool|Blue}} | |||
| | |||
{{name|Glittering Dunes|link=Glittering Dunes{{!}}The Oasis}} | |||
| {{inlineIcon|Fish|link=:Category:Fish}} | |||
| | | | ||
|- | |- | ||
|[[File: | | [[File:Electric Eel.png|center|50px|link=Electric Eel]] | ||
|[[ | | [[Electric Eel]] | ||
| data-sort-value=" | | {{price|1025}} | ||
|{{ | | {{energy|1200}} | ||
|{{ | | data-sort-value="6" | {{pool|Gold}} | ||
|{{ | | | ||
{{name|Wild Tangle|link=Wild Tangle{{!}}The Grasslands}}<br> | |||
{{name|Wild Tangle|link=Wild Tangle{{!}}The Promenade}} | |||
| {{inlineIcon|Fish|link=:Category:Fish}} | |||
| | | | ||
|- | |- | ||
|[[File:Fugu.png|center|50px|link=Fugu]] | | [[File:Fugu.png|center|50px|link=Fugu]] | ||
|[[Fugu]] | | [[Fugu]] | ||
| data-sort-value=" | | {{price|900}} | ||
|{{ | | {{energy|1700}} | ||
|{{ | | data-sort-value="6" | {{pool|Gold}} | ||
| | | {{name|Dazzle Beach}} | ||
| {{inlineIcon|Fish|link=:Category:Fish}} | |||
| Requires [[Environment#Rain|rain]] | | Requires [[Environment#Rain|rain]] | ||
|- | |- | ||
|[[File:Here_and_There_Fish.png|center|50px|link=Here and There Fish]] | |[[File:Here_and_There_Fish.png|center|50px|link=Here and There Fish]] | ||
|[[Here and There Fish]] | |[[Here and There Fish]] | ||
|{{price|2000}} | |{{price|2000}} | ||
|{{energy|1000}} | |{{energy|1000}} | ||
| | | data-sort-value="0" | {{pool|None}}, can be {{pool|White}}<!--Most often none, hence 0 instead of 1 for sort purposes--> | ||
| Requires morning (6-10am) or evening (6-10pm) after | | | ||
{{name|Peaceful Meadow}}<br> | |||
{{name|Dazzle Beach}}<br> | |||
{{name|Glade of Trust}}<br> | |||
{{name|Forest of Valor}}<br> | |||
{{name|Sunlit Plateau}}<br> | |||
{{name|Frosted Heights}}<br> | |||
{{name|Forgotten Lands}} | |||
| {{inlineIcon|Fish|link=:Category:Fish}} | |||
| Requires morning (6-10am) or evening (6-10pm) after completing {{quest|Here and There and Back Again|friendship=Nala|level=10}} | |||
|- | |- | ||
|[[File:Herring.png|center|50px|link=Herring]] | | [[File:Herring.png|center|50px|link=Herring]] | ||
|[[Herring]] | | [[Herring]] | ||
| {{price|65}} | |||
|{{ | | {{energy|250}} | ||
|{{ | | data-sort-value="2" | {{pool|White}} | ||
| | | | ||
{{name|Dazzle Beach}}<br> | {{name|Dazzle Beach}}<br> | ||
{{name|Glade of Trust}} | {{name|Glade of Trust}} | ||
| {{inlineIcon|Fish|link=:Category:Fish}} | |||
| | | | ||
|- | |- | ||
|[[File:Kingfish.png|center|50px|link=Kingfish]] | | [[File:Kingfish.png|center|50px|link=Kingfish]] | ||
|[[Kingfish]] | | [[Kingfish]] | ||
| {{price|450}} | |||
|{{ | | {{energy|800}} | ||
|{{ | | data-sort-value="5" | {{pool|Blue}} | ||
|{{name|Dazzle Beach}} | |{{name|Dazzle Beach}} | ||
| {{inlineIcon|Fish|link=:Category:Fish}} | |||
| Requires night (6pm-5am) | | Requires night (6pm-5am) | ||
|- | |- | ||
|[[File:Lancetfish.png|center|50px|link=Lancetfish]] | | [[File:Lancetfish.png|center|50px|link=Lancetfish]] | ||
|[[Lancetfish]] | | [[Lancetfish]] | ||
| data-sort-value=" | | {{price|650}} | ||
|{{ | | {{energy|1300}} | ||
|{{ | | data-sort-value="5" | {{pool|Blue}} | ||
| | | {{name|Forgotten Lands}} | ||
| {{inlineIcon|Fish|link=:Category:Fish}} | |||
| | | | ||
|- | |- | ||
|[[File:Lobster.png|center|50px|link=Lobster]] | |[[File:Lobster.png|center|50px|link=Lobster]] | ||
|[[Lobster]] | |[[Lobster]] | ||
| data-sort-value=" | | {{price|950}} | ||
|{{price| | | {{energy|1600}} | ||
|{{energy| | | data-sort-value="6" | {{pool|Gold}} | ||
|{{name| | | {{name|Glade of Trust}} | ||
| {{inlineIcon|Seafood|link=:Category:Seafood}} | |||
| | |||
|- | |||
| [[File:Octopus.png|center|50px|link=Octopus]] | |||
| [[Octopus]] | |||
| {{price|290}} | |||
| {{energy|700}} | |||
| data-sort-value="4" | {{pool|Blue}}, can be {{pool|White}} | |||
| | |||
{{name|Ancient's Landing|link=Ancient's Landing{{!}}The Docks}}<br> | |||
{{name|Ancient's Landing|link=Ancient's Landing{{!}}The Overlook}} | |||
| {{inlineIcon|Seafood|link=:Category:Seafood}} | |||
| | | | ||
|- | |- | ||
|[[File:Perch.png|center|50px|link=Perch]] | | [[File:Perch.png|center|50px|link=Perch]] | ||
|[[Perch]] | | [[Perch]] | ||
| data-sort-value=" | | {{price|80}} | ||
| {{energy|400}} | |||
| data-sort-value="4" | {{pool|Blue}}, can be {{pool|White}} | |||
| | | | ||
{{name|Forest of Valor}}<br> | {{name|Forest of Valor}}<br> | ||
{{name|Sunlit Plateau}} | {{name|Sunlit Plateau}}<br> | ||
{{name|Wild Tangle|link=Wild Tangle{{!}}The Grove}}<br> | |||
{{name|Wild Tangle|link=Wild Tangle{{!}}The Lagoon}} | |||
| {{inlineIcon|Fish|link=:Category:Fish}} | |||
| | |||
|- | |||
| [[File:Pike.png|center|50px|link=Pike]] | |||
| [[Pike]] | |||
| {{price|800}} | |||
| {{energy|1500}} | |||
| data-sort-value="6" | {{pool|Gold}} | |||
| {{name|Forest of Valor}} | |||
| {{inlineIcon|Fish|link=:Category:Fish}} | |||
| | |||
|- | |||
| [[File:Piranha.png|center|50px|link=Piranha]] | |||
| [[Piranha]] | |||
| {{price|1300}} | |||
| {{energy|1900}} | |||
| data-sort-value="6" | {{pool|Gold}} | |||
| {{name|Wild Tangle|link=Wild Tangle{{!}}The Lagoon}} | |||
| {{inlineIcon|Fish|link=:Category:Fish}} | |||
| | |||
|- | |||
| [[File:Pirarucu.png|center|50px|link=Pirarucu]] | |||
| [[Pirarucu]] | |||
| {{price|625}} | |||
| {{energy|1250}} | |||
| data-sort-value="5" | {{pool|Blue}} | |||
| | |||
{{name|Wild Tangle|link=Wild Tangle{{!}}The Grasslands}}<br> | |||
{{name|Wild Tangle|link=Wild Tangle{{!}}The Promenade}}<br> | |||
{{name|Wild Tangle|link=Wild Tangle{{!}}The Grove}}<br> | |||
{{name|Wild Tangle|link=Wild Tangle{{!}}The Lagoon}} | |||
| {{inlineIcon|Fish|link=:Category:Fish}} | |||
| | | | ||
|- | |- | ||
|[[File: | |[[File:Pretty Pink Starfish.png|center|50px|link=Pretty Pink Starfish]] | ||
|[[ | |[[Pretty Pink Starfish]] | ||
|{{price|875}} | |||
|{{price| | |||
|{{energy|1500}} | |{{energy|1500}} | ||
|{{name| | | data-sort-value="6" | {{pool|Gold}} | ||
|{{name|Glittering Dunes|link=Glittering Dunes{{!}}The Oasis}} | |||
| {{inlineIcon|Seafood|link=:Category:Seafood}} | |||
| | | | ||
|- | |- | ||
|[[File:Rainbow Trout.png|center|50px|link=Rainbow Trout]] | |[[File:Prisma Shrimp.png|center|50px|link=Prisma Shrimp]] | ||
|[[Rainbow Trout]] | |[[Prisma Shrimp]] | ||
|{{price|1100}} | |||
|{{energy|1600}} | |||
| data-sort-value="6" | {{pool|Gold}} | |||
| | |||
{{name|Wild Tangle|link=Wild Tangle{{!}}The Grove}} | |||
| {{inlineIcon|Seafood|link=:Category:Seafood}} | |||
| | |||
|- | |||
| [[File:Rainbow Trout.png|center|50px|link=Rainbow Trout]] | |||
| [[Rainbow Trout]] | |||
| {{price|50}} | |||
| {{energy|300}} | |||
| data-sort-value="3" | {{pool|White}} | | data-sort-value="3" | {{pool|White}} | ||
| | | | ||
{{name|Peaceful Meadow}}<br> | {{name|Peaceful Meadow}}<br> | ||
{{name|Forest of Valor}} | {{name|Forest of Valor}} | ||
| {{inlineIcon|Fish|link=:Category:Fish}} | |||
| | |||
|- | |||
| [[File:Robot Fish.png|center|50px|link=Robot Fish]] | |||
| [[Robot Fish]] | |||
| {{price|625}} | |||
| {{energy|1350}} | |||
| data-sort-value="6" | {{pool|Gold}} | |||
| | |||
{{name|Ancient's Landing|link=Ancient's Landing{{!}}The Docks}}<br> | |||
{{name|Ancient's Landing|link=Ancient's Landing{{!}}The Overlook}} | |||
| {{inlineIcon|Fish|link=:Category:Fish}} | |||
| | | | ||
|- | |- | ||
|[[File: | | [[File:Salmon.png|center|50px|link=Salmon]] | ||
|[[ | | [[Salmon]] | ||
| data-sort-value=" | | {{price|150}} | ||
| {{energy|500}} | |||
| data-sort-value="3" | {{pool|White}}, can be {{pool|Blue}} | |||
| | | | ||
| | {{name|Frosted Heights}}<br> | ||
{{name|Sunlit Plateau}}<br> | |||
{{name|Wild Tangle|link=Wild Tangle{{!}}The Grasslands}}<br> | |||
{{name|Wild Tangle|link=Wild Tangle{{!}}The Promenade}} | |||
| {{inlineIcon|Fish|link=:Category:Fish}} | |||
| | | | ||
|- | |- | ||
|[[File: | | [[File:Sand Fish.png|center|50px|link=Sand Fish]] | ||
|[[ | | [[Sand Fish]] | ||
| data-sort-value=" | | {{price|30}} | ||
| {{energy|150}} | |||
| data-sort-value="2" | {{pool|None}}, can be {{pool|White}} | |||
| | | | ||
{{name|The | {{name|Glittering Dunes|link=Glittering Dunes{{!}}The Plains}}<br> | ||
{{name|The | {{name|Glittering Dunes|link=Glittering Dunes{{!}}The Wastes}}<br> | ||
{{name|Glittering Dunes|link=Glittering Dunes{{!}}The Borderlands}} | |||
| {{inlineIcon|Fish|link=:Category:Fish}} | |||
| | | | ||
|- | |- | ||
|[[File: | | [[File:Sand Worm.png|center|50px|link=Sand Worm]] | ||
|[[ | | [[Sand Worm]] | ||
| data-sort-value=" | | {{price|800}} | ||
|{{price| | | {{energy|1650}} | ||
|{{energy| | | data-sort-value="6" | {{pool|Gold}} | ||
| | |||
{{name|Glittering Dunes|link=Glittering Dunes{{!}}The Plains}}<br> | |||
{{name|Glittering Dunes|link=Glittering Dunes{{!}}The Wastes}}<br> | |||
{{name|Glittering Dunes|link=Glittering Dunes{{!}}The Borderlands}} | |||
| {{inlineIcon|Dairy and Oil|link=:Category:Dairy and Oil}} | |||
| | |||
|- | |||
| [[File:Scorpion.png|center|50px|link=Scorpion]] | |||
| [[Scorpion]] | |||
| {{price|425}} | |||
| {{energy|900}} | |||
| data-sort-value="5" | {{pool|Blue}} (Pink) | |||
| | |||
{{name|Glittering Dunes|link=Glittering Dunes{{!}}The Plains}}<br> | |||
{{name|Glittering Dunes|link=Glittering Dunes{{!}}The Wastes}}<br> | |||
{{name|Glittering Dunes|link=Glittering Dunes{{!}}The Borderlands}} | |||
| {{inlineIcon|Dairy and Oil|link=:Category:Dairy and Oil}} | |||
| | |||
|- | |||
|[[File:Sea Snail.png|center|50px|link=Sea Snail]] | |||
|[[Sea Snail]] | |||
|{{price|250}} | |||
|{{energy|800}} | |||
| data-sort-value="4" | {{pool|Blue}}, can be {{pool|White}} | |||
| | |||
{{name|Ancient's Landing|link=Ancient's Landing{{!}}The Docks}}<br> | |||
{{name|Ancient's Landing|link=Ancient's Landing{{!}}The Overlook}} | |||
| {{inlineIcon|Seafood|link=:Category:Seafood}} | |||
| | | | ||
{{ | |- | ||
{{ | | [[File:Seaweed.png|center|50px|link=Seaweed]] | ||
| [[Seaweed]] | |||
| {{price|20}} | |||
| {{energy|25}} | |||
| data-sort-value="0" | {{pool|None}} | |||
| {{inlineIcon|Everywhere}} | |||
| {{inlineIcon|Vegetables|link=:Category:Vegetables}} | |||
| | | | ||
|- | |- | ||
|[[File: | |[[File:Shad.png|center|50px|link=Shad]] | ||
|[[ | |[[Shad]] | ||
|{{price|60}} | |||
|{{ | |{{energy|300}} | ||
|{{ | | data-sort-value="2" | {{pool|White}} | ||
| | | | ||
{{name|The | {{name|Ancient's Landing|link=Ancient's Landing{{!}}The Docks}}<br> | ||
{{name|The | {{name|Ancient's Landing|link=Ancient's Landing{{!}}The Overlook}} | ||
{{ | | {{inlineIcon|Fish|link=:Category:Fish}} | ||
| | | | ||
|- | |- | ||
|[[File: | | [[File:Shrimp.png|center|50px|link=Shrimp]] | ||
|[[ | | [[Shrimp]] | ||
| data-sort-value="4" | {{pool| | | {{price|300}} | ||
|{{ | | {{energy|750}} | ||
|{{ | | data-sort-value="4" | {{pool|Blue}}, can be {{pool|White}} | ||
| {{name|Dazzle Beach}} | |||
| {{inlineIcon|Seafood|link=:Category:Seafood}} | |||
| | | | ||
|- | |- | ||
|[[File: | | [[File:Skeleton Fish.png|center|50px|link=Skeleton Fish]] | ||
|[[ | | [[Skeleton Fish]] | ||
| data-sort-value=" | | {{price|100}} | ||
|{{ | | {{energy|500}} | ||
|{{ | | data-sort-value="3" | {{pool|White}}, can be {{pool|Blue}} (Pink) | ||
|{{ | | | ||
{{name|Glittering Dunes|link=Glittering Dunes{{!}}The Plains}}<br> | |||
{{name|Glittering Dunes|link=Glittering Dunes{{!}}The Wastes}}<br> | |||
{{name|Glittering Dunes|link=Glittering Dunes{{!}}The Borderlands}} | |||
| {{inlineIcon|Fish|link=:Category:Fish}} | |||
| | | | ||
|- | |- | ||
|[[File:Sole.png|center|50px|link=Sole]] | | [[File:Sole.png|center|50px|link=Sole]] | ||
|[[Sole]] | | [[Sole]] | ||
| data-sort-value=" | | {{price|200}} | ||
|{{ | | {{energy|500}} | ||
|{{ | | data-sort-value="3" | {{pool|White}}, can be {{pool|Blue}} | ||
|{{ | | | ||
{{name|Forgotten Lands}}<br> | |||
{{name|Ancient's Landing|link=Ancient's Landing{{!}}The Docks}}<br> | |||
{{name|Ancient's Landing|link=Ancient's Landing{{!}}The Overlook}} | |||
| {{inlineIcon|Fish|link=:Category:Fish}} | |||
| | | | ||
|- | |- | ||
|[[File:Squid.png|center|50px|link=Squid]] | | [[File:Squid.png|center|50px|link=Squid]] | ||
|[[Squid]] | | [[Squid]] | ||
| data-sort-value=" | | {{price|500}} | ||
| {{energy|1000}} | |||
| data-sort-value="4" | {{pool|Blue}}, can be {{pool|White}} | |||
| | | | ||
{{name|Glade of Trust}}<br> | {{name|Glade of Trust}}<br> | ||
{{name|Forgotten Lands}} | {{name|Forgotten Lands}} | ||
| {{inlineIcon|Seafood|link=:Category:Seafood}} | |||
| | | | ||
|- | |- | ||
|[[File:Swordfish.png|center|50px|link=Swordfish]] | | [[File:Swordfish.png|center|50px|link=Swordfish]] | ||
|[[Swordfish]] | | [[Swordfish]] | ||
| data-sort-value=" | | {{price|700}} | ||
|{{ | | {{energy|1500}} | ||
|{{ | | data-sort-value="6" | {{pool|Gold}} | ||
| | | {{name|Dazzle Beach}} | ||
| {{inlineIcon|Fish|link=:Category:Fish}} | |||
| | | | ||
|- | |- | ||
|[[File:Tilapia.png|center|50px|link=Tilapia]] | | [[File:Tilapia.png|center|50px|link=Tilapia]] | ||
|[[Tilapia]] | | [[Tilapia]] | ||
| {{price|600}} | |||
|{{ | | {{energy|1150}} | ||
|{{ | | data-sort-value="5" | {{pool|Blue}} | ||
| | | | ||
{{name|Sunlit Plateau}}<br> | {{name|Sunlit Plateau}}<br> | ||
{{name|Frosted Heights}} | {{name|Frosted Heights}} | ||
| {{inlineIcon|Fish|link=:Category:Fish}} | |||
| | | | ||
|- | |- | ||
|[[File:Tuna.png|center|50px|link=Tuna]] | | [[File:Tuna.png|center|50px|link=Tuna]] | ||
|[[Tuna]] | | [[Tuna]] | ||
| data-sort-value="3" | {{pool|White}} | | {{price|95}} | ||
| {{energy|350}} | |||
| data-sort-value="3" | {{pool|White}}, can be {{pool|Blue}} | |||
| | | | ||
{{name|Forgotten Lands}}<br> | {{name|Forgotten Lands}}<br> | ||
{{name|Glade of Trust}} | {{name|Glade of Trust}} | ||
| {{inlineIcon|Fish|link=:Category:Fish}} | |||
| | | | ||
|- | |- | ||
|[[File:Walleye.png|center|50px|link=Walleye]] | | [[File:Walleye.png|center|50px|link=Walleye]] | ||
|[[Walleye]] | | [[Walleye]] | ||
| data-sort-value=" | | {{price|1100}} | ||
|{{ | | {{energy|1700}} | ||
|{{ | | data-sort-value="6" | {{pool|Gold}} | ||
| | | {{name|Sunlit Plateau}} | ||
| {{inlineIcon|Fish|link=:Category:Fish}} | |||
| | | | ||
|- | |- | ||
|[[File:White Sturgeon.png|center|50px|link=White Sturgeon]] | | [[File:White Sturgeon.png|center|50px|link=White Sturgeon]] | ||
|[[White Sturgeon]] | | [[White Sturgeon]] | ||
| data-sort-value=" | | {{price|1250}} | ||
|{{ | | {{energy|1800}} | ||
|{{ | | data-sort-value="6" | {{pool|Gold}} | ||
| | | {{name|Frosted Heights}} | ||
| {{inlineIcon|Fish|link=:Category:Fish}} | |||
| | | | ||
|} | |} | ||
==Limited Time Fish== | ==Limited Time Fish== | ||
These festive fish were available December 18th - December 31st 2022. One of each type could be caught and catching each of them was a requirement of the [[Dreamlight#Special_Tasks|seasonal task]] "Even Fish are Festive" which awarded {{name|Santa Hat}}. | These festive fish were available December 18th - December 31st 2022, and returned in during the same dates in 2023. One of each type could be caught from Green & Red Ripples and catching each of them was a requirement of the [[Dreamlight#Special_Tasks|seasonal task]] "Even Fish are Festive" which awarded {{name|Santa Hat}}. | ||
{| class="wikitable sortable" id='recipe-table' | {| class="wikitable sortable" id='recipe-table' | ||
!Image | !Image | ||
| Line 361: | Line 532: | ||
|- | |- | ||
|} | |} | ||
<references/> | |||
< | ==Crafting Materials== | ||
<!--These items are not listed on the Fishing Collection Menu, but they can obtained by Fishing--> | |||
{| class="wikitable sortable" id='recipe-table' | |||
! class="unsortable" | Image | |||
! Name | |||
! Sell Price | |||
! class="hidden" | Energy | |||
! Ripples | |||
! Locations | |||
! class="hidden" | Collection Menu Category | |||
|- | |||
| [[File:Red Algae.png|center|50x50px|link=Red Algae]] | |||
| [[Red Algae]] | |||
| {{price|150}} | |||
| class="hidden" | n/a | |||
| data-sort-value="0" | {{pool|None}} | |||
| (Any) | |||
| class="hidden" | {{inlineIcon|Crafting Materials|link=Foraging#Crafting Materials}} | |||
|- | |||
| [[File:Bones.png|center|50x50px|link=Bones]] | |||
| [[Bones]] | |||
| {{price|20}} | |||
| class="hidden" | n/a | |||
| data-sort-value="0" | {{pool|None}} | |||
| | |||
<!--{{inlineIcon|Digging|size=20|link=Digging}}<br> | |||
:{{name|Glittering Dunes|link=Glittering Dunes}}--> | |||
{{name|Glittering Dunes|link=Glittering Dunes{{!}}The Plains}}<br> | |||
{{name|Glittering Dunes|link=Glittering Dunes{{!}}The Wastes}}<br> | |||
{{name|Glittering Dunes|link=Glittering Dunes{{!}}The Borderlands}} | |||
| class="hidden" | {{inlineIcon|Crafting Materials|link=Foraging#Crafting Materials}} | |||
|- | |||
| [[File:Plastic Scrap.png|center|50x50px|link=Plastic Scrap]] | |||
| [[Plastic Scrap]] | |||
| {{price|10}} | |||
| class="hidden" | n/a | |||
| data-sort-value="0" | {{pool|None}} | |||
| | |||
{{name|Ancient's Landing|link=Ancient's Landing{{!}}The Docks}}<br> | |||
{{name|Ancient's Landing|link=Ancient's Landing{{!}}The Overlook}}<br> | |||
| class="hidden" | {{inlineIcon|Crafting Materials|link=Foraging#Crafting Materials}} | |||
|- | |||
| [[File:Scales.png|center|50x50px|link=Scales]] | |||
| [[Scales]] | |||
| {{price|20}} | |||
| class="hidden" | n/a | |||
| data-sort-value="0" | {{pool|None}} | |||
| {{name|Glittering Dunes|link=Glittering Dunes{{!}}The Oasis}} | |||
| class="hidden" | {{inlineIcon|Crafting Materials|link=Foraging#Crafting Materials}} | |||
|} | |||
==Dreamlight and Memories== | ==Dreamlight and Memories== | ||
There are two rotating [[Dreamlight#Dreamlight Duties|Dreamlight Duties]] directly related to Fishing: "Catch 3 Fish" and "Catch 3 Seafood". Fishing comprises its own tab of [[Dreamlight#Fishing|Dreamlight Achievements]]. There are | There are two rotating [[Dreamlight#Dreamlight Duties|Dreamlight Duties]] directly related to Fishing: "Catch 3 Fish" and "Catch 3 Seafood". Fishing comprises its own tab of [[Dreamlight#Fishing|Dreamlight Achievements]]. There are 14 [[Memories]] consisting of 10 Memory Pieces each that can only be found by fishing. | ||
<div id="memorygallery"> | <div id="memorygallery"> | ||
| Line 377: | Line 598: | ||
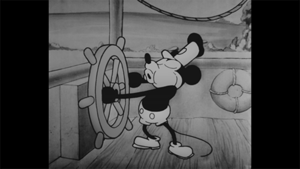
{{Memory|Mickey & Friends Memory 1|6|color=blue|type=hidden}} | {{Memory|Mickey & Friends Memory 1|6|color=blue|type=hidden}} | ||
{{Memory|The Sword in the Stone Memory 3|6|color=pink|type=hidden}} | {{Memory|The Sword in the Stone Memory 3|6|color=pink|type=hidden}} | ||
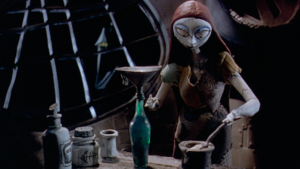
{{Memory|Nightmare Before Christmas Memory 3|9|color=pink|type=hidden}} | |||
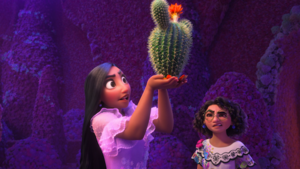
{{Memory|Encanto Memory 5|9|color=pink|type=hidden}} | |||
{{Memory|Lilo & Stitch Memory 1|3|color=pink|type=hidden}} | |||
{{Memory|Aladdin Memory 2|6|color=red|type=hidden}} | |||
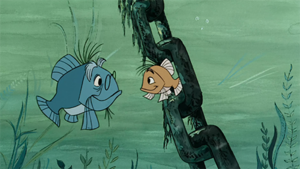
{{Memory|The Princess and the Frog Memory 2|9|color=pink|type=hidden}} | |||
</div> | </div> | ||
Latest revision as of 12:29, 21 June 2024
| Fishing | |
|---|---|
 | |
| Information | |
| Type: | |
| Tool: | |
| Energy: | |
| Companion Friendship Reward: |
Failure
Success
|
Fishing is an action using the Fishing Pole to cast in water to catch Fish. Fish are an ingredient type which can only be caught in pools of water when fishing. Fish can be used for cooking, consumed for Energy, sold for Star Coins or gifted to villagers to raise Friendship.
Even though fish are an ingredient for cooking, they're tracked in a separate section of the collection window labeled 'Fish'. The entry for each fish unlocks when they are first caught.
Moana's Boat is an important unlock to support fishing. It will provide free fish every few hours, but just as importantly will provide up to a 20% reduction in energy required for fishing which will allow more actions without needing to restore energy using food.
How to Fish
Casting anywhere into water can hook a fish, but specific (and more valuable) fish types can only be caught in 'Pools' which appear as ripples. Different colored pools denote rare potential fish.
To cast into a pool the player must position themselves so they are facing it, then charge the cast so the line drops into the pool area. If it 'attaches' to the pool the line will appear in the center of the ripple.
When a fish bites a circle will shrink around the ripple, when it enters the colored zone it will turn from white to green. When it's green, tap the action button to hook the line. If you miss the hook the fish will release (but still remain available to catch again). Some higher level fish require hooking multiple times before being caught.
There's a rare chance when fishing that Red Algae will drop, which is a rare resource used to craft fishing bait. By using fishing bait, any cast into a white ripple will turn into a gold ripple.
When fishing, if you are not currently Hanging Out with a Companion, a nearby Villager will often come to the Player's side and react accordingly to success or failure.
Energy Cost
- Main article: Energy
At the start of the game, fishing requires ![]() 150. The energy is deducted when the line is pulled or when the player misses the chance to pull, except the first pull after the initial bite costs no energy (missing the initial bite does cost energy). No energy is deducted at the time when the line is cast, but no fish have "bit" yet. Thus, it is possible to recast a line for no energy before any fish bites the line. Each upgrade to Moana's Boat reduces energy cost by 2%, capping at 20% reduction at level 10, reducing energy cost to
150. The energy is deducted when the line is pulled or when the player misses the chance to pull, except the first pull after the initial bite costs no energy (missing the initial bite does cost energy). No energy is deducted at the time when the line is cast, but no fish have "bit" yet. Thus, it is possible to recast a line for no energy before any fish bites the line. Each upgrade to Moana's Boat reduces energy cost by 2%, capping at 20% reduction at level 10, reducing energy cost to ![]() 120.
120.
Villager Companions
When reaching level 2 Friendship with a Villager (aside from Ariel or Ursula), they can be assigned a Role. Villagers who have been assigned the Fishing Role will gain extra Friendship for every fish caught. They also have a chance to drop extra fish when any fish is caught while they're following. Extra materials they produce will be dropped on the ground, and can be picked up by running over them.
Each level of friendship increases the rate which extra materials will drop. It's not only effective for leveling up Friendship with these characters, but extremely helpful for offering bonus materials when fishing. Be sure to always bring a Companion along when fishing!
Fish Types
| Image | Name | Sell Price | Energy | Ripples | Locations | Cooking Ingredient Category |
Notes |
|---|---|---|---|---|---|---|---|
 |
Anglerfish | Gold | |||||
 |
Bass | None or White |
|
||||
 |
Bream | Blue | |||||
| Brilliant Blue Starfish | Gold | ||||||
 |
Carp | Blue, can be White | |||||
 |
Catfish | Gold | |||||
 |
Cod | None or White |
|
||||
 |
Crab | Blue, can be White | |||||
 |
Dunebopper | Blue | |||||
| Electric Eel | Gold | ||||||
 |
Fugu | Gold | Requires rain | ||||
 |
Here and There Fish | None, can be White |
|
Requires morning (6-10am) or evening (6-10pm) after completing | |||
 |
Herring | White | |||||
 |
Kingfish | Blue | Requires night (6pm-5am) | ||||
 |
Lancetfish | Blue | |||||
 |
Lobster | Gold | |||||
| Octopus | Blue, can be White | ||||||
 |
Perch | Blue, can be White | |||||
 |
Pike | Gold | |||||
| Piranha | Gold | ||||||
| Pirarucu | Blue | ||||||
| Pretty Pink Starfish | Gold | ||||||
| Prisma Shrimp | Gold | ||||||
 |
Rainbow Trout | White | |||||
| Robot Fish | Gold | ||||||
 |
Salmon | White, can be Blue | |||||
 |
Sand Fish | None, can be White | |||||
| Sand Worm | Gold | ||||||
 |
Scorpion | Blue (Pink) | |||||
| Sea Snail | Blue, can be White | ||||||
 |
Seaweed | None | |||||
| Shad | White | ||||||
 |
Shrimp | Blue, can be White | |||||
| Skeleton Fish | White, can be Blue (Pink) | ||||||
 |
Sole | White, can be Blue | |||||
 |
Squid | Blue, can be White | |||||
 |
Swordfish | Gold | |||||
 |
Tilapia | Blue | |||||
 |
Tuna | White, can be Blue | |||||
 |
Walleye | Gold | |||||
 |
White Sturgeon | Gold |
Limited Time Fish
These festive fish were available December 18th - December 31st 2022, and returned in during the same dates in 2023. One of each type could be caught from Green & Red Ripples and catching each of them was a requirement of the seasonal task "Even Fish are Festive" which awarded ![]() Santa Hat.
Santa Hat.
| Image | Name | Ripples | Energy | Locations |
|---|---|---|---|---|
| Festive Anglerfish[1][2] | Red & Green | |||
| Festive Bass[1] | Red & Green | |||
| Festive Fugu[1][3] | Red & Green | |||
| Festive Salmon[1] | Red & Green | |||
 |
Festive Squid[1] | Red & Green |
Crafting Materials
| Image | Name | Sell Price | Energy | Ripples | Locations | Collection Menu Category |
|---|---|---|---|---|---|---|
| Red Algae | n/a | None | (Any) | |||
| Bones | n/a | None | ||||
| Plastic Scrap | n/a | None | ||||
| Scales | n/a | None |
Dreamlight and Memories
There are two rotating Dreamlight Duties directly related to Fishing: "Catch 3 Fish" and "Catch 3 Seafood". Fishing comprises its own tab of Dreamlight Achievements. There are 14 Memories consisting of 10 Memory Pieces each that can only be found by fishing.